

Simple Nails 2026 – Fresh Minimal Designs and Inspo for the New Year
If you have been scrolling Pinterest lately, you have probably noticed that simple nail trends are shifting away from loud, maximalist looks and leaning into something calmer. Minimal nail art is having a real moment heading into 2026, and it is easy to see why. These designs feel polished without trying too hard, and they fit into everyday life just as easily as they fit a night out. Whether you are getting your nails done for the holidays or just want a fresh set to start the year, this roundup has something for you.
Below you will find a mix of soft, sparkly, and subtly detailed nail ideas that all share one thing in common, they keep things simple. Think delicate lines, soft glitter placement, and color palettes that feel wintery without being overdone. Each idea works whether you have short natural nails or a longer set, and most of these looks are beginner friendly enough to try at home. Save your favorites and bring them to your next nail appointment, or use them as a guide for your own at home mani.
Misty Pink with White Minimal Lines
There is something quietly beautiful about a manicure that does not try to shout for attention, and this misty pink design is exactly that. The base color sits somewhere between a soft blush and a barely there mauve, giving the nails a hazy, almost cloudlike finish. Instead of relying on glitter or bold color blocking, this look uses thin white lines placed at the base or tip of each nail to add just enough visual interest. It feels romantic, a little dreamy, and perfect for anyone who wants their nails to look expensive without being complicated.
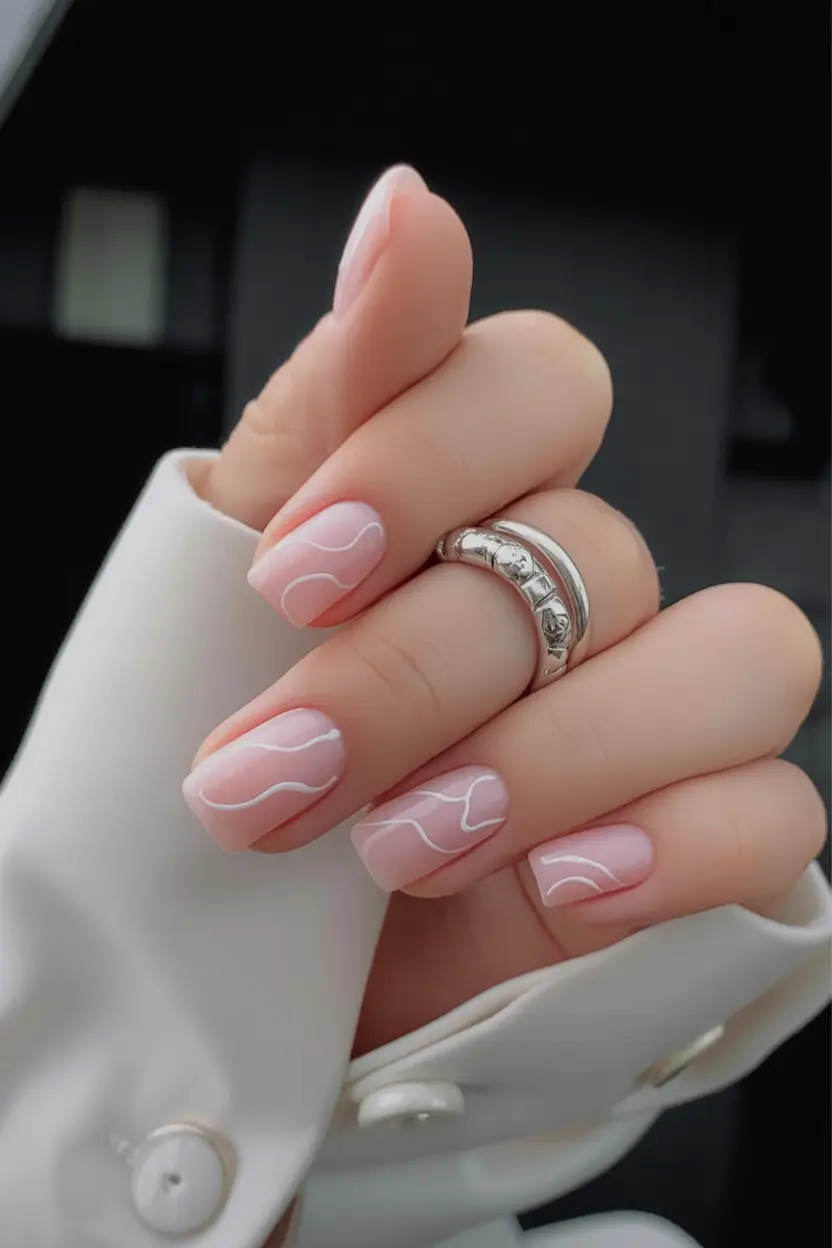
Recreating this at home is simpler than it looks. Start with two coats of a sheer to medium coverage pink polish, letting each layer dry fully so the color stays even. Once the base is set, use a thin nail art brush dipped in white polish to draw fine, slightly curved lines near the cuticle or along the tip edge. You do not need perfectly straight lines here, a little imperfection actually adds to the handmade charm of the design. Seal everything with a glossy top coat to help the white lines pop against the muted pink underneath.
This style works beautifully for almost any nail shape, though it looks especially elegant on almond or oval nails where the curved lines can follow the natural shape of the nail bed. It is a great choice for weddings, winter birthdays, or simply refreshing your look for the new year. Pair it with soft knitwear and neutral tones for an outfit that matches the same quiet, put together energy. Pin this one if you love manicures that feel effortless yet clearly intentional.
Rose Gold Micro Glitter French
The classic French manicure gets a warmer, more festive update with this rose gold micro glitter version. Instead of the traditional white tip, this design swaps in a fine, shimmering rose gold glitter that catches the light beautifully from every angle. The base nail stays a soft nude or sheer pink, which keeps the overall look grounded and wearable, while the glittery tip adds just enough sparkle to feel special. It reads as polished and celebratory at the same time, which makes it a favorite for the new year season.
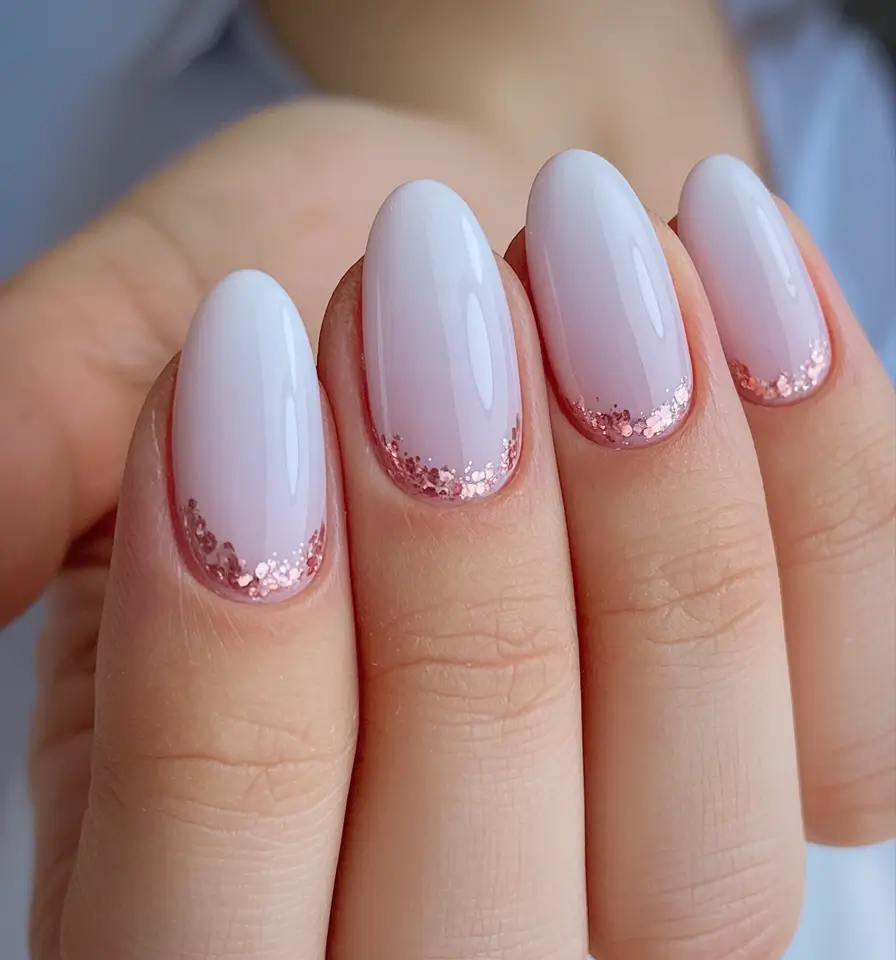
To get this finish, apply a nude or milky pink base color as your foundation, letting it dry completely before moving on. For the tip, dip a small sponge or brush into a rose gold micro glitter polish and gently press it along the free edge of the nail, building up the color gradually for a soft, blended line rather than a harsh stripe. Some people prefer using nail vinyl guides for a crisp edge, while others like the slightly diffused look of a sponge application. Either way, finish with a thick, glossy top coat to lock in the glitter and prevent any snagging.
This design suits nearly every occasion, from holiday parties to everyday wear, since the glitter is subtle enough not to feel overly dressy. It looks especially striking on medium length square or squoval nails, where the tip has enough surface area to show off the shimmer. Pair it with gold jewelry and warm toned makeup for a cohesive, festive vibe. If you love a manicure that feels timeless but still on trend, this rose gold twist on the French tip deserves a spot on your Pinterest board.
Soft Starlight Nude Sparkle
If you want a manicure that looks like it belongs on a quiet winter evening, the soft starlight nude sparkle design captures that feeling perfectly. The base is a warm, muted nude that flatters almost every skin tone, and scattered throughout are tiny flecks of fine silver or holographic glitter that mimic the look of stars against a dark sky. It is subtle enough to wear to work or school, yet it still has that soft glow that makes it feel special for the season. This is the kind of manicure people notice without it ever feeling loud.
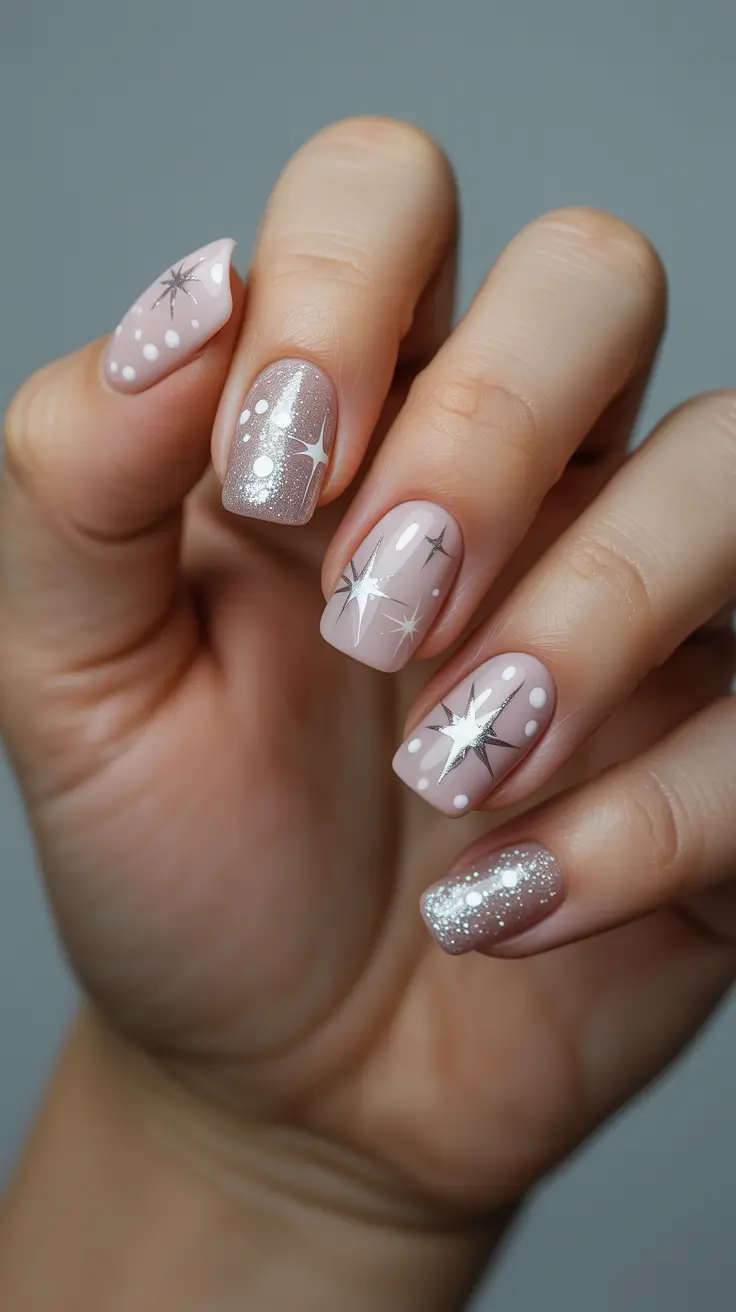
Achieving this look starts with a nude polish that leans slightly warm rather than cool, since that undertone helps the sparkle read as soft rather than harsh. Once your base coats are fully dry, apply a top coat mixed with fine glitter, or dab on a glitter polish sparingly with a makeup sponge for more control over placement. The goal is scattered, natural looking sparkle rather than an even, solid shimmer, so resist the urge to cover every inch of the nail. A high shine top coat at the end helps everything blend together seamlessly.
This design is incredibly versatile and works on any nail length or shape, though it looks especially soft and pretty on rounded or almond nails. It pairs well with cozy winter outfits, soft glam makeup looks, or even a simple everyday outfit when you want your hands to feel a little more finished. Because the color is so neutral, it transitions easily from December straight into the new year without feeling out of season. Save this idea if you are drawn to manicures that feel calm, warm, and quietly glamorous.
Emerald and Gold Winter Accent Harmony
There is a reason emerald and gold keep showing up together during the colder months, the combination feels rich, festive, and timeless all at once. This design leans into that pairing by keeping most of the nail a soft neutral or sheer base, then adding a single emerald green accent nail paired with delicate gold detailing on the others. Rather than covering every nail in color, the look uses restraint, letting emerald and gold speak through small, intentional touches instead of overwhelming the hand. It feels like a manicure made for holiday parties, yet it is understated enough to wear well past the season.
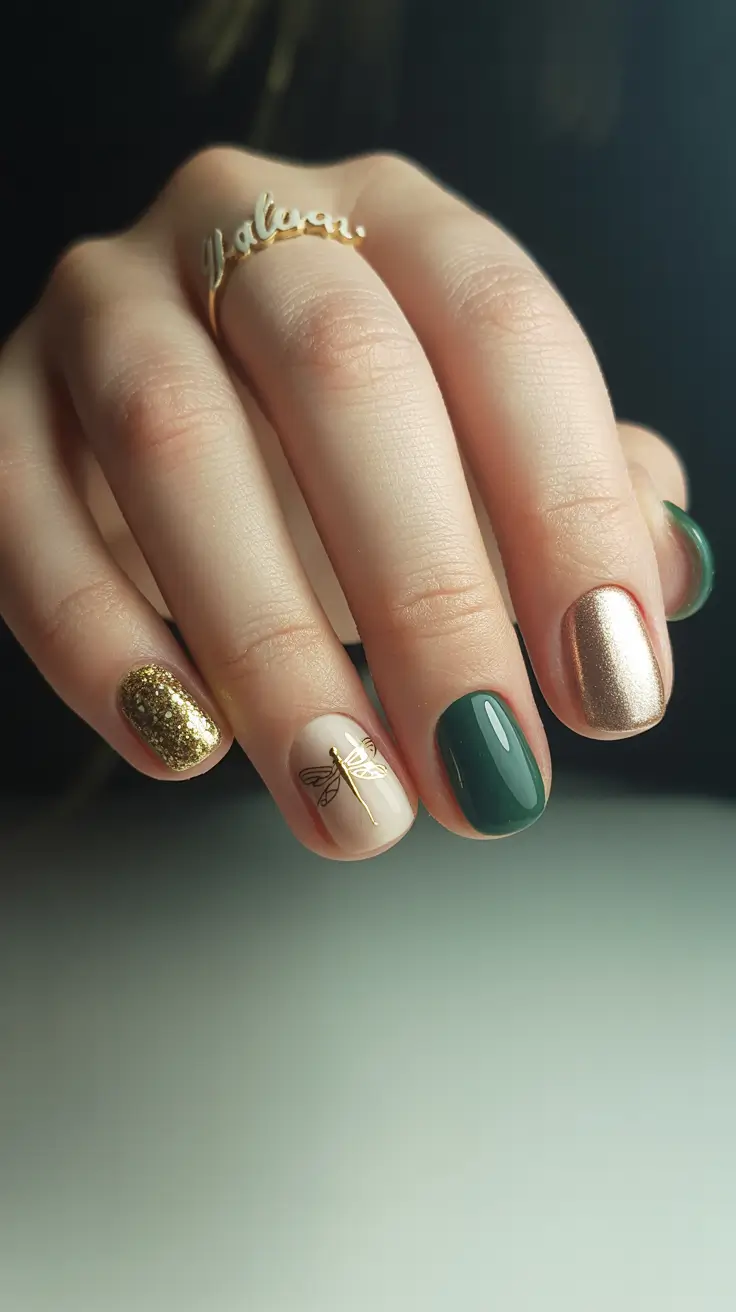
To recreate this, start with a neutral or milky white base on most nails, saving one or two fingers for the emerald accent. Apply two even coats of a deep emerald polish on those chosen nails, allowing full drying time between layers for a smooth, opaque finish. On the neutral nails, use a fine detail brush to add small gold accents, this could be delicate dots along the cuticle line, a thin gold stripe near the tip, or tiny gold foil flecks pressed gently onto wet top coat. The key is keeping the gold minimal so it reads as an accent rather than a competing focal point.
This design works particularly well on medium length coffin or almond nails, where there is enough surface area for the color blocking to look intentional rather than cramped. It pairs beautifully with winter greens, deep reds, and neutral knitwear, making it an easy match for holiday outfits or New Year gatherings. Because emerald and gold are both classic colors, this manicure does not feel trend dependent, it will look just as good years from now as it does today. Pin this one if you love a manicure that balances color with restraint.
Pink Snowflake and Rose Glitter Mix
Winter nail art often leans into snowflakes, but this design keeps things fresh by pairing delicate snowflake details with soft rose glitter instead of the usual icy blue or silver palette. The base color is a warm, muted pink that feels gentle rather than saccharine, and a few nails feature hand painted white snowflakes layered over a light dusting of rose gold or pink toned glitter. The result feels wintery and romantic at the same time, which makes it stand out from more traditional holiday nail looks while still fitting the season perfectly.
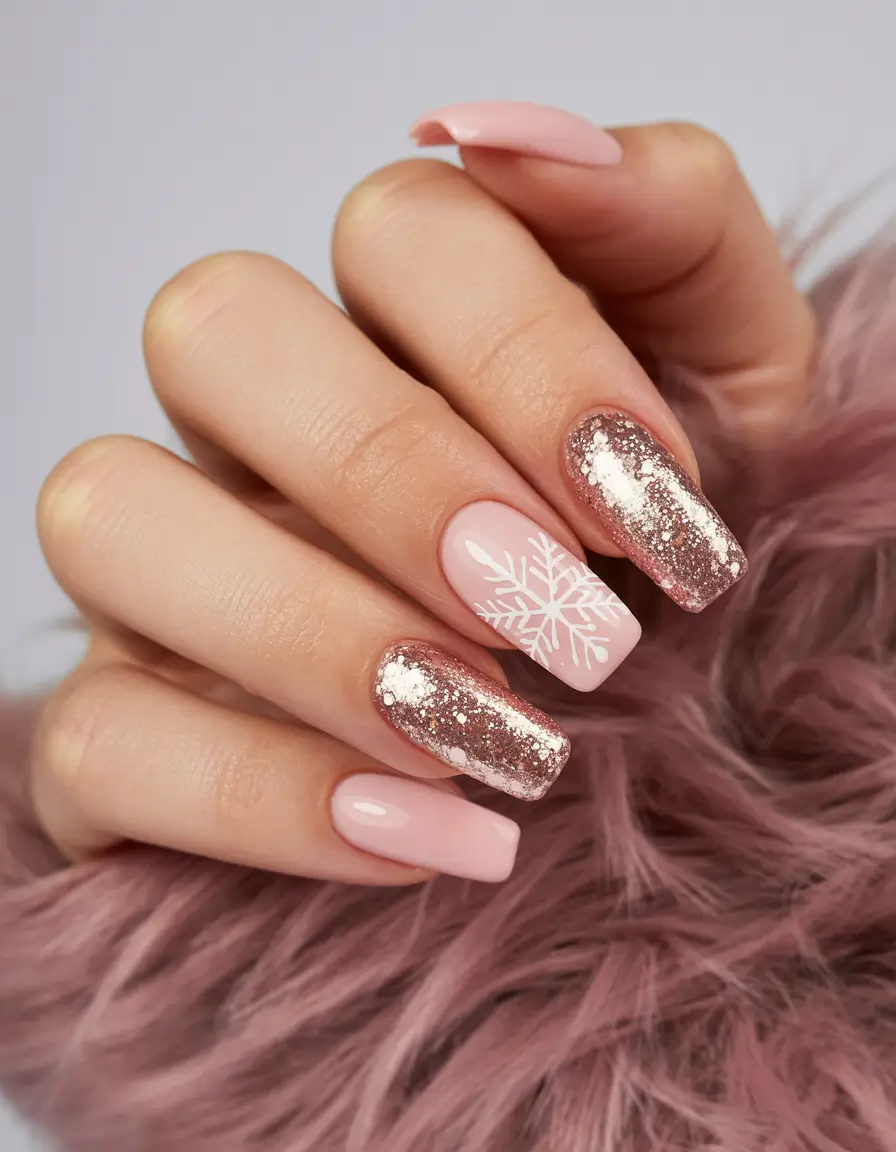
Creating this design starts with a smooth pink base applied in two thin coats for even coverage. Once fully dry, choose one or two accent nails for the snowflake detail and use a fine liner brush with white polish to paint simple, six pointed snowflake shapes, they do not need to be perfectly symmetrical to look charming. On the remaining nails, apply a soft rose glitter either as a full coverage shimmer or gently placed near the cuticle for a softer effect. Sealing the whole look with a glossy top coat helps the glitter catch light without feeling overly textured.
This manicure looks especially pretty on rounded or oval nails, where the snowflake detail has enough space to feel delicate rather than cramped. It suits everything from holiday parties to casual winter days, and the soft pink tone makes it easy to wear well into the new year without feeling strictly tied to Christmas. Pair it with cozy sweaters, soft pink makeup, or even simple gold jewelry for a coordinated look. If you love nail art that feels festive without being overly literal, this snowflake and glitter mix is worth saving.
Cozy Grey Snowflake Minimalism
For anyone who wants a winter manicure that feels calm rather than flashy, this cozy grey snowflake design offers a quiet, sophisticated alternative to brighter holiday looks. The base is a soft, warm toned grey that feels a little like a knitted sweater, and simple white snowflake outlines are added to just one or two accent nails to keep the design minimal. There is no glitter or shimmer here, just clean lines and a muted palette that feels grounded and easy to wear no matter the occasion.
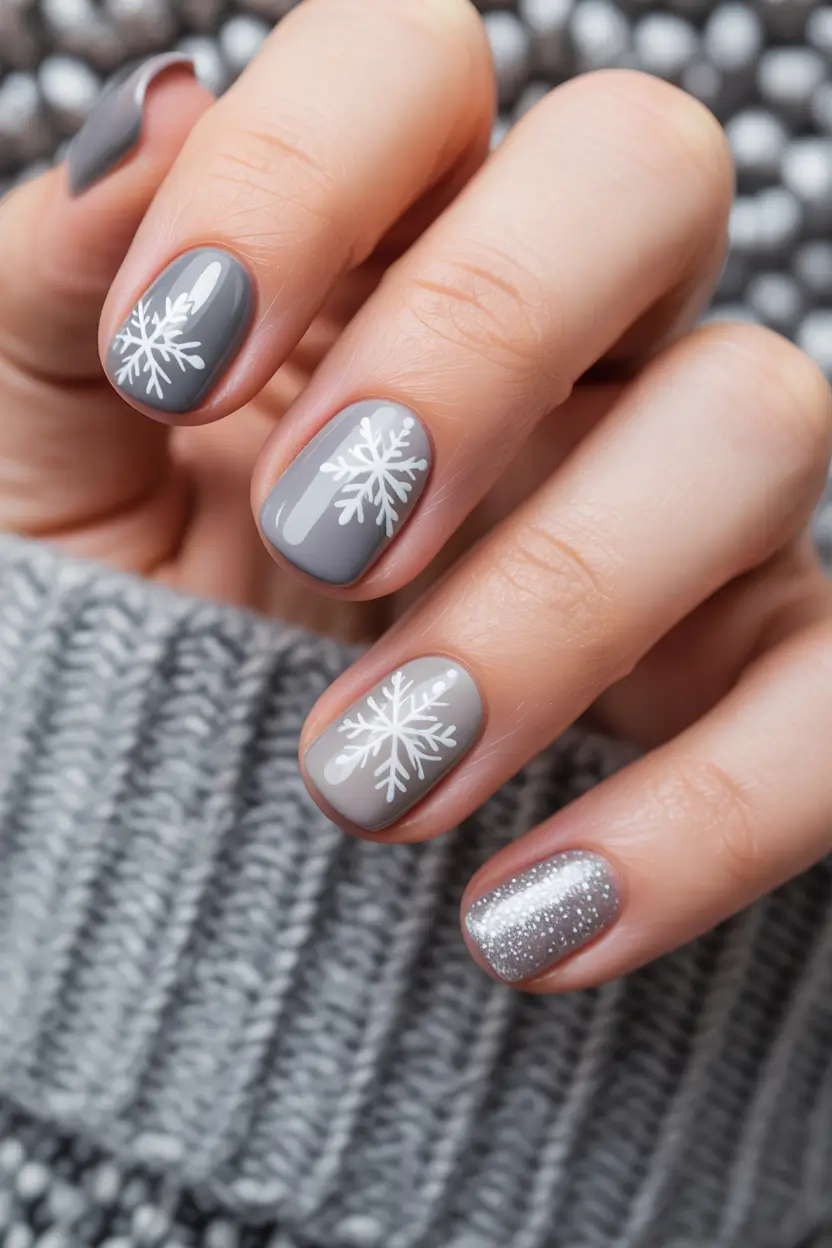
To achieve this look, apply two coats of a matte or slightly satin grey polish as your base, making sure each layer dries fully before moving forward. On your chosen accent nails, use a fine detail brush and white polish to draw simple snowflake outlines, keeping the design loose and slightly imperfect for a more handcrafted feel. If you prefer a softer effect, you can also use a dotting tool to create small snowflake centers before adding thin branching lines outward. A matte top coat finishes the look beautifully, though a glossy finish works just as well if you want a bit more shine.
This design pairs perfectly with almond or squoval nail shapes, where the accent nail has enough space for the snowflake to feel balanced rather than crowded. It looks especially good with neutral winter outfits, oversized sweaters, and simple silver or gold jewelry, making it a versatile choice for everyday wear throughout the colder months. Because the color palette is so neutral, this manicure transitions easily from December into January without needing any changes. Save this idea if you love minimal nail art that still feels distinctly wintery.
Silver Angled Modern French
The classic French manicure gets a modern makeover with this silver angled version that trades the traditional straight white tip for a sleek, diagonal line in metallic silver. The base nail stays clean and neutral, usually a sheer pink or milky white, which lets the angled silver tip become the true focal point of the design. This twist on the French manicure feels current and edgy without losing the timeless appeal that makes the original style so popular. It is a great pick for anyone who wants something familiar but slightly reinvented for the new year.
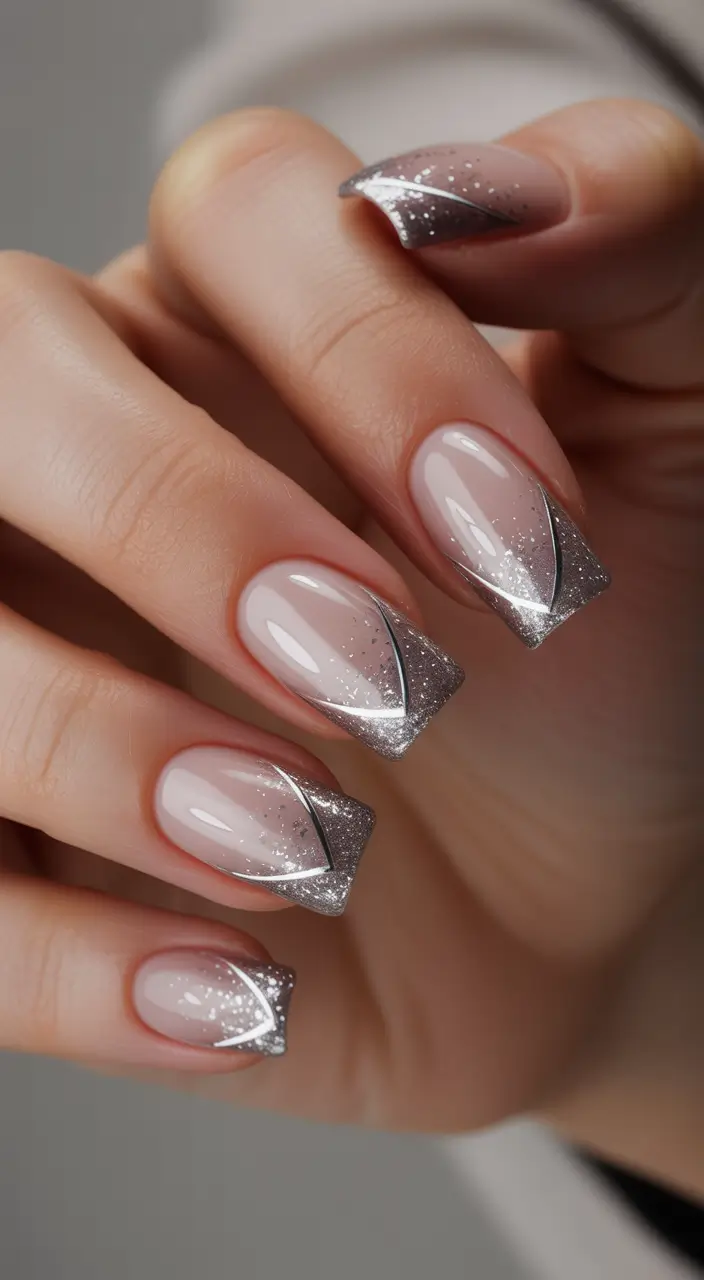
To recreate this design, start with a neutral base color applied in two even coats, allowing full drying time before adding any detail work. For the angled tip, use nail vinyl strips or tape to map out a diagonal line across the top of the nail, then fill in the space with a metallic silver polish for a crisp, clean edge. If you prefer a freehand approach, a thin angled brush works well too, though it may take a bit more practice to get sharp lines. Once the silver is fully dry, seal everything with a high shine top coat to enhance the metallic finish and protect the design.
This style looks particularly striking on squoval or square nails, where the straight edges complement the angular line beautifully. It works well for both everyday wear and special occasions, since the neutral base keeps things versatile while the silver tip adds a modern edge. Pair it with silver jewelry, monochrome outfits, or even a simple black dress for a sleek, put together look. If you are drawn to fresh takes on classic manicures, this angled French design is worth pinning.
Night Sky Sparkle with Soft Blush Accents
This design pairs two seemingly opposite ideas, deep, moody sparkle and soft, gentle blush tones, into one cohesive and eye catching look. Most nails feature a dark navy or almost black base dotted with fine silver or holographic glitter, meant to resemble a clear night sky scattered with stars. One or two accent nails break up the darkness with a soft blush pink, creating a gentle contrast that keeps the overall design from feeling too heavy. The combination feels dramatic yet balanced, making it a standout choice for winter and new year celebrations.
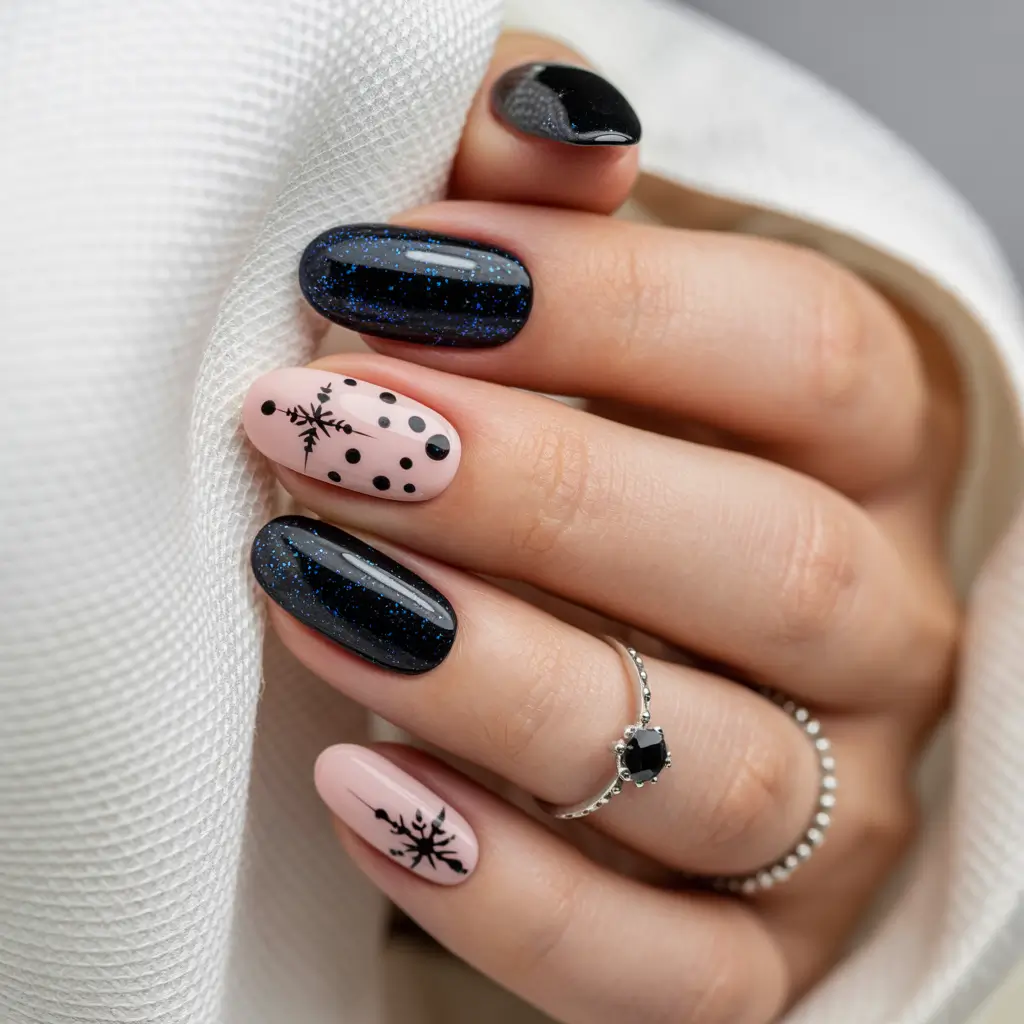
To create this look, begin by applying two coats of a deep navy or black polish on your chosen nails, letting each layer dry completely for full opacity. Once set, dab on a fine glitter top coat or individually placed glitter flecks using a small brush, focusing on scattered placement rather than even coverage to mimic a natural night sky. For the accent nails, apply a soft blush pink in two thin, even coats, keeping the finish clean and glitter free to maintain the contrast. Finish the entire set with a glossy top coat to unify the shine across both textures.
This design works beautifully on medium to long almond or coffin nails, where the dark glittery nails have enough space to feel dramatic without overwhelming the hand. It suits evening events, holiday parties, or any occasion where you want your nails to make a statement. Pair it with dark, elegant outfits or soft neutral tones to let the blush accents shine through. If you love manicures with contrast and depth, this night sky and blush combination deserves a place on your board.
Pink Glitter Soft French Touch
This design takes the beloved French manicure and softens it even further by swapping the crisp white tip for a delicate wash of pink glitter instead. The base nail remains sheer or lightly tinted, almost like bare nails with a healthy glow, while the tips are dusted with a fine pink glitter that fades gently rather than stopping in a hard line. The overall effect feels soft, romantic, and a little whimsical, making it a popular choice for anyone who loves French manicures but wants something gentler and more textured.
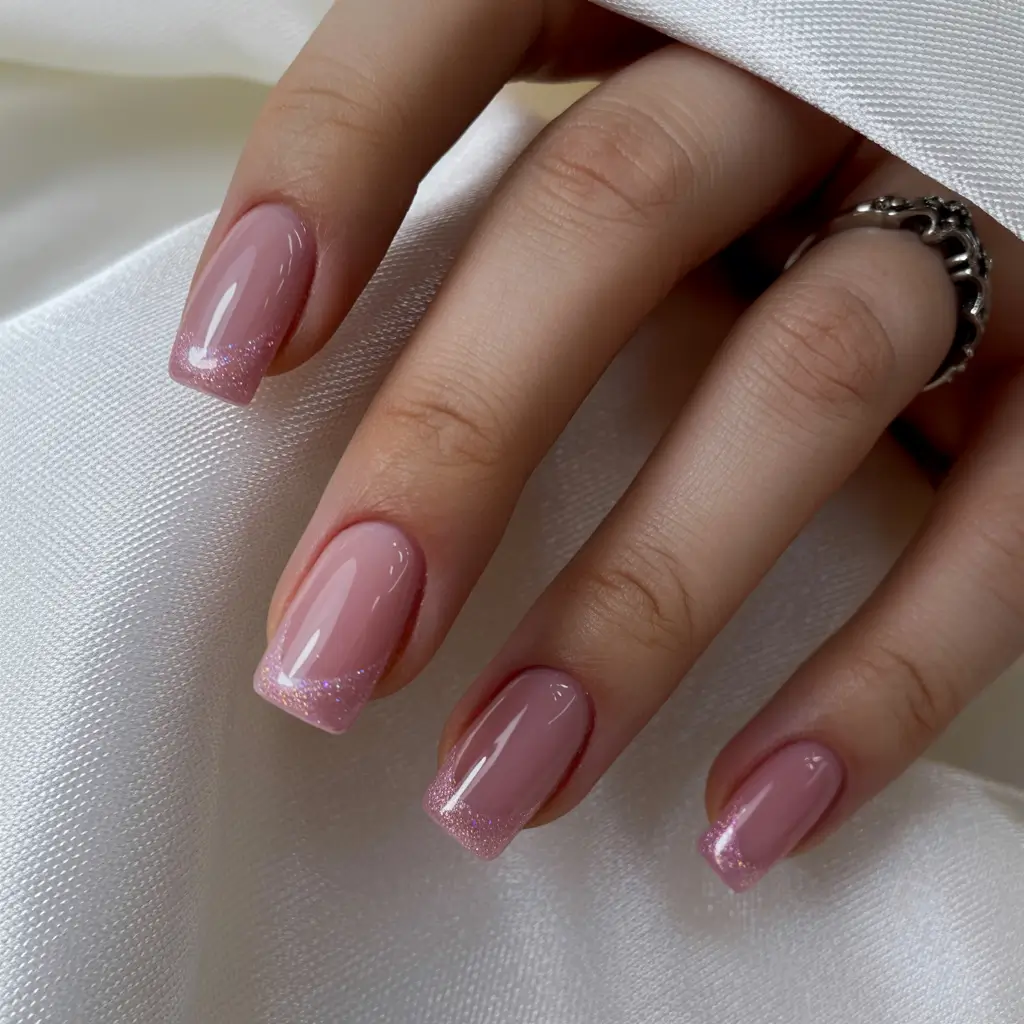
Achieving this look starts with a sheer pink or milky base color applied in thin, even layers. Once dry, use a makeup sponge to gently press pink glitter polish onto the tips, building the color gradually so it fades naturally into the base rather than creating a sharp division. This gradient technique takes a little practice, but working in light layers and blending as you go makes it much easier to control. A thick, glossy top coat at the end helps smooth out the glitter texture and gives the whole manicure a polished, cohesive shine.
This style pairs wonderfully with almond or oval nail shapes, where the soft gradient tip flows naturally with the curve of the nail. It suits nearly any occasion, from casual daily wear to more dressed up events, since the glitter adds sparkle without feeling overly formal. Pair it with soft pink makeup, delicate jewelry, or feminine outfits for a cohesive, romantic aesthetic. If you love French manicures with a softer, more textured twist, this pink glitter version is easy to fall in love with.
Soft Silver Frosted Gradient
There is a quiet elegance to frosted metallics, and this soft silver gradient design captures that feeling perfectly for the colder months. Rather than a solid metallic finish, the silver is applied as a soft gradient that fades from the tip toward the cuticle, creating a frosted, almost icy effect. The base underneath stays sheer or lightly tinted, allowing the silver to feel like a gentle wash of color rather than a heavy, opaque layer. This design feels wintery without leaning into anything too literal like snowflakes or holiday imagery, making it a versatile pick for anyone who wants understated sparkle.
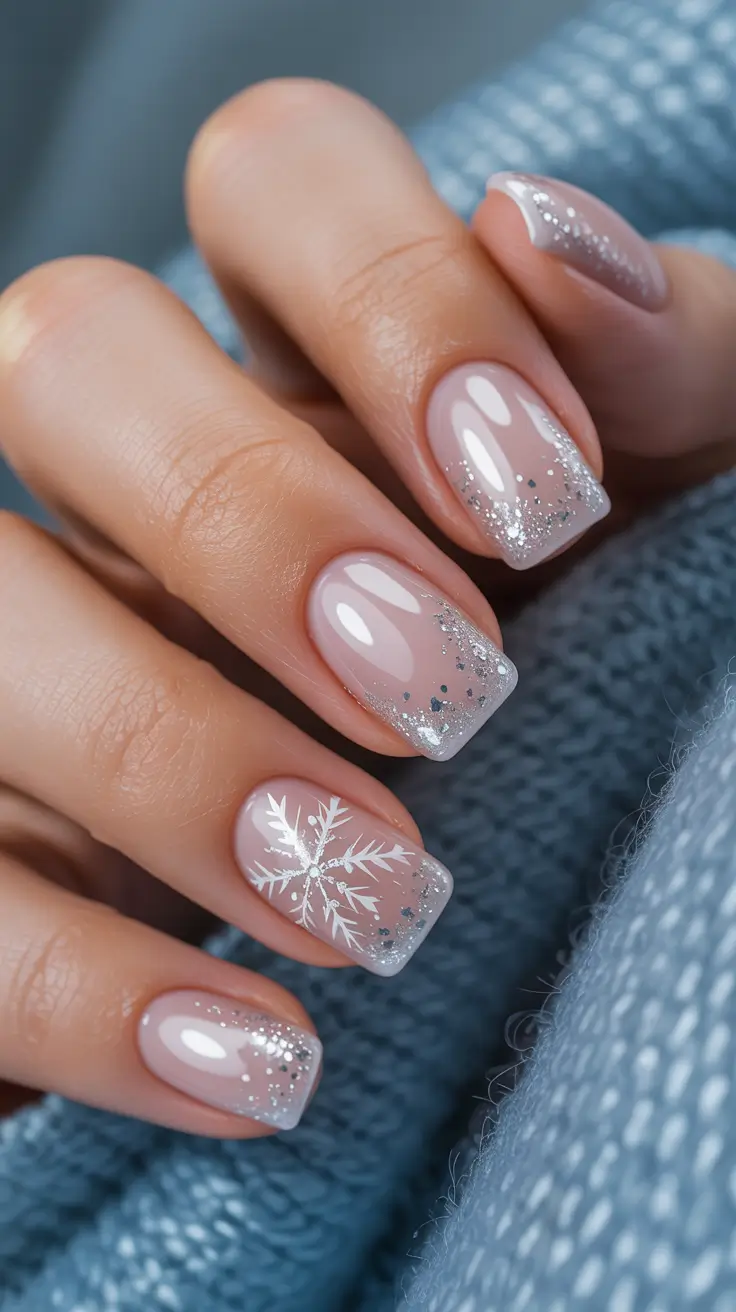
To recreate this gradient, start with a sheer or milky white base color and let it dry fully. Using a makeup sponge, dab a frosted silver polish onto the tip of the nail, gradually working your way down with lighter pressure to create a soft fade rather than a hard edge. Building the color in thin layers gives you more control and helps avoid a patchy or uneven finish. Once you are happy with the gradient, seal the design with a glossy top coat, which helps blend any remaining texture and gives the frosted silver an extra luminous quality.
This look suits almost any nail shape, though it looks especially soft and cohesive on round or oval nails where the gradient can flow smoothly without harsh angles. It works well for everyday wear as well as more special occasions, since the frosted finish feels elevated without being overly flashy. Pair it with cool toned outfits, silver jewelry, or even a simple all black look for a sleek, wintery aesthetic. If you love manicures that feel soft, icy, and effortlessly elegant, this frosted silver gradient is worth saving.
Green Striped Winter Chic
Stripes might not be the first thing that comes to mind for winter nail art, but this green striped design proves how well the technique can work for the season. The look features thin, evenly spaced green stripes running vertically or diagonally across a neutral or white base, creating a clean, graphic effect that feels modern and a little unexpected. The green shade leans slightly deep and muted, closer to a forest or pine tone, which keeps the design feeling wintery rather than bright or summery. It is a great option for anyone who wants nail art with a bit of structure and visual interest.
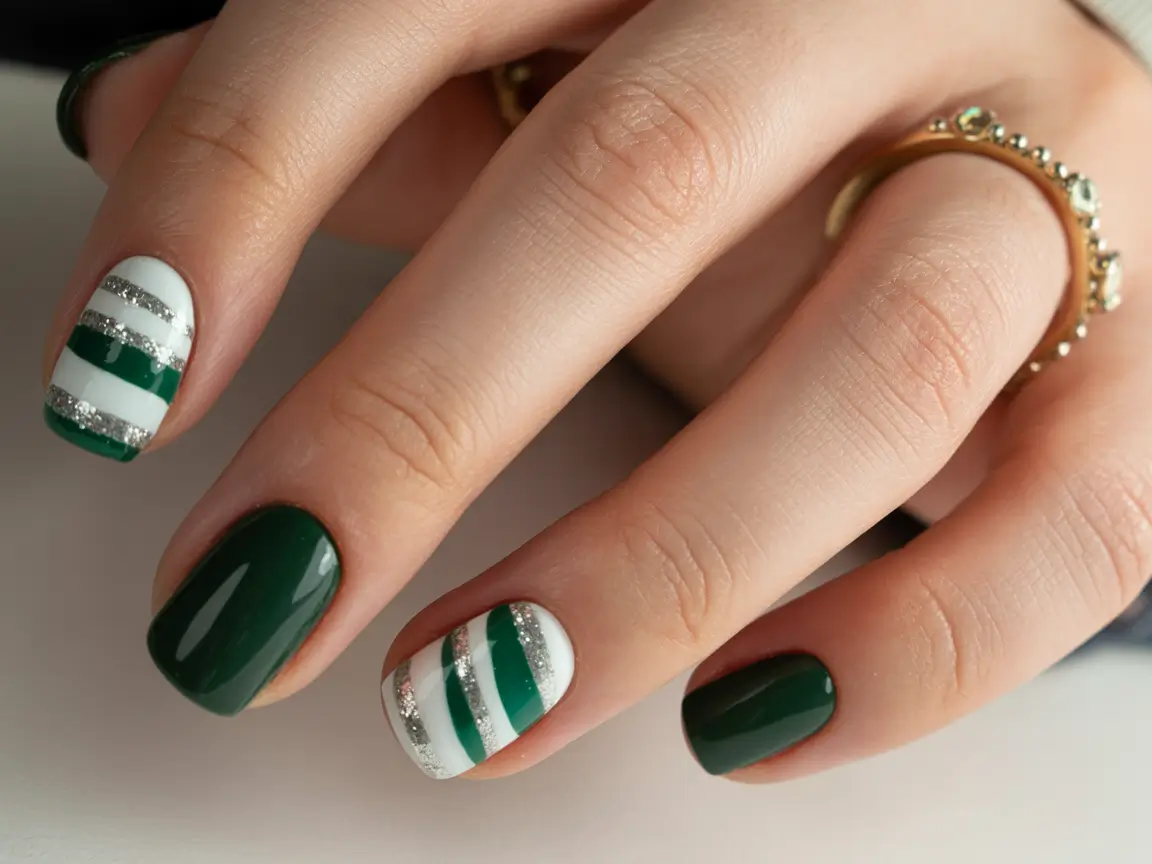
To achieve this design, begin with a white or neutral base color, applying two coats and allowing full drying time in between. Using a thin nail art brush or a striping tool, carefully paint even lines of deep green polish across the nail, working slowly to keep the spacing as consistent as possible. If straight lines feel tricky freehand, thin strips of tape can help guide your brush for a cleaner result. Once the stripes are dry, finish with a glossy top coat to smooth out any texture and give the design a polished, cohesive look.
This style works particularly well on square or squoval nails, where the flat surface allows the stripes to read clearly without distortion. It pairs nicely with minimalist winter outfits, structured knitwear, or even a simple monochrome look, since the graphic stripes add just enough personality without overwhelming an outfit. This design also transitions easily from winter into early spring, since the green tone feels fresh rather than strictly seasonal. If you love nail art with clean lines and a bit of edge, this striped design deserves a spot on your board.
Grey and White Snowflake Minimal Set
This design takes the classic snowflake motif and simplifies it even further, resulting in a manicure that feels clean, cohesive, and effortlessly wintery. The set alternates between soft grey and crisp white nails, with one or two accent nails featuring simple, minimal snowflake outlines in a contrasting shade. Because the color palette stays so limited, the overall look feels calm and put together rather than busy, even with the added detail work. It is an ideal choice for anyone who loves winter themes but prefers a more toned down, sophisticated approach.
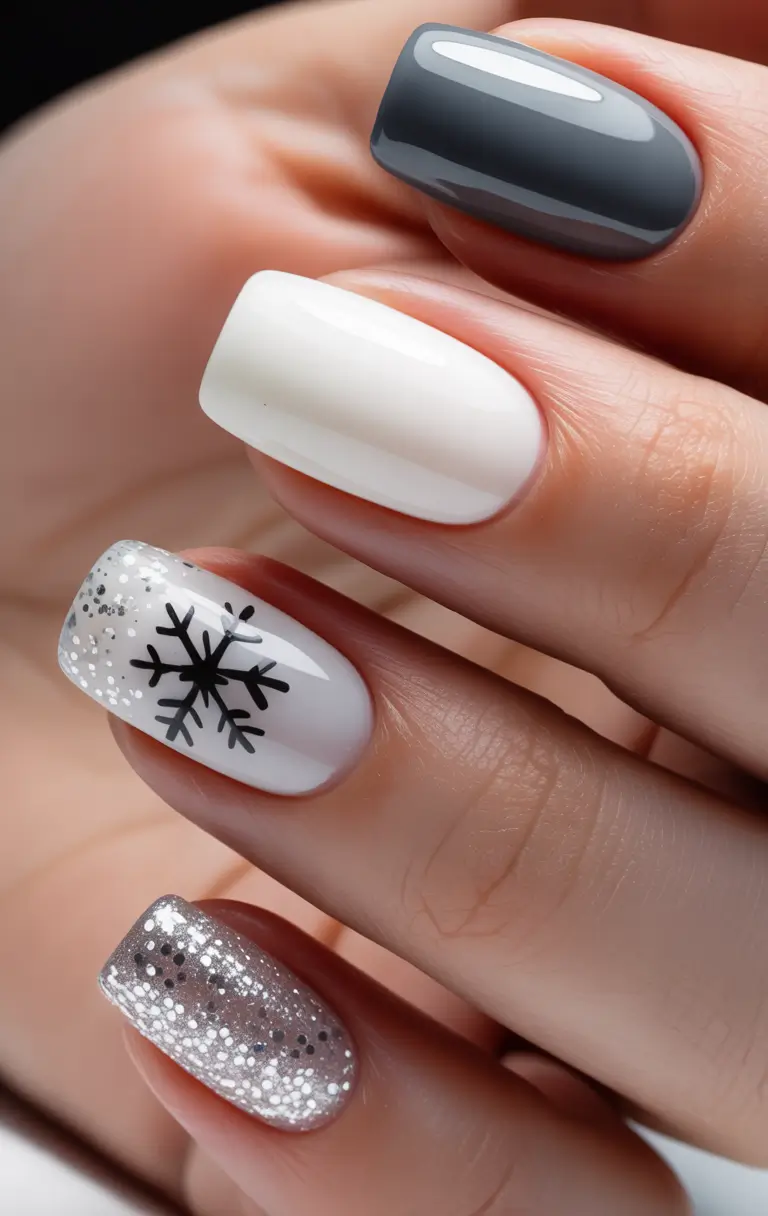
To create this look, apply your grey and white base colors across different nails, using two even coats of each to ensure full opacity. Once dry, choose your accent nails and use a fine detail brush to paint simple snowflake outlines, keeping the design small and centered rather than covering the entire nail. If you are using white as your snowflake color, contrast it against the grey nails for the clearest visual effect, and vice versa for the white nails. A glossy top coat at the end ties the whole set together and gives the snowflake details a slightly raised, polished finish.
This design looks especially neat on medium length square or almond nails, where the clean color blocking has enough space to feel intentional. It works beautifully for both everyday wear and holiday occasions, since the neutral palette keeps things versatile no matter where you are headed. Pair it with grey or white outfits, cozy textures, and simple silver jewelry for a coordinated, wintery feel. If you love minimal nail art that still captures the spirit of the season, this grey and white snowflake set is easy to love.
Red Sparkle and Black Winter Contrast
Bold and dramatic, this design pairs deep black with vibrant red sparkle for a manicure that feels striking without losing its winter appropriateness. Most nails feature a solid black base, sleek and matte or glossy depending on preference, while one or two accent nails are covered in a rich red glitter that catches light beautifully. The contrast between the flat black and the shimmering red creates visual tension that feels festive and edgy at the same time, making this a favorite for anyone who wants their nails to make a real statement during the holiday season.
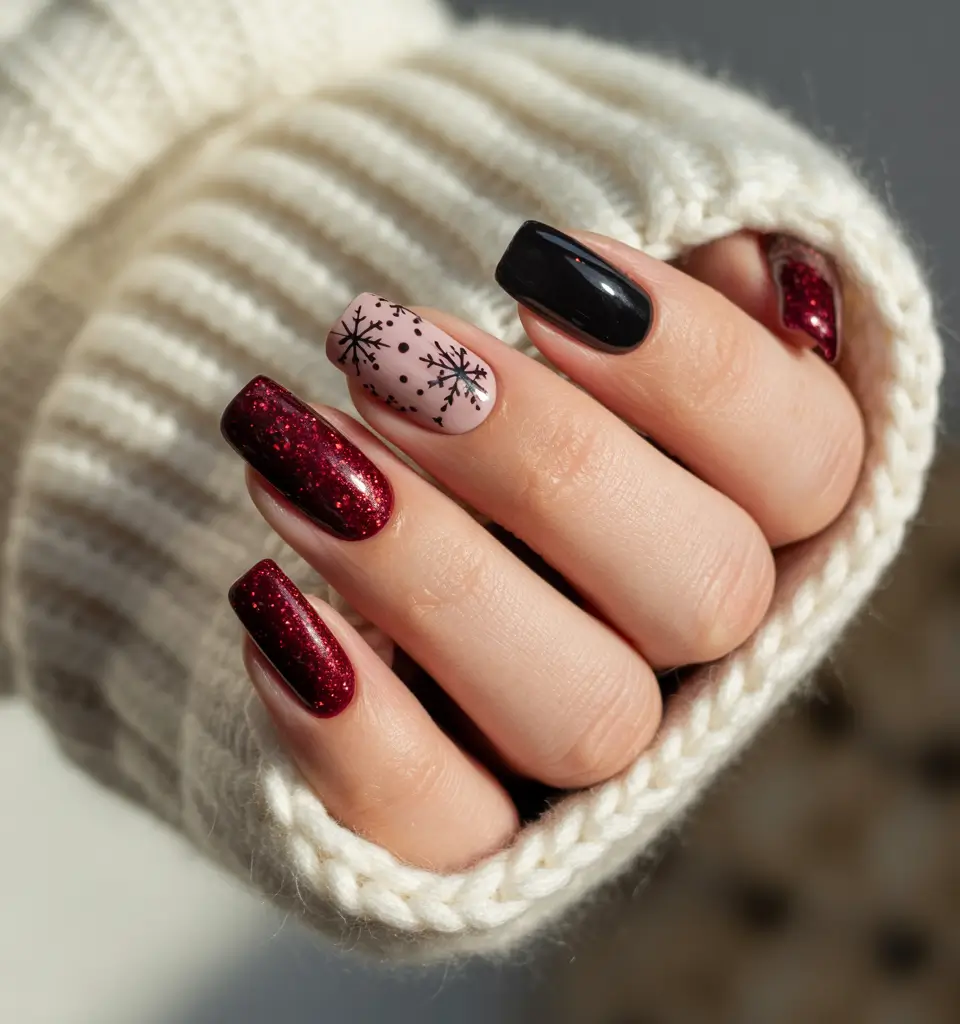
To recreate this look, apply two coats of black polish to your chosen nails, allowing each layer to dry fully for a smooth, opaque finish. On your accent nails, apply a red glitter polish in even layers, building up coverage gradually until the glitter appears full and vibrant rather than sparse. If you want extra dimension, you can layer a red glitter over a red base color first, which helps the glitter appear richer and more saturated. Finish the entire set with a thick, glossy top coat to enhance the shine and smooth out the glitter texture across all nails.
This design works wonderfully on medium to long coffin or almond nails, where the bold contrast has enough surface area to feel dramatic rather than cramped. It suits evening events, holiday parties, and New Year celebrations especially well, since the combination of black and red naturally reads as festive and glamorous. Pair it with little black dresses, red lips, or metallic accessories for a cohesive, statement making look. If you love nail art with bold contrast and a bit of drama, this red and black combination is absolutely worth pinning.
Iridescent Winter Pastel Glow
Soft, dreamy, and slightly otherworldly, this design uses iridescent polish to create a gentle glow across pastel toned nails. The base colors rotate through light lavender, soft blue, and pale pink, each finished with a sheer iridescent top coat that shifts subtly in the light depending on the angle. Unlike bold glitter or metallic finishes, iridescent polish offers a much softer kind of sparkle, one that feels ethereal rather than flashy. This design is perfect for anyone who wants their nails to feel a little magical without straying from a minimal, wearable aesthetic.
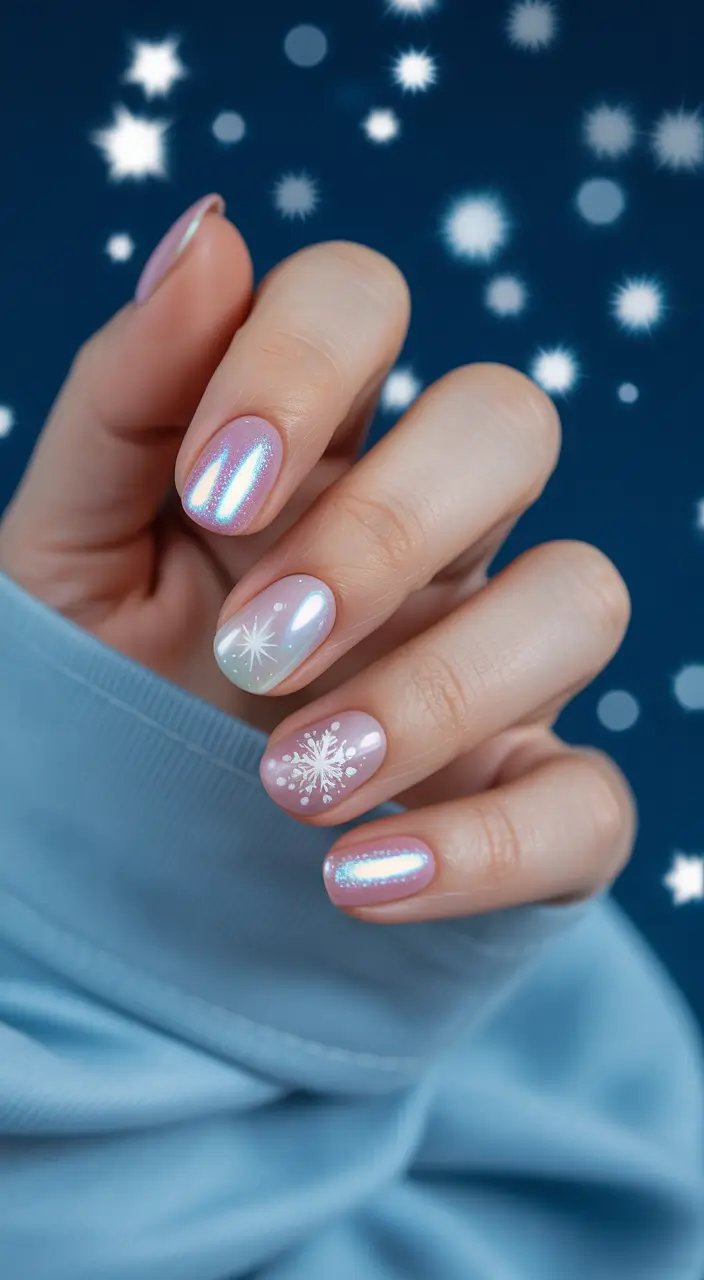
To achieve this glow, start with your chosen pastel base color, applying two thin coats and allowing full drying time between each. Once the base is set, apply an iridescent or holographic top coat in a thin, even layer, moving the brush slowly to avoid streaking. Because iridescent finishes rely on light reflection, it helps to apply this coat in natural light so you can see how the shimmer is building as you go. A final glossy top coat helps seal everything in place and enhances the overall glow without dulling the iridescent effect.
This look pairs beautifully with almond or oval nail shapes, where the soft color and subtle shimmer feel harmonious with the nail’s natural curve. It works well for both everyday wear and special occasions, since the pastel tones keep things soft while the iridescent finish adds just enough interest to feel special. Pair it with soft glam makeup, pastel outfits, or delicate jewelry for a cohesive, dreamy aesthetic. If you love nail art that feels gentle yet a little magical, this iridescent pastel glow is easy to fall for.
Pink Sparkle Modern Short Classic
Not every trend requires long nails, and this design proves that short nails can carry just as much sparkle and personality as longer sets. The look features a solid pink base with a fine, evenly distributed glitter mixed throughout, creating a manicure that feels celebratory and modern even on a short, practical nail length. Because the design keeps things simple with just one glittery color rather than multiple elements, it works well for anyone who wants a low maintenance manicure that still feels festive for the season.
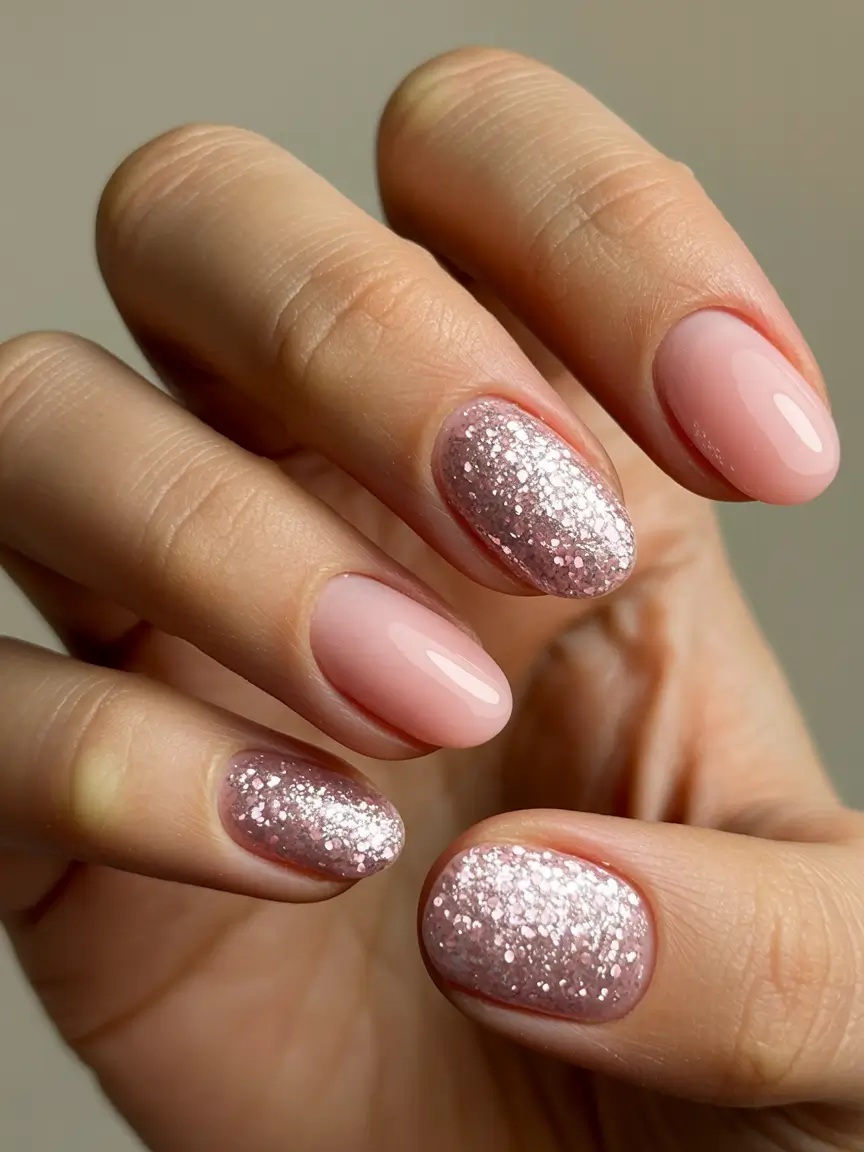
To recreate this design, mix a fine glitter polish into your pink base, or apply the glitter as a top layer over a solid pink base color for more control over placement. Apply two even coats of your chosen pink shade first, letting each layer dry completely, then add your glitter layer, building it up gradually until you reach your desired level of sparkle. Because short nails have less surface area, it helps to keep glitter application thin and even to avoid a heavy, clumped look. A glossy top coat at the end smooths everything out and gives the glitter a polished, cohesive shine.
This style is ideal for round or squoval short nails, where the classic shape complements the simple, sparkly design beautifully. It works well for everyday wear, office settings, and holiday occasions alike, since the glitter adds festivity without feeling impractical for daily tasks. Pair it with simple gold or silver jewelry and neutral outfits for an easy, put together look. If you love manicures that prove short nails can still shine, this pink sparkle classic is a great one to save.
Soft Almond Frost Gradient
This design brings a soft, wintery gradient effect specifically tailored to almond shaped nails, where the tapered tip creates a naturally elegant canvas for frosted color blending. The base starts sheer near the cuticle and gradually deepens into a frosted, icy tone toward the tip, creating a soft ombre effect that feels cool and refined. Unlike brighter gradient looks, this design leans into muted, frosty tones like pale blue grey or soft lilac, giving it a distinctly winter feel without relying on any glitter or embellishment. It is a great choice for anyone who wants their nail shape itself to be part of the design.
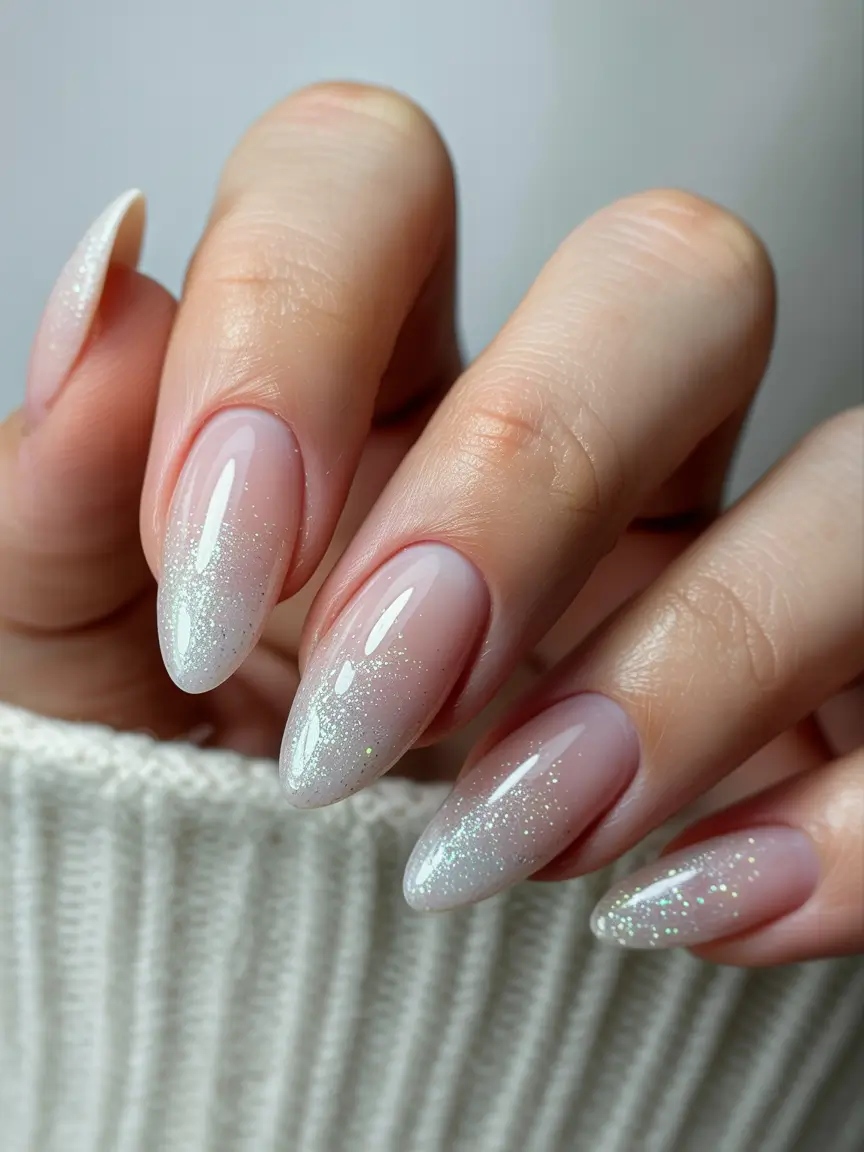
To create this gradient, begin with a clear or sheer base coat and allow it to dry fully before starting the color application. Using a makeup sponge, dab your chosen frosted polish onto the tip of the nail, working the color gradually toward the center while using a lighter touch as you move closer to the cuticle. Building the gradient in thin layers helps create a smooth, seamless transition rather than a harsh line of color. Once you are satisfied with the blend, seal the design with a glossy top coat, which helps enhance the frosted finish and gives the whole look a polished, cohesive shine.
This design is specifically well suited to almond and coffin nail shapes, since the elongated tip provides more space for the gradient to unfold gracefully. It works beautifully for both everyday wear and more elevated occasions, since the frosted, neutral tones feel sophisticated without being overly formal. Pair it with cool toned outfits, minimalist jewelry, or soft winter makeup for a look that feels effortlessly put together. If you love gradients that feel soft, icy, and a little refined, this almond frost design is well worth pinning.
Rosy Metallic Holiday Minimalism
Metallic finishes often read as bold or statement making, but this rosy metallic design proves they can also feel calm and minimal when done with restraint. The base color is a soft, warm rose gold applied in a smooth, even metallic finish across most nails, while one or two nails are left in a matching sheer or nude shade to break up the shine. This balance between metallic shine and quiet neutrals keeps the overall look feeling holiday appropriate without becoming overly flashy, making it a versatile pick for both daytime and evening wear during the season.
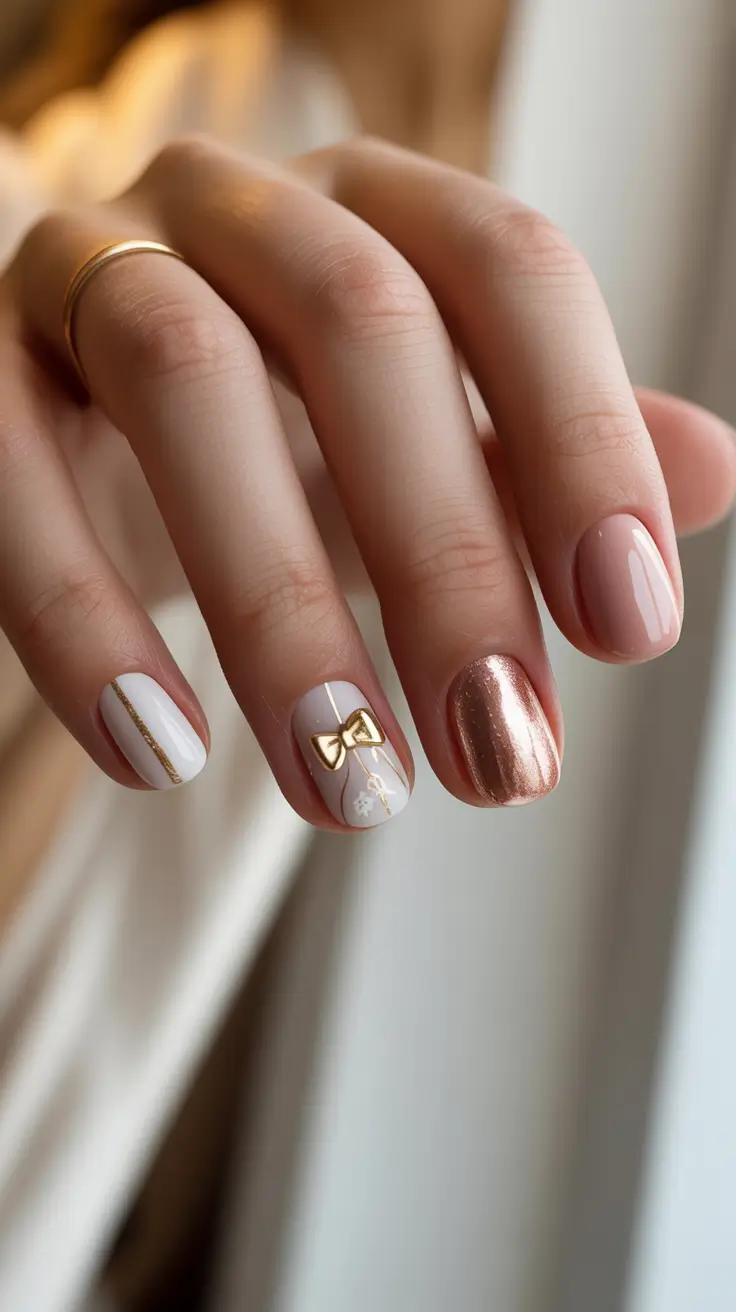
To achieve this look, apply your rosy metallic polish in two thin, even coats, allowing full drying time between layers to avoid any streaking or unevenness. Metallic polishes can sometimes show brush strokes more easily than cream finishes, so working in smooth, single direction strokes helps keep the surface looking clean. For your neutral accent nails, apply a sheer or nude polish in the same warm undertone as the metallic shade, which helps tie the whole set together visually. A glossy top coat at the end enhances the metallic shine and gives the entire manicure a cohesive, polished finish.
This design works beautifully on medium length oval or almond nails, where the smooth metallic finish has enough space to catch the light attractively. It suits holiday parties, family gatherings, and everyday winter wear alike, since the rose gold tone feels festive without being overly dressy. Pair it with warm toned makeup, gold jewelry, and cozy neutral outfits for a coordinated, elegant look. If you love metallics that feel soft rather than loud, this rosy holiday design deserves a place on your board.
Snowy Shimmer Minimal Elegance
This design captures the quiet beauty of freshly fallen snow, using a soft white base infused with fine, cool toned shimmer to create a manicure that feels elegant and understated. Rather than opting for bright white or stark opacity, the base leans slightly sheer, allowing a gentle, almost translucent quality to come through. Scattered throughout is a fine silver or icy shimmer that catches light softly rather than aggressively, mimicking the way snow sparkles under natural daylight. This design feels fresh, clean, and perfectly suited to the transition from winter into the new year.
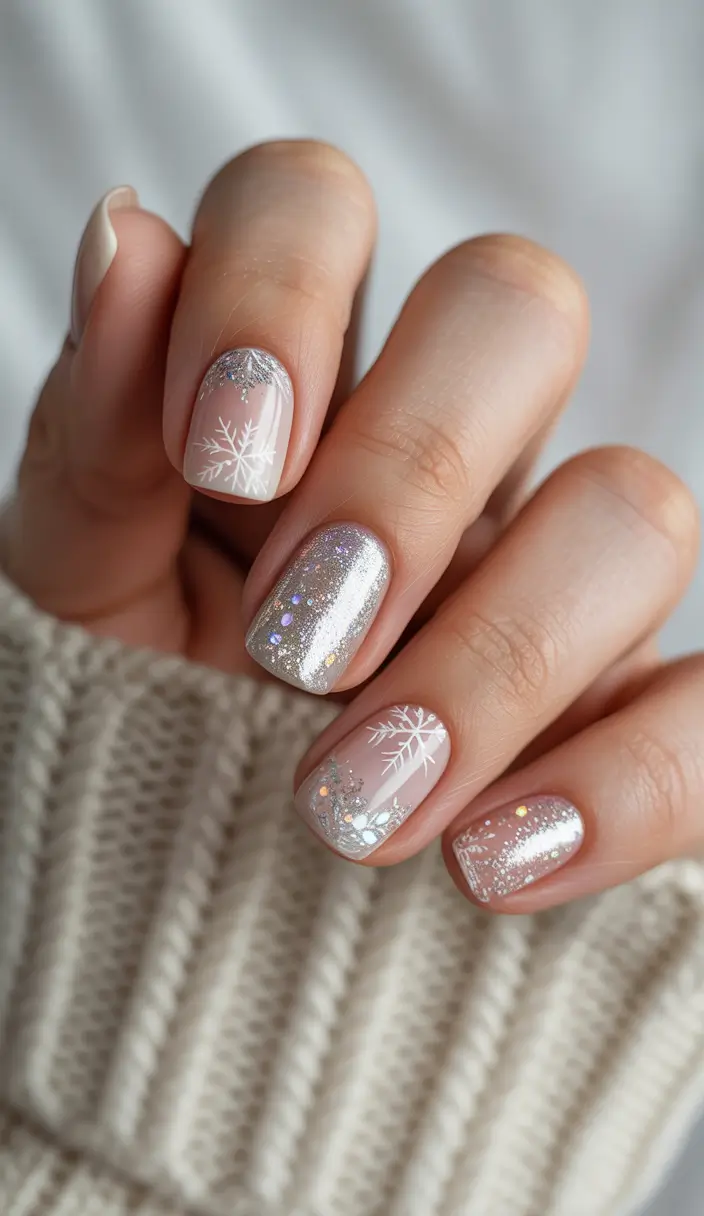
To recreate this look, start with a sheer white or milky base polish, applying two thin coats to build gentle opacity without losing that soft, translucent quality. Once dry, apply a fine shimmer top coat in a cool silver or icy tone, using thin, even strokes to distribute the shimmer evenly across the nail. Because the goal here is subtlety, avoid layering too many coats of shimmer, as this can create a heavier, less natural looking finish. A high shine top coat at the end helps unify the sheer base and shimmer, giving the whole design a soft, glowing quality.
This design pairs beautifully with almost any nail shape, though it looks especially elegant on oval or almond nails where the soft, rounded edges complement the delicate shimmer. It suits nearly every winter occasion, from holiday gatherings to quiet New Year celebrations at home, since the neutral palette keeps things versatile and easy to wear. Pair it with soft winter whites, silver jewelry, or a simple monochrome outfit for a clean, elegant aesthetic. If you love manicures that feel soft, clean, and quietly glamorous, this snowy shimmer design is easy to fall in love with.
Champagne Glow Classic Neutral
There is a reason champagne toned nails remain a perennial favorite through every new year season, they feel warm, sophisticated, and endlessly easy to wear. This design uses a soft champagne shade as an all over base color, finished with just a touch of fine shimmer to give the nails a subtle glow rather than a flat, matte finish. Because the tone sits so close to skin, it flatters nearly every complexion and pairs effortlessly with almost any outfit or occasion. This is the kind of manicure that feels put together without ever feeling fussy, making it a reliable choice whenever you want your hands to look polished.
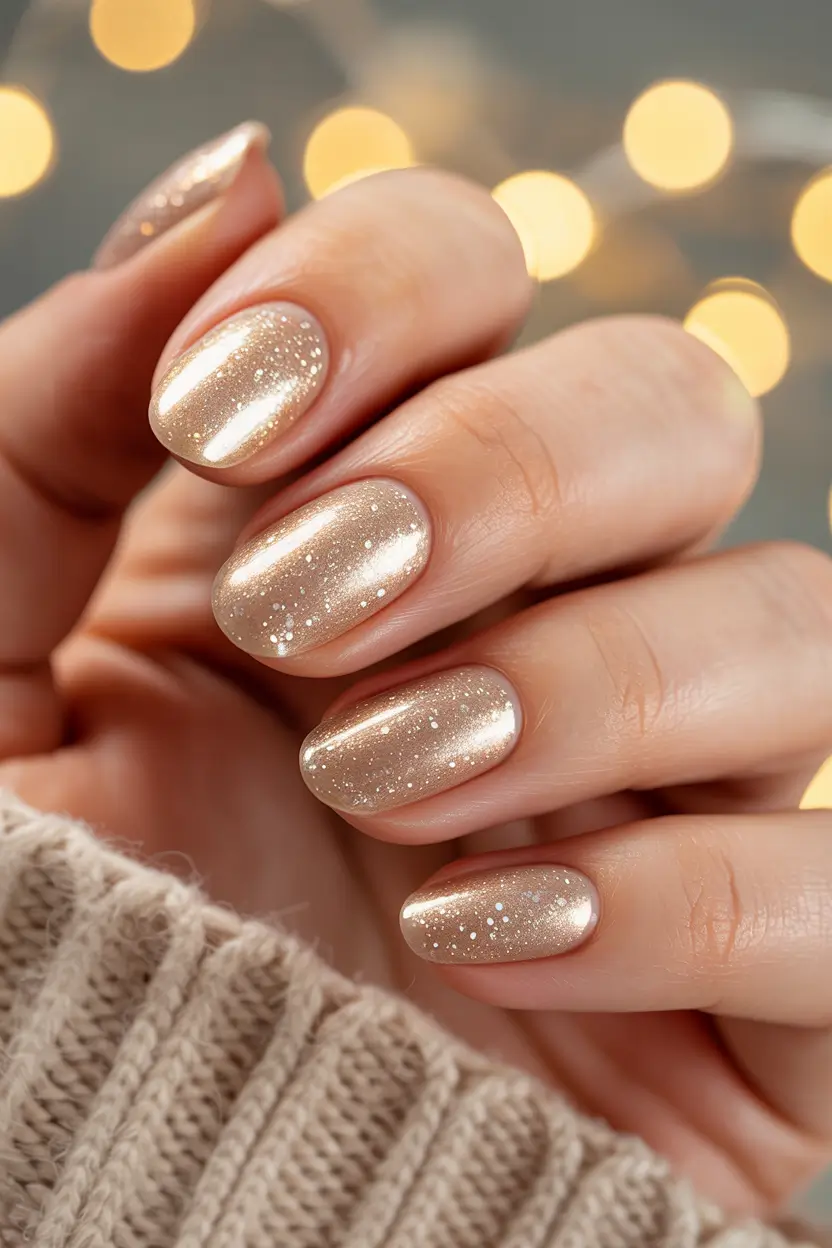
To recreate this look, apply your champagne polish in two even coats, allowing each layer to dry fully before adding the next for the smoothest possible finish. If your chosen shade does not already contain shimmer, you can add a fine shimmer top coat afterward, applying it thinly so the glow feels soft rather than glittery. Because champagne tones can sometimes appear streaky depending on the formula, working in slow, even strokes and building color gradually helps avoid any patchiness. Finish with a glossy top coat to enhance the natural warmth of the shade and give the whole manicure a smooth, cohesive shine.
This design suits virtually every nail shape and length, though it looks especially elegant on medium almond or oval nails where the warm tone can catch light beautifully along the curve. It works for everyday wear just as easily as it does for holiday parties or New Year celebrations, since the neutral base never feels out of place. Pair it with gold jewelry, warm toned makeup, or simple neutral outfits for a cohesive, classic look. If you love manicures that feel timeless rather than trend dependent, this champagne glow design deserves a permanent spot on your board.
Black & Champagne Contrast Chic
Pairing a deep, dramatic black with a soft, warm champagne creates a manicure that feels both bold and refined at the same time. Most nails in this design feature a solid black base, sleek and glossy, while one or two accent nails are finished in the same champagne shade used elsewhere in this roundup, adding warmth and contrast to the darker tones. The result feels elegant without being overly severe, since the champagne accents soften what could otherwise be a very stark color combination. This design works particularly well for anyone who wants their nails to feel a bit more editorial during the holiday and new year season.
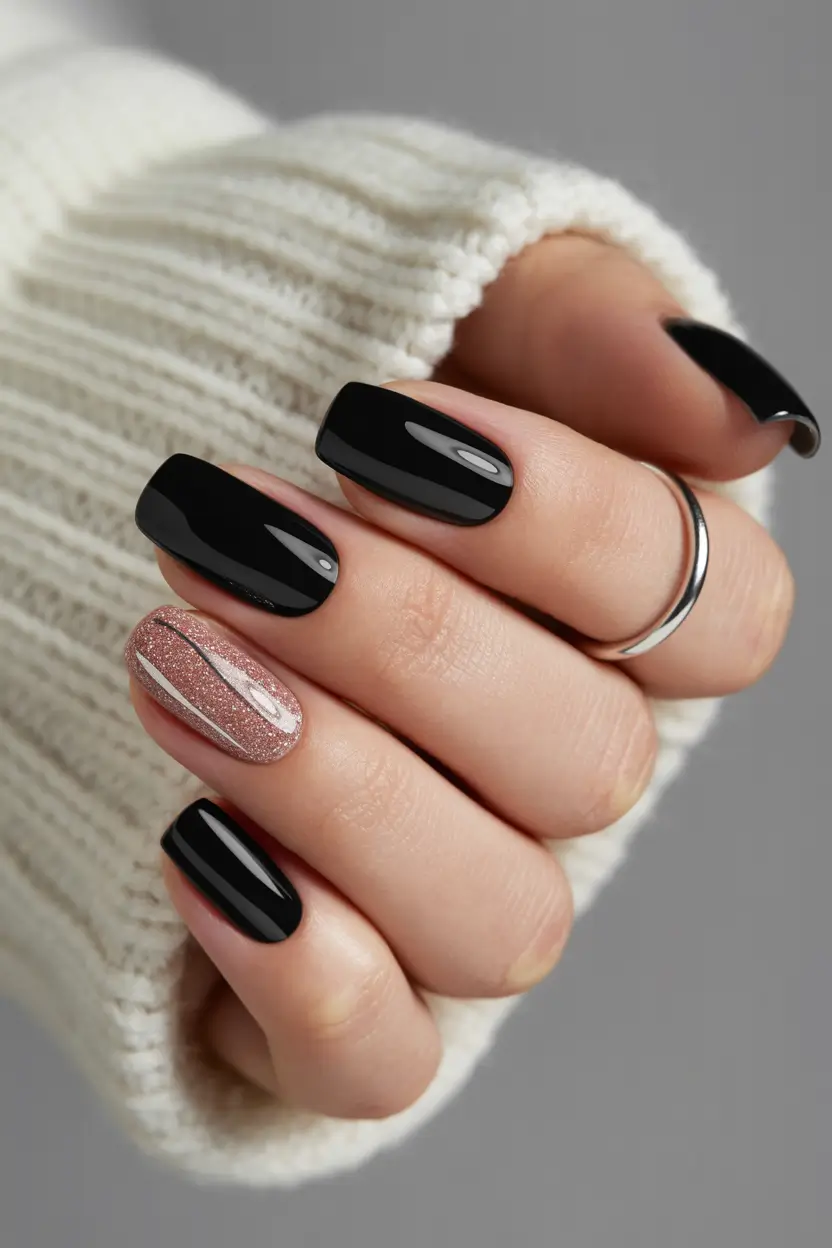
To achieve this look, begin with two coats of a glossy black polish on your chosen nails, making sure each layer dries fully before moving forward. On your accent nails, apply the champagne shade in the same manner, using even strokes to ensure smooth, streak free coverage. If you want to add a touch of extra detail, a thin gold line can be painted along the edge where black and champagne nails meet, though this step is entirely optional. Seal the entire set with a glossy top coat to unify the shine across both the deep black and warm champagne tones.
This design works beautifully on longer coffin or almond nails, where the bold color blocking has enough space to feel intentional and dramatic. It suits evening events, holiday parties, and New Year celebrations especially well, since the combination of black and champagne naturally reads as elegant and a little glamorous. Pair it with little black dresses, gold accessories, or simple neutral makeup for a cohesive, sophisticated look. If you love contrast that feels chic rather than harsh, this black and champagne design is well worth saving.
Pearly Glow Neutral Gradient
Soft and luminous, this design uses a pearlescent finish to create a gentle glow across a neutral gradient base, resulting in a manicure that feels understated yet clearly elevated. The gradient moves subtly between two close neutral tones, often a pale nude and a soft ivory, finished with a pearl shimmer top coat that adds dimension without introducing any bold color or heavy glitter. This combination gives the nails a soft, almost lit from within quality that feels perfect for the quieter, more reflective mood of the new year season. It is an ideal choice for anyone who wants their manicure to feel polished without drawing too much attention.
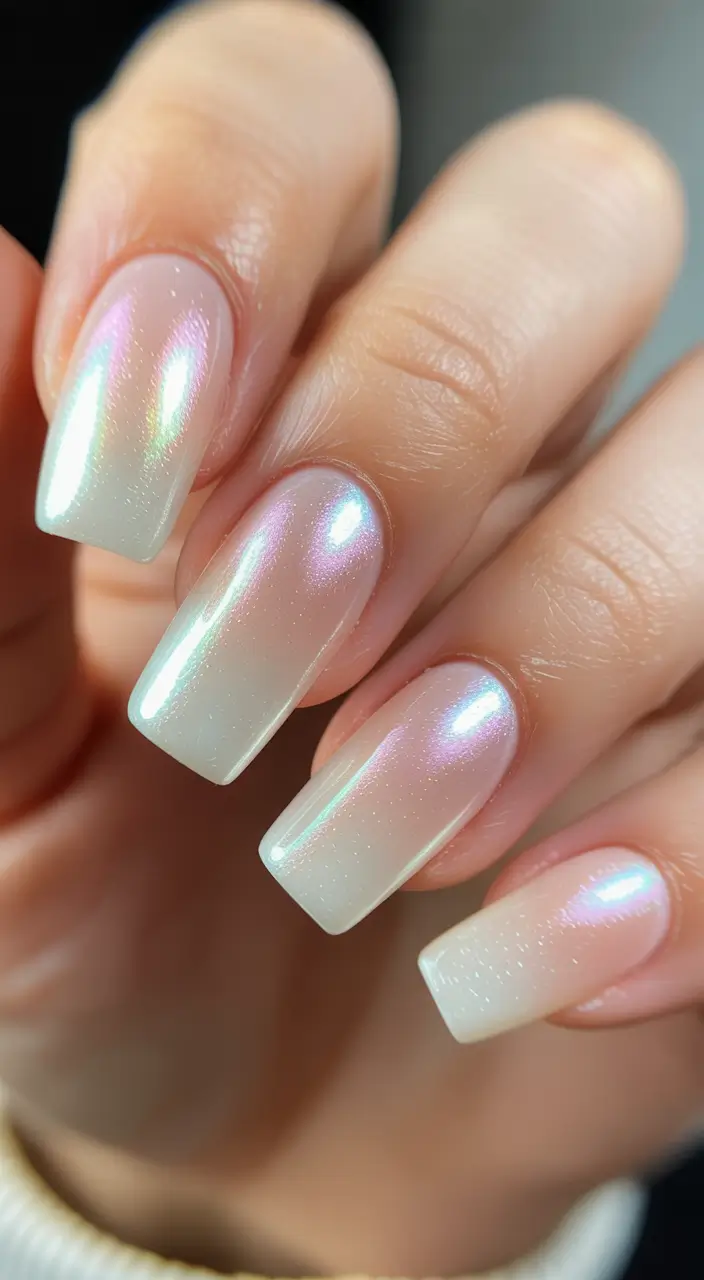
To create this gradient, start with your lighter neutral shade as a base, applying two thin coats and allowing full drying time. Using a makeup sponge, gently dab your slightly deeper neutral tone onto the tip of the nail, blending toward the center with a light touch to avoid any harsh lines. Once you are happy with the gradient, apply a pearlescent top coat in thin, even layers, moving slowly to let the shimmer build gradually rather than appearing all at once. A final glossy coat helps seal the pearl finish and gives the whole design a smooth, radiant shine.
This design pairs beautifully with oval or almond nail shapes, where the soft gradient and subtle shimmer feel harmonious with the nail’s natural curve. It works well for both everyday wear and special occasions, since the neutral palette keeps things versatile no matter where you are headed. Pair it with soft neutral makeup, delicate jewelry, or simple winter outfits for a cohesive, understated look. If you love manicures that feel soft, glowing, and effortlessly elegant, this pearly gradient design is easy to fall for.
Modern Gold Accent Minimalism
This design proves that a single well placed metallic detail can elevate an otherwise simple manicure into something that feels intentional and refined. Most nails feature a clean, neutral base, often a sheer pink or soft nude, while one nail on each hand is finished with a solid gold accent, whether through a full metallic coat or a delicate gold line placed near the cuticle. The restraint shown here is what makes the design feel modern, since it avoids covering every nail in metallic finish and instead lets the gold act as a quiet focal point. This is a great option for anyone who wants their nails to feel special without straying too far from an everyday, wearable look.
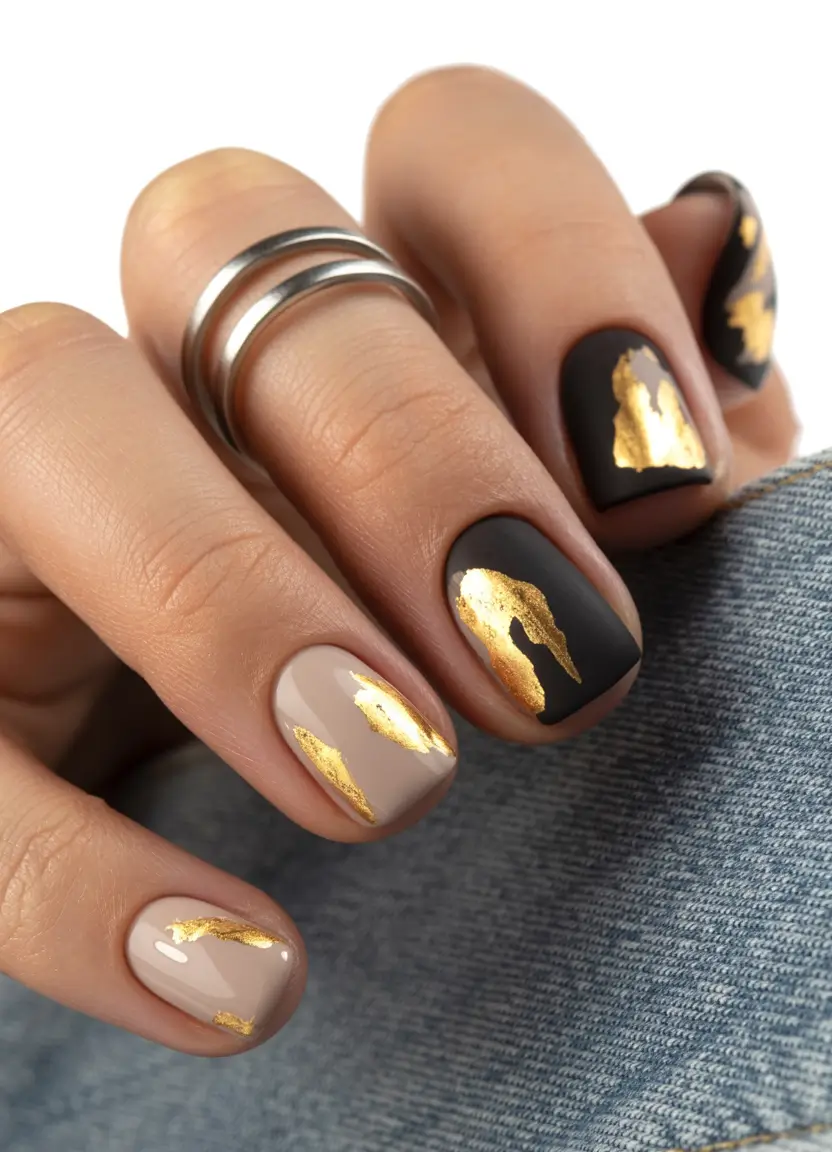
To recreate this design, begin with your chosen neutral base color, applying two even coats and allowing full drying time before adding any gold detailing. For a full metallic accent nail, apply gold polish in thin, even layers to avoid streaking, since metallic finishes tend to show brush strokes more visibly than cream polishes. If you prefer a more subtle approach, use a fine detail brush to paint a thin gold line along the cuticle or through the center of the nail instead of covering the entire surface. Finish with a glossy top coat across all nails to unify the shine and protect the gold detailing from chipping.
This design works well on almost any nail shape, though it looks particularly clean and modern on square or squoval nails where the gold accent has a clear, defined space to stand out. It suits everyday wear as easily as it does holiday parties or New Year celebrations, since the neutral base keeps things versatile while the gold adds just enough shine for the occasion. Pair it with simple gold jewelry, neutral outfits, or soft glam makeup for a coordinated look. If you love minimal nail art with a touch of metallic interest, this gold accent design deserves a spot on your board.
Soft Winter Sparkle Minimalism
Rounding out this collection, soft winter sparkle minimalism brings together everything that makes minimal nail art so appealing for the season, a quiet neutral palette, a touch of shimmer, and just enough detail to feel festive without ever becoming overwhelming. The base color is typically a soft, muted neutral, whether that is a pale pink, warm nude, or gentle grey, finished with a fine, evenly distributed glitter or shimmer top coat that catches light softly rather than dramatically. This design works as a kind of blank canvas approach, one that feels effortlessly put together no matter what the occasion calls for.
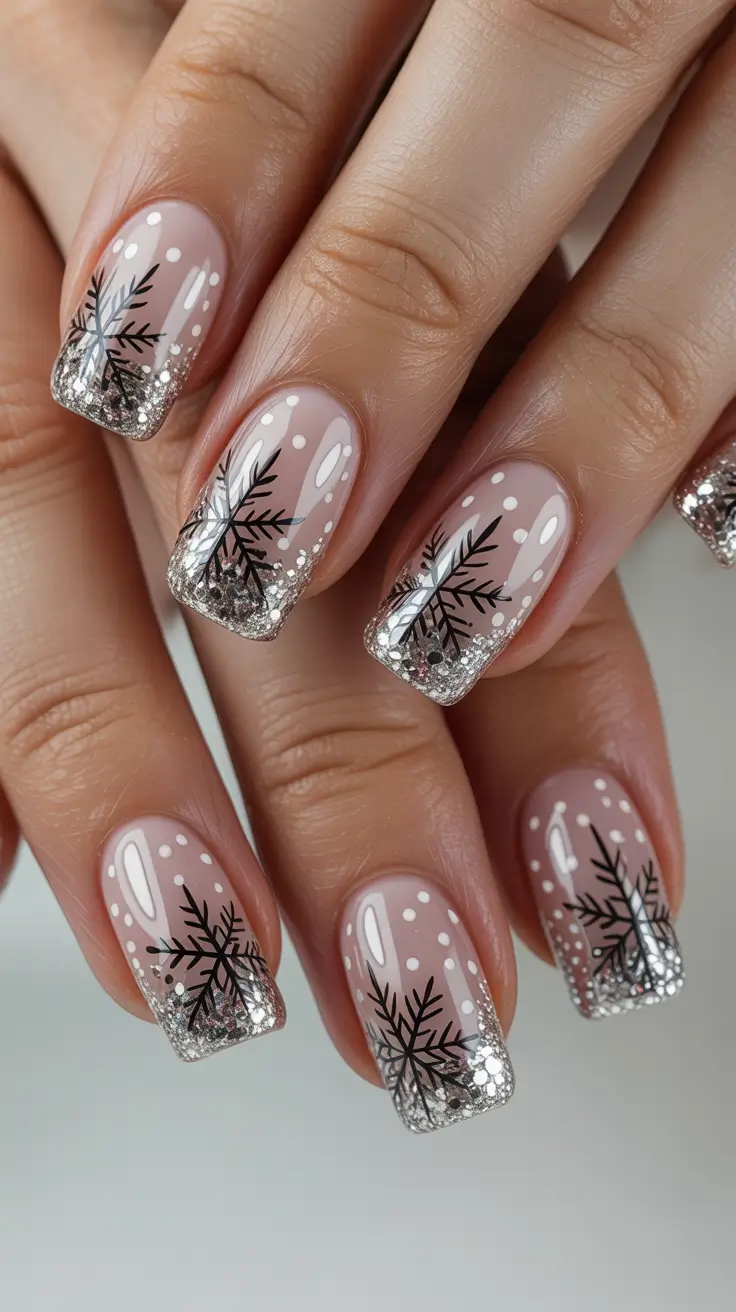
To achieve this look, start with your chosen neutral base color, applying two even coats and allowing each layer to dry fully for a smooth, opaque finish. Once your base is set, apply a fine glitter or shimmer top coat in thin, even layers, building gradually until you reach a level of sparkle that feels balanced rather than heavy. Because the goal here is subtlety, it helps to blot excess product from your brush before application, which prevents the glitter from clumping or appearing patchy. A final glossy top coat ties everything together, enhancing the shimmer while keeping the overall finish smooth and cohesive.
This design suits virtually every nail shape and length, making it one of the most versatile options in this entire roundup. It works beautifully for everyday wear, holiday gatherings, and New Year celebrations alike, since the neutral base and soft sparkle never feel out of place. Pair it with cozy winter outfits, simple jewelry, or soft everyday makeup for a look that feels put together with minimal effort. If you love nail art that captures the quiet, sparkly spirit of the season without ever feeling overdone, this soft winter sparkle design is the perfect note to end on.
Final Thoughts
Minimal nail art has clearly earned its place as one of the standout trends heading into 2026, and it is easy to understand the appeal. These designs prove that you do not need bold colors or intricate patterns to make a lasting impression, sometimes a soft gradient, a single metallic accent, or a scattering of fine glitter is all it takes to feel polished and put together. Whether you gravitate toward icy frosted tones, warm champagne neutrals, or a touch of festive sparkle, there is a design in this roundup suited to almost any taste, occasion, or nail shape. The best part is that most of these looks are approachable enough to recreate at home, so you do not need to be a professional to enjoy them.
As you head into the new year, consider this list a starting point rather than a final destination. Nail art is one of the easiest and most affordable ways to refresh your look, and these minimal designs offer plenty of room to experiment with your own personal touches, whether that means adjusting a shade to better suit your skin tone or combining two ideas from this list into something entirely your own. Save your favorites, screenshot the ones that speak to you, and bring them along to your next appointment or DIY session. However you choose to wear them, these simple, elegant designs are proof that sometimes the quietest manicures leave the biggest impression.


