

23 Winter Almond Nails 2026–2027: Classy, Chic & Inspiring Winter Nail Designs
Almond nails have a quiet elegance that few other shapes can match, and this winter they are taking center stage across Pinterest boards everywhere. The soft, tapered tip gives fingers a naturally longer, more graceful look, which makes it the perfect canvas for everything from glossy solid colors to intricate hand painted art. This season’s designs lean into rich winter tones, icy pastels, and just enough sparkle to feel festive without ever tipping into overdone. Whether you’re drawn to deep jewel shades or soft, romantic pinks, almond nails offer the flexibility to wear whatever mood matches your winter wardrobe. It’s a shape that photographs beautifully in every lighting condition, which is exactly why it continues to dominate winter nail inspiration year after year.
What makes this collection so appealing is how each design pulls from something tangible about the season, whether that’s frost on a window, the glow of holiday lights, or the deep green of a winter evergreen. Nail artists are combining classic techniques like French tips and chrome finishes with newer touches like crystal placement and soft ombre blending to keep things feeling fresh. Almond nails also happen to be one of the more forgiving shapes for at home application, since the tapered tip hides minor unevenness better than a squared off edge would. Below you’ll find twenty three distinct looks, each broken down with the inspiration behind it and simple steps to recreate it yourself, so you can pick the design that speaks to your own winter style.
Rose Glaze Glamour
Rose Glaze Glamour takes a soft, dusty rose shade and finishes it with a high shine, almost glazed looking topcoat, creating a nail that looks like it was dipped in a light pink sheen straight out of a bakery window. This color sits perfectly between pink and nude, warm enough to feel romantic but neutral enough to wear with nearly any outfit throughout the winter season. The glazed finish is what really sets this look apart, giving the nail a wet, glossy quality that catches light beautifully without relying on any glitter or embellishment. On Pinterest, this look consistently appears on boards dedicated to soft glam or everyday elegant nails, since it offers that polished, put together appearance without requiring any nail art skill. It suits almond nails especially well, since the tapered shape softens the color even further, giving the whole look a naturally graceful quality.
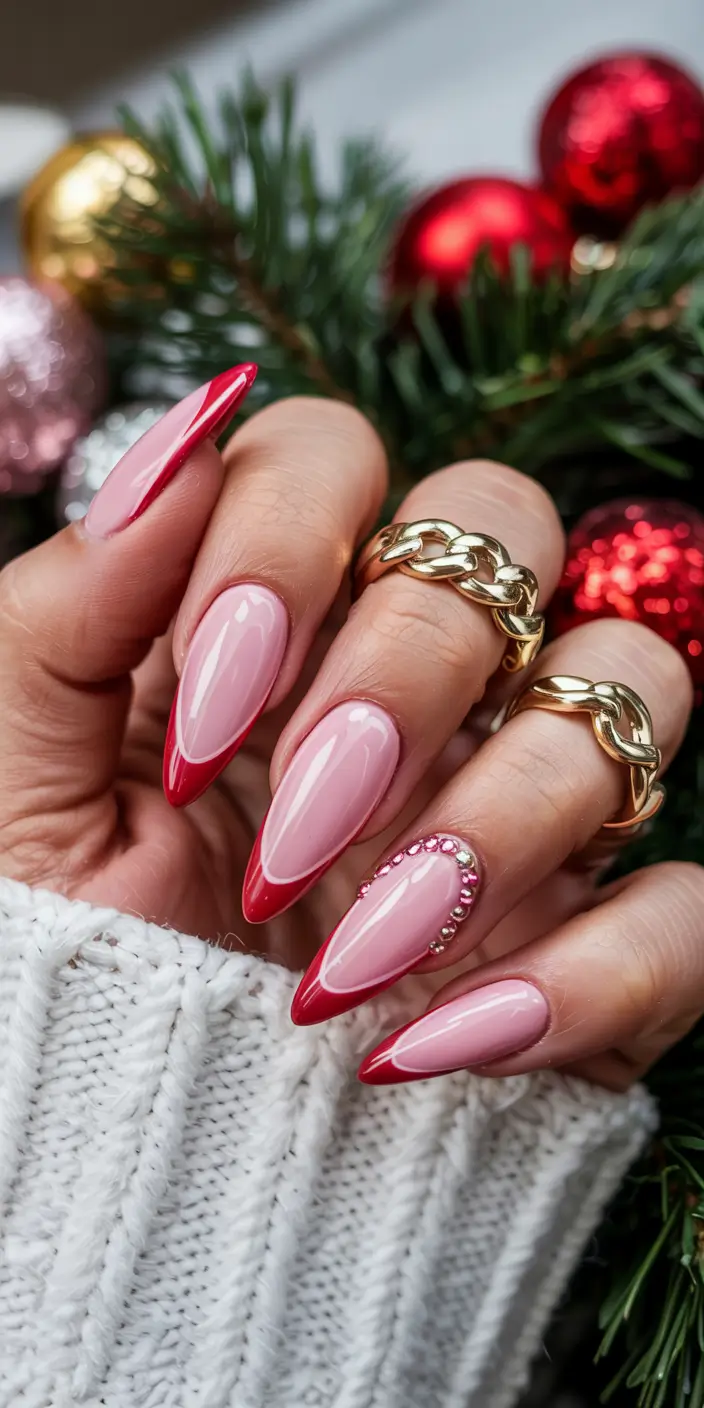
Recreating this at home starts with a smooth, well prepped nail bed, since glossy finishes tend to show any texture underneath more clearly than matte ones do. Apply a ridge filling base coat first, then two even coats of the dusty rose polish, allowing full drying time between each layer so the color stays even and opaque rather than streaky. Once your color is set, the real key to this look lies in the topcoat, so reach for a thick, high shine glaze style topcoat rather than a standard one, applying it generously to build up that glassy, almost 3D looking finish. Some people apply two coats of the glaze topcoat for an even deeper shine, waiting a few minutes between each layer to let it settle properly. The entire process takes about twenty five minutes and requires no special tools beyond your usual polish kit.
Rose Glaze Glamour earns its spot on this list because it proves a simple, well executed color can feel just as special as something more elaborate. It pairs beautifully with soft winter makeup looks and warm toned jewelry, working equally well for everyday wear or a holiday gathering. Because the color is soft and the finish so glossy, minor chips tend to blend in rather than stand out sharply, keeping the manicure looking fresh for longer between touch ups. This look resonates with people who want their nails to feel elevated without spending extra time on technique, which is exactly the kind of achievable, photogenic content that keeps circulating on Pinterest throughout the colder months. For anyone wanting soft glamour with almost no effort, Rose Glaze Glamour is a reliable place to start.
Blue Frost Mirage
Blue Frost Mirage combines a pale icy blue base with a soft holographic shimmer that shifts gently between blue, silver, and lavender depending on the light, creating a nail that looks almost like a mirage shimmering across frozen ground. This design has a dreamy, ethereal quality that photographs differently in every shot, which is part of what makes it so popular for saving and resharing on Pinterest throughout the winter season. Unlike a bold, obvious glitter finish, the shimmer here stays subtle and soft, giving the nail depth without ever feeling flashy or overdone. It works beautifully on almond nails, where the tapered shape allows the shimmer to catch light evenly from base to tip. This look tends to appear on boards dedicated to icy or dreamy winter aesthetics, since it captures that quiet, magical quality people associate with frost covered mornings.
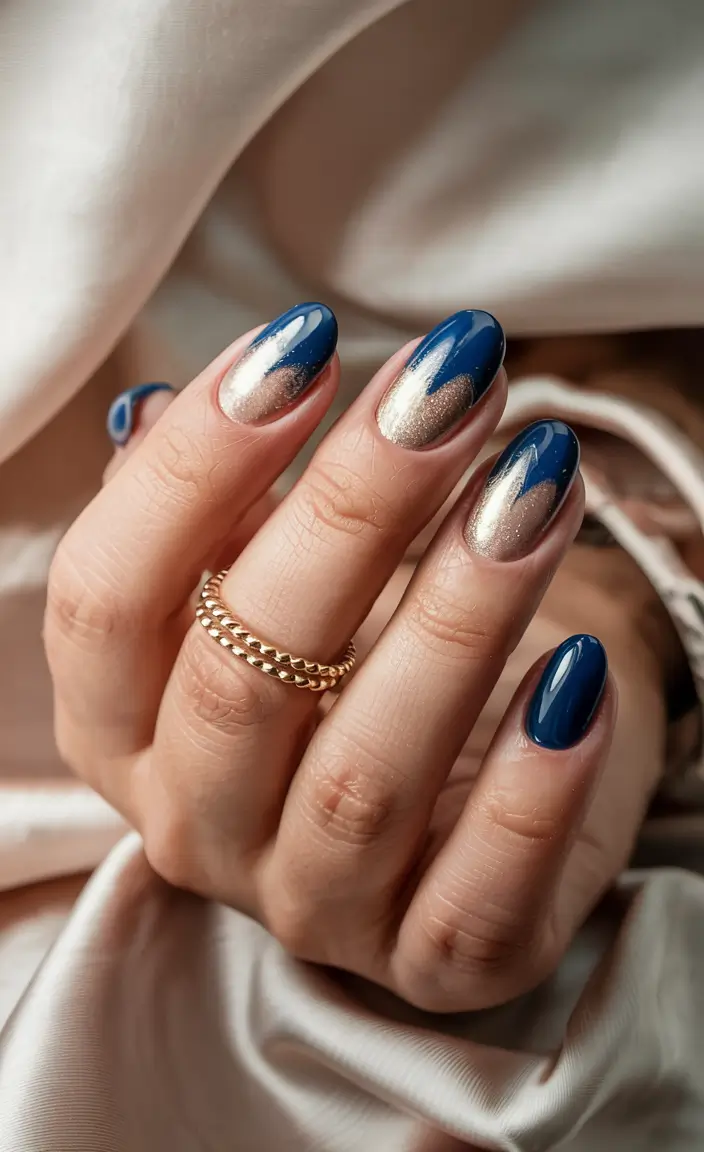
To recreate this at home, start with two coats of a pale icy blue holographic polish, letting each layer dry fully so the shimmer builds evenly across the nail rather than looking patchy in certain spots. Because holographic finishes rely so heavily on light, working near a window or under bright lighting while applying helps you see the true shift and shimmer as you go, making it easier to catch any missed spots. Once your color is fully dry, seal everything with a holographic specific topcoat rather than a standard glossy one, since this is what really maximizes the color shifting effect that makes the design so distinctive. Skipping this specific topcoat often results in a flatter, less dimensional finish that doesn’t capture the full mirage like quality the look is known for. The whole process takes about twenty five minutes from start to finish, making it accessible even for a relaxed evening at home.
Blue Frost Mirage stands out because it offers something visually interesting without requiring any freehand nail art, relying instead on the quality of the polish itself to do the heavy lifting. It pairs beautifully with simple, monochrome winter outfits that let the shifting shimmer serve as the main visual interest on its own. Because the color is light and the shimmer subtle, this design also tends to suit people who want something seasonal without going too bold or dramatic. This look resonates strongly with people who enjoy trying newer polish finishes and formulas, which continues to be a growing area of interest across Pinterest’s winter beauty content. For anyone wanting a nail that feels a little otherworldly this season, Blue Frost Mirage delivers a soft, captivating result.
Evergreen Christmas Charm
Evergreen Christmas Charm brings the rich, deep green of a fresh pine tree to the nails, pairing a glossy forest green base with tiny gold accents that mimic the ornaments and lights found on a decorated Christmas tree. This shade captures the warmth and coziness of the holiday season without relying on the more obvious red and white color combinations typically associated with Christmas nail art. The deep, saturated green feels rich and luxurious on its own, while the small gold details add just enough festive charm to tie the whole look together. On Pinterest, this design performs especially well during the lead up to the holidays, appearing frequently on boards dedicated to Christmas nail inspiration or cozy winter beauty. It suits almond nails particularly well, since the elongated shape gives the deep green color a naturally elegant, sophisticated quality.
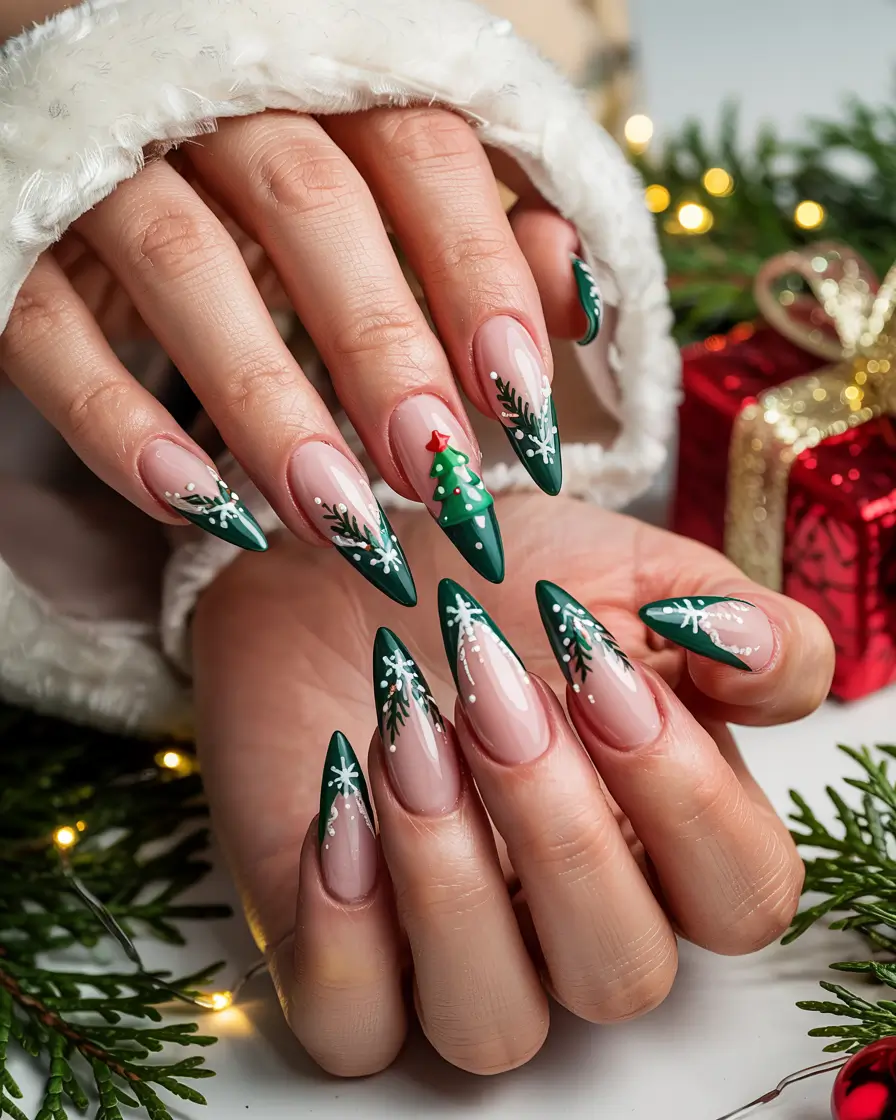
Creating this look at home begins with two to three coats of a rich forest green polish, allowing full drying time between each layer so the color builds to a deep, opaque finish without appearing streaky. Once your base color is completely dry, use a fine detail brush dipped in gold polish to add small dots, thin lines, or tiny star shapes scattered across one or two accent nails, keeping the placement light and intentional rather than covering the entire nail. A little gold goes a long way here, so resist the temptation to overdo the detailing, since the contrast between the deep green and sparse gold accents is what makes the look feel elegant rather than costume like. Finish the entire set with a glossy topcoat to seal the design and give the green that same rich, lacquered shine found on fresh pine needles. The whole process takes about thirty minutes, factoring in the extra time needed for the gold detail work.
Evergreen Christmas Charm earns its place on this list by offering a sophisticated alternative to more literal or cartoonish holiday nail art. It pairs beautifully with red or gold accessories, cozy sweaters, and the kind of warm, traditional holiday styling that dominates this time of year. Because the design relies on a solid color base with only minimal detailing, it also tends to be more approachable for people with limited nail art experience compared to more intricate holiday designs. This look resonates strongly with people who want their nails to feel festive and seasonal without looking overly themed, which continues to be a popular balance sought after across Pinterest’s Christmas beauty boards. For anyone wanting a touch of elegant holiday charm this winter, Evergreen Christmas Charm delivers exactly that feeling.
Red & Gold Ember Touch
Red & Gold Ember Touch pairs a warm, glossy red base with soft gold foil accents that look like glowing embers catching light, creating a nail design that feels rich, warm, and perfectly suited to the darker days of winter. This shade of red leans slightly warmer than a typical classic red, giving it a cozy, fireside quality rather than the crisp, cool red often associated with holiday nails. The gold foil pieces are placed sparingly, mimicking the way small sparks might catch and glow against a dark background, which keeps the overall look elegant rather than overwhelming. On Pinterest, this design tends to perform well on boards dedicated to warm winter glam or cozy holiday nails, since it captures that fireside, candlelit atmosphere people associate with the coldest months. It suits almond nails beautifully, since the tapered shape allows the gold accents to follow a natural, flattering line down the nail.
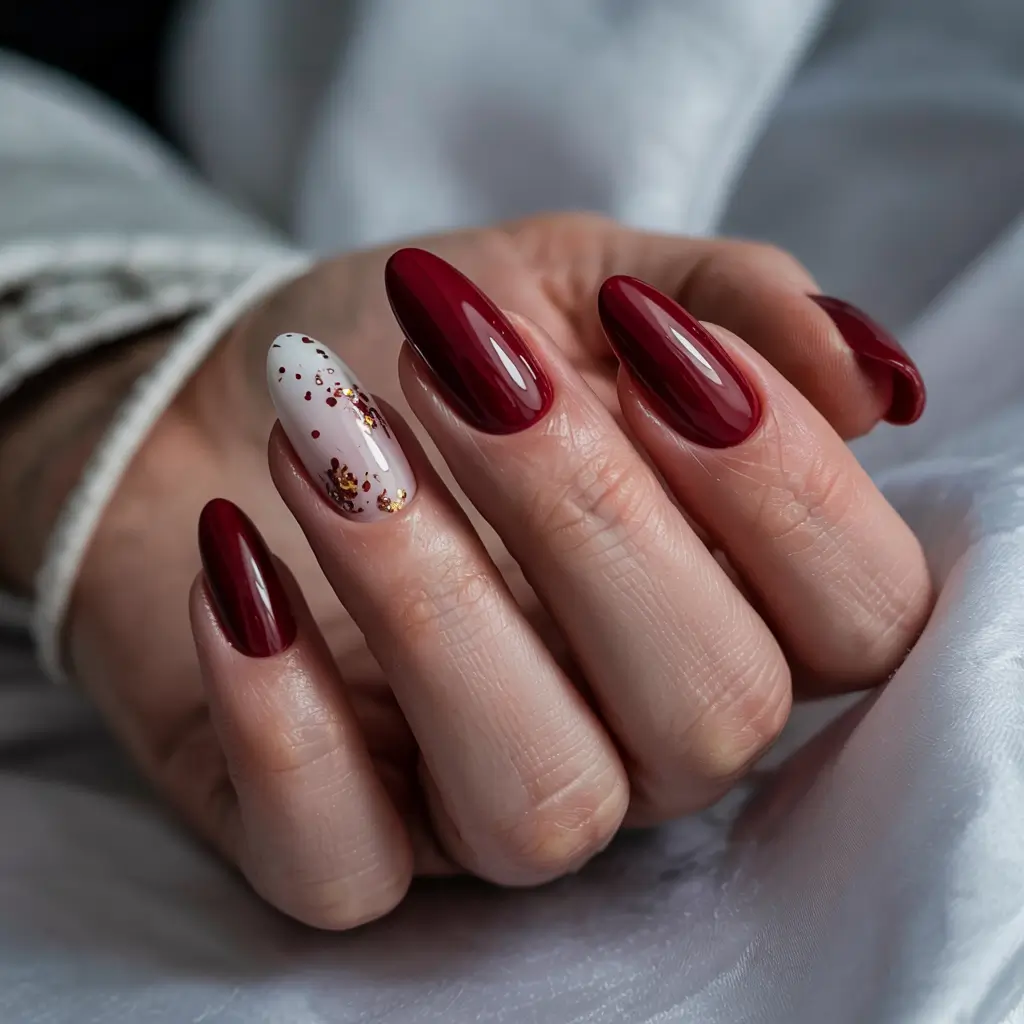
Recreating this look at home starts with two to three coats of a warm, glossy red polish, allowing each layer to dry fully so the color builds to a deep, rich finish without looking streaky. Once your red base is completely dry, apply a small dab of clear nail glue to the spots where you want your gold accents, then use tweezers to gently press small pieces of gold foil onto the tacky glue, varying the size and placement slightly to mimic the organic, scattered look of real embers. Foil application takes a little practice to master, since pressing too hard can cause the foil to tear, but working slowly and patiently gives the best results. Once you’re happy with the placement, seal everything with a glossy topcoat, sealing around the edges of the foil carefully so it stays secure without lifting throughout the week. The whole process takes about thirty minutes, with most of that time spent on careful foil placement.
Red & Gold Ember Touch stands out on this list because it delivers real warmth and richness without relying on anything overly literal or costume like. It pairs beautifully with velvet clothing, gold jewelry, and the kind of warm, candlelit settings that define cozy winter gatherings. Because the foil accents are placed sparingly rather than covering the whole nail, this design also tends to hold up well over time, since any natural wear simply blends into the existing pattern rather than looking obviously chipped. This look resonates strongly with people who want their nails to feel luxurious and warm during the colder months, which continues to be a popular theme across Pinterest’s winter beauty boards. For anyone wanting a rich, glowing manicure this season, Red & Gold Ember Touch offers exactly that warmth.
Blue Velvet Spark
Blue Velvet Spark combines a deep, matte navy base with scattered fine silver glitter to create a nail that feels both moody and celebratory at the same time, much like a velvet evening gown catching the light at a holiday party. The matte finish gives the navy a soft, fabric like texture, while the glitter adds just enough sparkle to keep the look from feeling too flat or somber. This combination of texture and shine creates real depth, since the eye is drawn first to the rich matte color and then to the small flashes of light from the glitter placement. On Pinterest, this design performs particularly well on boards dedicated to winter evening nails or elegant holiday beauty, since it has that refined, dressed up quality without feeling over the top. It suits almond nails especially well, since the elongated shape gives the matte navy a naturally sophisticated look.

Achieving this at home starts with two coats of a deep navy polish, allowing each layer to dry fully so the base color stays rich and even. Once your color is set, apply a thin layer of clear topcoat and, while it’s still slightly tacky, use a small brush to press fine silver glitter onto the nail in a scattered, natural pattern, concentrating slightly more glitter near the base and tapering off toward the tip. After the glitter placement feels right, seal everything with a clear topcoat first to lock the sparkle in place, then finish with a matte topcoat over the rest of the nail, being careful to work around the glitter area so it retains its natural shine rather than being dulled by the matte finish. This contrast between the matte navy and glossy glitter is what really makes the design pop, so taking a little extra care during this final step makes a noticeable difference. The whole process takes about thirty minutes from start to finish.
Blue Velvet Spark earns its place on this list by successfully blending two finishes that don’t often appear together, giving the nail a level of depth and interest that a single texture alone couldn’t achieve. It pairs beautifully with velvet or satin evening wear and silver jewelry, making it a strong choice for holiday parties or New Year celebrations. Because the glitter is concentrated rather than covering the whole nail, this design also tends to age gracefully as the nails grow out, since the sparkle simply shifts slightly rather than looking obviously outdated. This look resonates with people who want their nails to feel like part of their evening outfit rather than an afterthought, which continues to be a strong, recurring theme across Pinterest’s winter glam boards. For anyone wanting moody elegance with a touch of sparkle, Blue Velvet Spark delivers a striking, memorable result.
Midnight Glam Accent
Midnight Glam Accent uses a deep black or near black base across most nails, paired with one heavily embellished accent nail featuring a mix of crystals, glitter, and metallic detailing, creating a dramatic, high impact look without requiring intricate work on every single finger. This approach lets the accent nail act as a true statement piece, drawing all the attention while the rest of the set stays clean, glossy, and easy to maintain. The contrast between the simple black nails and the heavily detailed accent creates a striking visual balance that feels intentional and sophisticated rather than cluttered or busy. On Pinterest, this design performs especially well on boards dedicated to glam nail inspiration or New Year party looks, since it offers maximum drama with a technique that’s actually quite manageable to execute.
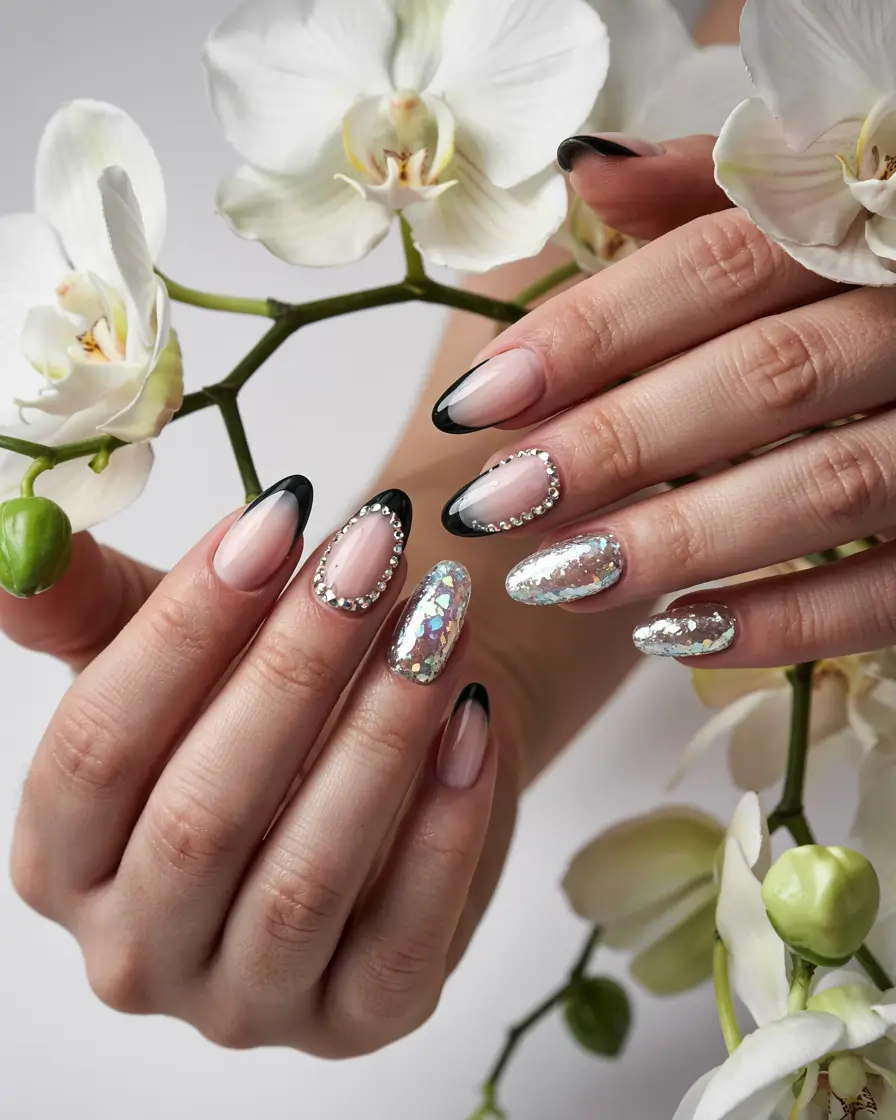
Creating this look at home starts with two coats of a deep black polish applied to every nail except your chosen accent finger, allowing full drying time between layers so the color builds to a rich, opaque finish. For the accent nail, apply the same black base first, then use nail glue to carefully place a mix of small crystals, sequins, and metallic studs in a pattern that feels balanced rather than randomly scattered, perhaps concentrating more embellishment near the base and tapering off toward the tip. Working with tweezers gives much better control over placement than fingers alone, especially for smaller crystals that can easily slip or shift. Once you’re happy with the arrangement, very carefully seal the embellished nail with a thin layer of topcoat, avoiding pressing down directly on any raised crystals so they keep their dimension rather than getting flattened. The rest of the black nails simply need a glossy topcoat to finish, keeping them sleek and complementary to the busier accent.
Midnight Glam Accent stands out because it delivers serious visual impact while keeping the overall time investment reasonable, since only one nail requires detailed embellishment work. It pairs beautifully with sleek, all black or monochrome outfits, letting the accent nail serve as the primary sparkle in an otherwise minimal look. Because the embellishment is contained to a single nail, this design is also easier to maintain and touch up compared to a fully embellished set, making it a practical choice for anyone wanting glam without daily upkeep concerns. This look resonates strongly with people planning New Year celebrations or winter formal events, which continues to make it one of the most saved looks on Pinterest during the final weeks of the year. For anyone wanting bold glamour without excessive effort, Midnight Glam Accent offers exactly that balance.
French Frost Chic
French Frost Chic reimagines the traditional French manicure with a soft, icy white tip against a sheer, frosty base, giving the classic style a distinctly wintery update. Instead of the usual bright white tip against a plain pink or nude base, this version uses a subtle shimmer in both the base and the tip, creating a look that feels frosted rather than flat. The overall effect is soft and luminous, almost like the nail itself has been lightly dusted with frost, which makes it a natural fit for the colder months without straying too far from a style people already know and love. On Pinterest, this design performs consistently well on boards dedicated to elevated French manicures or winter classic beauty, since it takes a familiar favorite and gives it just enough seasonal detail to feel fresh. It suits almond nails beautifully, since the tapered shape gives the frosted tip a naturally soft, rounded edge to follow.
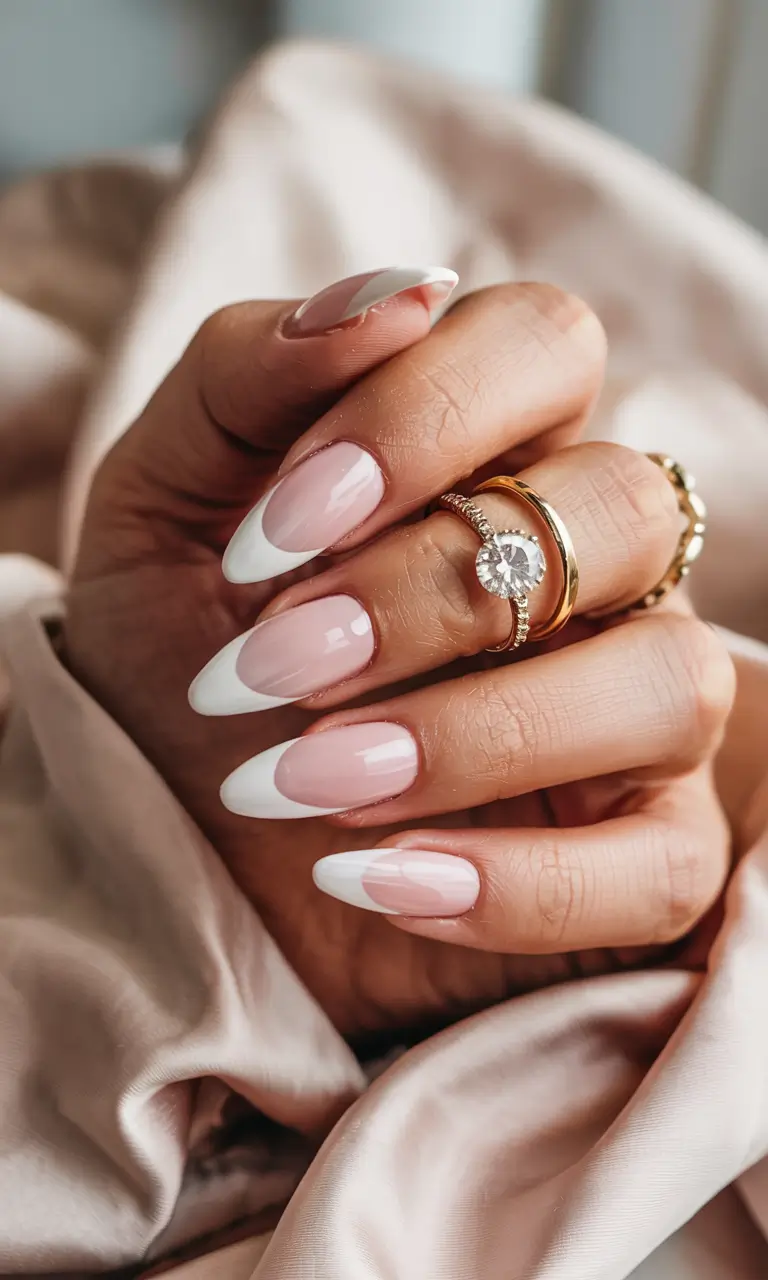
Recreating this at home starts with a sheer, shimmery pink or champagne base, applying one or two thin coats and letting them dry fully so the base stays soft and translucent rather than opaque. Using a thin nail art brush or a French tip guide sticker, paint a soft white shimmer polish along the tip in one smooth stroke, cleaning up any unevenness with a brush dipped in remover before it sets. Two thin coats on the tip usually give the best frosted opacity without looking too thick or heavy against the sheer base. Once both colors are fully dry, seal the whole design with a glossy topcoat to unify the shimmer and give the nail that soft, glowing finish that makes this look feel so wintery. The entire process takes about twenty five minutes, making it approachable even for those newer to French manicure techniques.
French Frost Chic earns its place on this list because it proves a familiar style can still feel current and seasonal with just a few thoughtful adjustments. It works beautifully for everyday wear, professional settings, and holiday occasions alike, since the shimmer keeps things soft rather than flashy. Because the design borrows its structure from a widely recognized style, it also tends to be easy to request at any salon, even for technicians less familiar with more elaborate winter trends. This look resonates with people who love the classic French manicure but want something that feels a little more special during the colder months, which continues to be a popular search across Pinterest’s winter nail boards. For anyone wanting timeless elegance with a frosted twist, French Frost Chic delivers a soft, polished result.
Deep Ruby Elegance
Deep Ruby Elegance brings the rich, saturated tone of a fine ruby gemstone to the nails, using a glossy, deeply pigmented red that leans slightly toward burgundy for a more sophisticated, jewel toned finish. This shade feels distinctly different from a bright, classic red, carrying a depth and warmth that suits the darker, cozier atmosphere of winter evenings. The high shine finish gives the color a glass like quality, making it look almost like a polished gemstone sitting at the end of each finger. On Pinterest, this look consistently appears on boards dedicated to jewel toned winter beauty or elegant holiday nails, since ruby red carries that same luxurious, timeless quality found in fine jewelry. It suits almond nails particularly well, since the elongated shape allows the deep color to catch light evenly along its length, enhancing that glossy, gemstone like appearance.
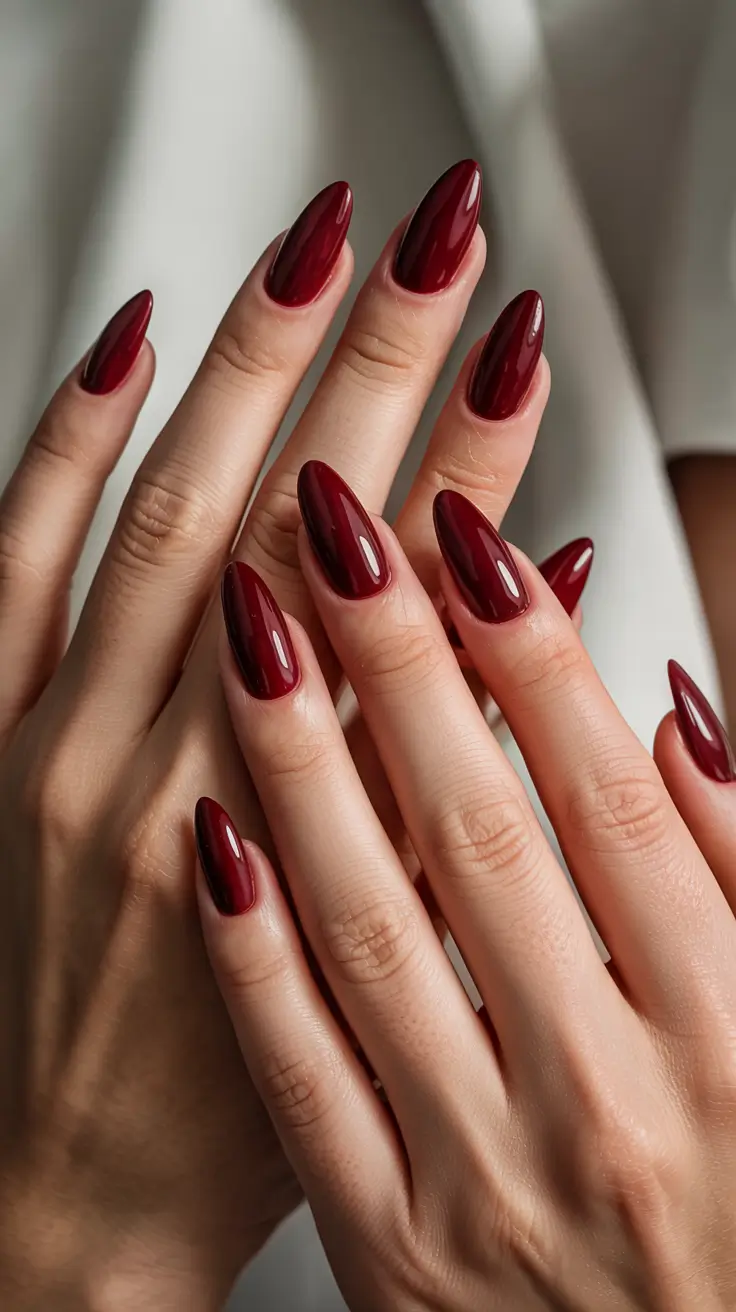
Achieving this look at home is fairly simple, since the focus lies entirely in the richness of the color and the quality of the shine rather than any additional technique. Start with a ridge filling base coat, then apply two to three thin coats of the deep ruby polish, allowing full drying time between each layer so the color builds to a rich, opaque finish without appearing streaky or patchy. Because this shade is so deeply pigmented, taking care with clean application along the cuticle line makes a real difference, since any stray polish tends to stand out more against such a bold, saturated color. Once your color is fully set, seal everything with a high quality, high shine topcoat, which is essential for achieving that glass like, gemstone quality that makes this look so elegant. The entire process takes about twenty five minutes and requires no special tools beyond your usual polish kit.
Deep Ruby Elegance stands out on this list because it offers timeless sophistication without requiring any nail art skill beyond careful, even application. It pairs beautifully with both gold and silver jewelry, working seamlessly with a wide range of winter outfits from casual sweaters to formal holiday attire. Because the color is so richly pigmented, it also tends to photograph exceptionally well, which explains why ruby red remains one of the most consistently saved winter nail colors on Pinterest year after year. This look appeals to people who want their nails to feel luxurious and polished without spending extra time on technique, offering maximum visual impact for minimal effort. For anyone seeking a red that feels a little more elevated than the usual classic shade, Deep Ruby Elegance remains a dependable, elegant choice this winter.
Muted Taupe Shine
Muted Taupe Shine offers a soft, sophisticated neutral that bridges the gap between traditional nude polish and something a little more interesting, using a warm gray brown shade with a subtle glossy finish that feels understated yet intentional. This color sits comfortably between beige and gray, never fully committing to either, which gives it a versatile quality that suits nearly any skin tone and outfit combination throughout the winter season. It has become a favorite among people who want their nails to feel polished and seasonal without straying into anything too bold or attention grabbing. On Pinterest, this look performs particularly well on boards dedicated to quiet luxury nails or minimalist winter beauty, since it fits seamlessly into the broader trend toward simpler, more intentional beauty choices. It suits almond nails especially well, since the soft, muted tone pairs naturally with the shape’s inherent elegance.
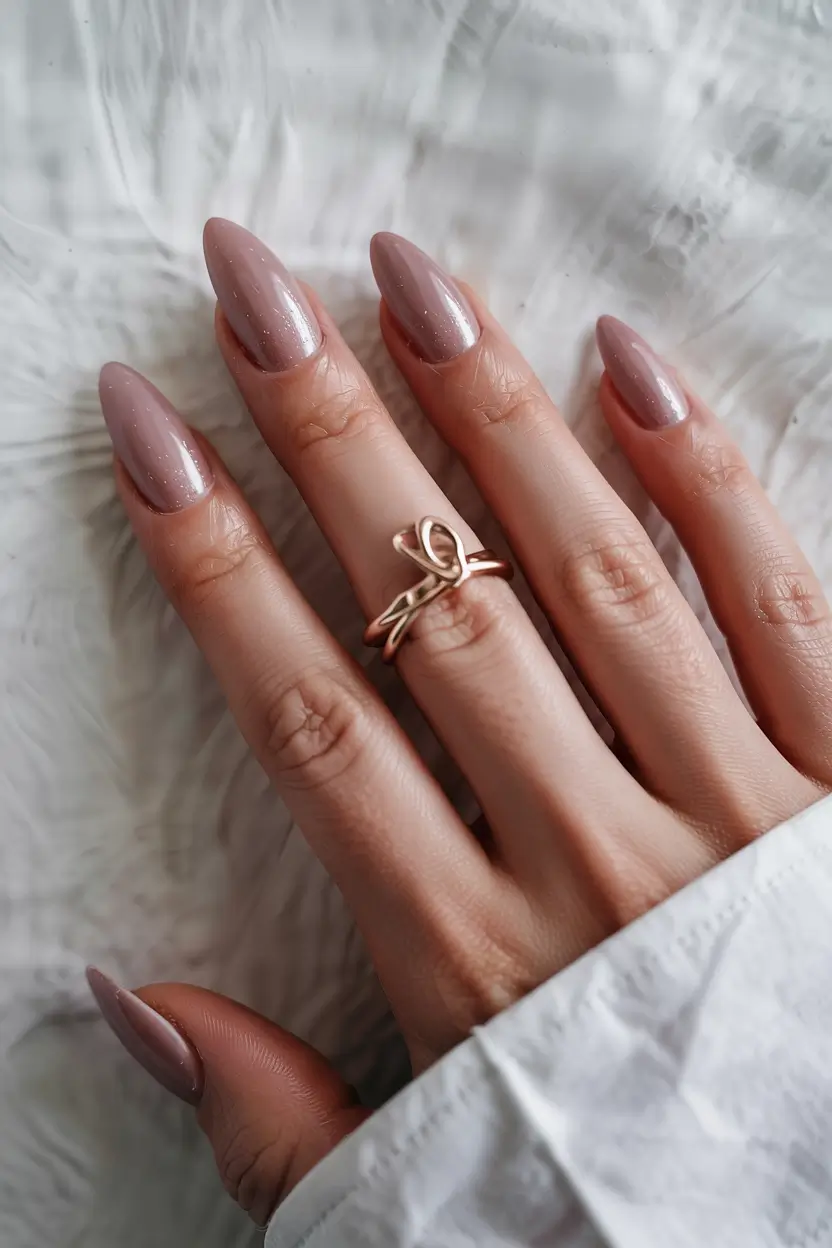
Recreating Muted Taupe Shine at home is straightforward, since the appeal lies almost entirely in the color itself rather than any additional technique or embellishment. Start with a smoothing base coat to ensure an even canvas, then apply two coats of the taupe polish, allowing each layer to dry completely so the color builds evenly without looking patchy or streaky. Because this shade sits in a more complex, muted color family, it can sometimes look slightly different depending on lighting, so checking the color under natural daylight helps ensure you’re getting the true shade rather than an unexpected variation. Finish with a glossy topcoat for a sleek, polished appearance, which enhances the warmth of the taupe without overpowering its understated nature. The entire process takes about twenty minutes, making it one of the more efficient looks on this list.
Muted Taupe Shine stands out because it offers a genuine alternative to both traditional nude and colder gray neutrals, giving people a wearable, everyday option that still feels current and stylish. It pairs effortlessly with nearly any outfit, making it a practical choice for anyone who prefers a more minimal approach to their overall beauty routine throughout the winter months. Because the color is muted rather than bold, it also tends to hide minor wear and tear better than brighter shades, keeping the manicure looking fresh for longer between appointments. This look resonates strongly with people drawn to quiet, understated elegance, a theme that continues to gain traction across Pinterest’s winter beauty content. For anyone wanting a fresh, sophisticated neutral this season, Muted Taupe Shine offers a subtle yet meaningful choice.
Rose Gold Geometry
Rose Gold Geometry brings clean, modern lines to winter nails by pairing a soft nude or blush base with thin, precise rose gold geometric shapes, such as triangles, angled lines, or simple grid patterns, placed strategically across one or two accent nails. This design offers a refreshing departure from softer, more organic winter looks, leaning instead into structure and symmetry for a style that feels contemporary and a little more editorial. The metallic rose gold detailing catches light beautifully against the soft, matte or satin base, creating just enough contrast to feel special without overwhelming the overall look. On Pinterest, this style performs particularly well on boards dedicated to modern minimalist nails or geometric beauty trends, since it offers something visually distinct from the more common glitter or floral designs typically associated with winter.
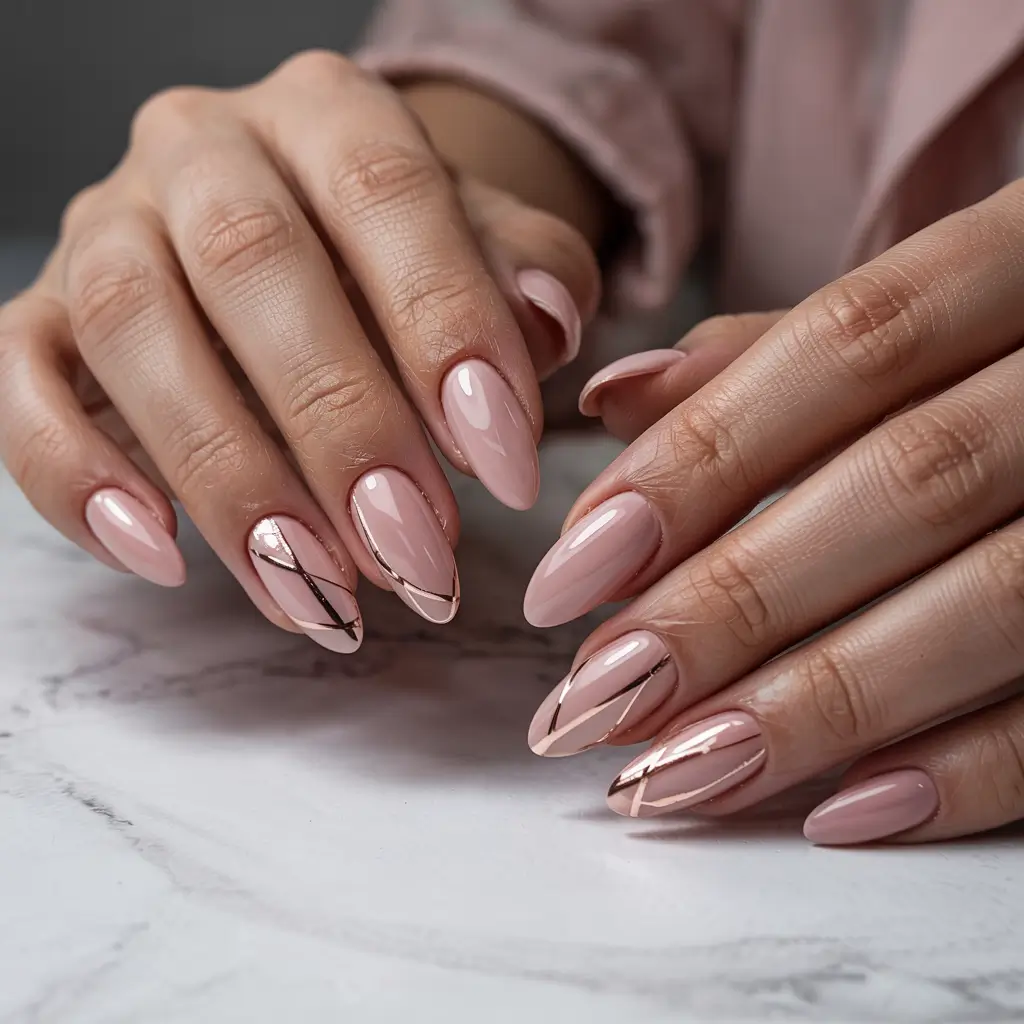
Recreating this look at home requires a bit of precision but relies on simple striping tools rather than freehand artistry. Begin with two coats of a soft nude or blush polish as your base, allowing full drying time so the surface is smooth and ready for detail work. Using a thin striping brush or fine tipped nail art pen dipped in rose gold polish, draw simple geometric lines across one or two accent nails, working slowly and wiping the brush clean between strokes to keep the lines crisp rather than smudged. Straight lines are easier to control than curves, so starting with simple angled or triangular shapes is a good approach for anyone newer to this technique. Once your design is complete and fully dry, seal everything with a glossy topcoat to protect the metallic detailing and give the whole set a cohesive, polished shine. The entire process takes about thirty minutes, with most of that time spent on the accent nail detailing.
Rose Gold Geometry earns its place on this list by proving that winter nail trends don’t always need to be soft or icy to feel seasonal and current. It pairs beautifully with structured, tailored winter outfits and delicate gold jewelry, appealing to people who lean toward a more modern, minimalist aesthetic in their overall style. Because the geometric detail is concentrated on just one or two nails, this design also tends to be more manageable to maintain compared to an all over pattern, making it practical for everyday wear. This look resonates with people who appreciate precision and clean design in their beauty routine, which continues to be a growing trend across Pinterest’s more contemporary winter nail boards. For anyone wanting a fresh, structured take on winter elegance, Rose Gold Geometry delivers a striking, modern result.
Snowflake Fantasy
Snowflake Fantasy brings a whimsical, storybook quality to winter nails, using a soft white or icy blue base as the canvas for delicate, hand painted snowflakes scattered across one or two accent nails in varying sizes and patterns. Unlike simpler dot based snowflake designs, this version leans into more detailed, intricate flake patterns, giving the nail a genuinely artistic quality that looks like it was lifted straight from a winter fairytale. Each snowflake is painted individually, which means no two nails ever look exactly alike, adding a handcrafted charm that mass produced press on designs simply can’t replicate. On Pinterest, this look performs especially well on boards dedicated to winter wonderland themes or detailed nail art inspiration, since the intricate detailing photographs beautifully in close up shots. It suits almond nails particularly well, giving the elongated shape a graceful canvas for the delicate snowflake patterns to unfold.
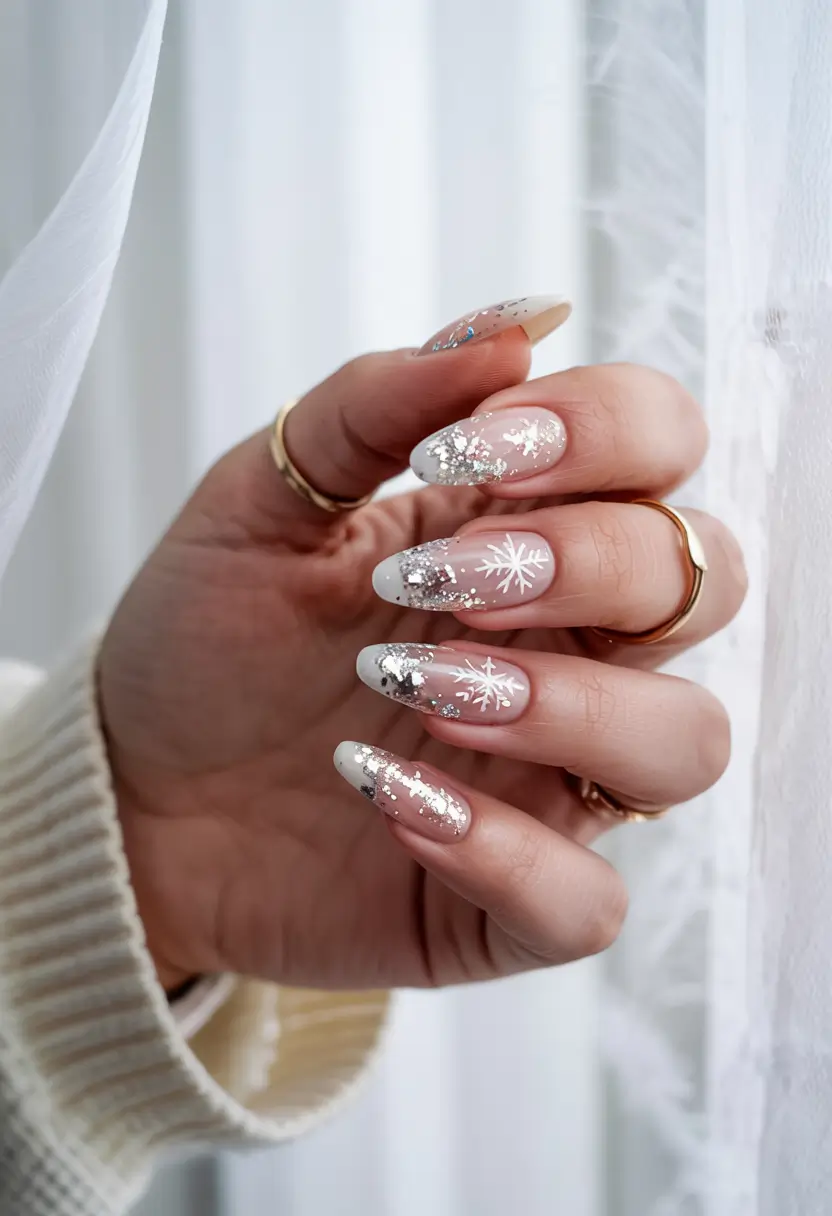
Creating Snowflake Fantasy at home takes patience but relies on a technique that’s more repetitive than difficult. Start with two coats of a soft white or pale icy blue base, allowing each layer to dry fully so the background stays clean and even. Using a fine detail brush dipped in white polish, begin each snowflake with a simple six pointed star shape, then add small branching lines off each point to build out the classic snowflake silhouette, varying the size and complexity slightly between each one for a more natural, scattered look. Working on a couple of accent nails rather than the entire set keeps the design feeling special rather than overwhelming, and it also makes the whole process considerably faster. Once your snowflakes are fully dry, seal the entire set with a glossy topcoat to protect the detailing and give the design a smooth, unified shine. The whole process takes about thirty five minutes, factoring in the careful detail work required for each flake.
Snowflake Fantasy stands out on this list because it delivers genuine artistry and charm without requiring professional level painting skills, since the repetitive, simple strokes become easier with each flake you paint. It works wonderfully for holiday parties, winter photoshoots, or any occasion where you want your nails to feel like a true focal point. Because the design is concentrated on select accent nails, it also remains fairly easy to maintain and touch up compared to a fully detailed set across all ten fingers. This look resonates strongly with people who enjoy the process of nail art as much as the finished result, and it continues to be one of the most saved and recreated winter designs on Pinterest. For anyone wanting a touch of magical, handcrafted charm this season, Snowflake Fantasy delivers a truly memorable result.
Midnight Galaxy
Midnight Galaxy takes deep space inspiration and brings it to almond nails, blending a rich black and navy base with swirls of purple, blue, and silver to create a design that mimics the swirling depth of a night sky filled with distant stars and nebulas. This look leans darker and more dramatic than some of the softer, pastel toned galaxy designs found elsewhere in winter nail trends, giving it a bold, statement making quality that stands out in any setting. The blended colors create genuine depth and movement across the nail, making each set feel like a unique, one of a kind piece of art rather than a repeatable pattern. On Pinterest, this design performs particularly well on boards dedicated to bold nail art or cosmic beauty inspiration, since it offers something visually striking and different from more common winter color palettes. It suits almond nails especially well, since the elongated shape gives the swirling galaxy pattern plenty of room to unfold dramatically.
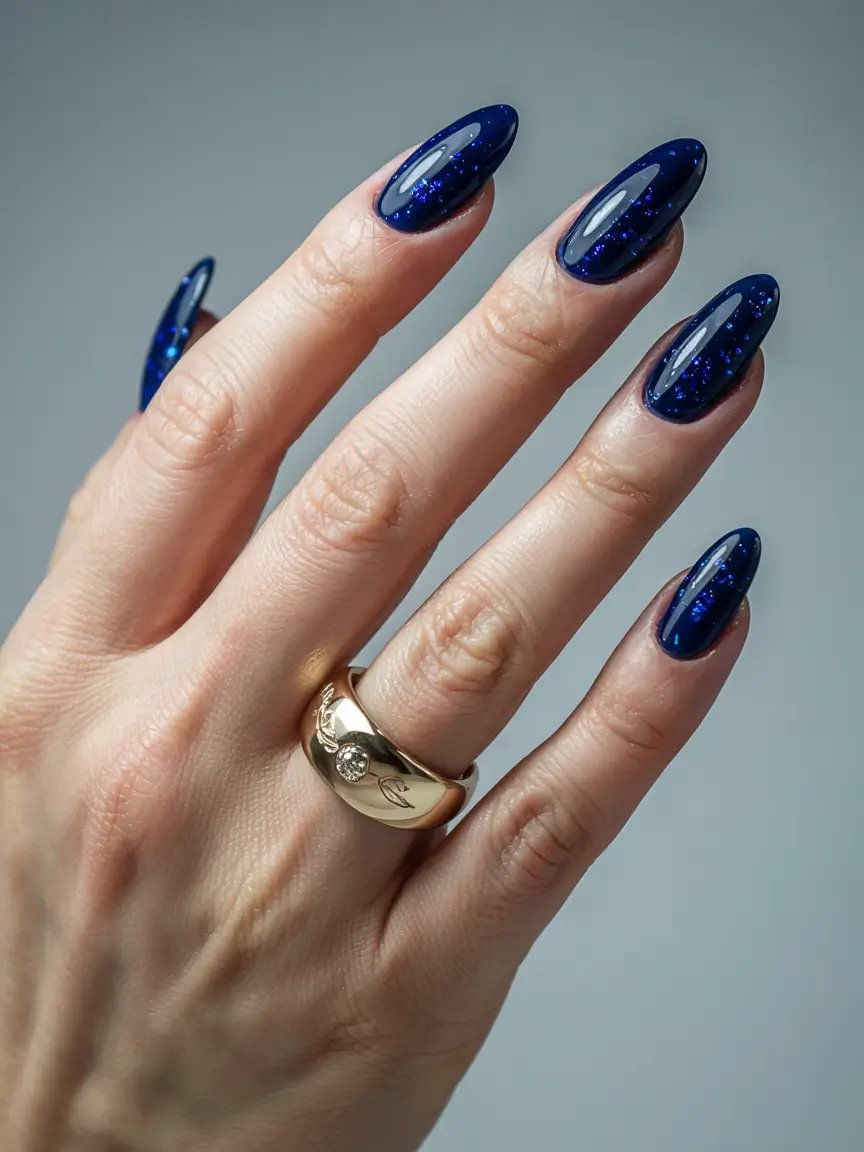
Recreating this look at home starts with two coats of a deep black or navy base, allowing full drying time so the dark backdrop stays rich and even. Once dry, use a small makeup sponge to gently dab streaks of purple, blue, and silver polish across the nail, overlapping the colors slightly so they blend into one another rather than sitting as separate, distinct blocks. Working while the polish is still slightly wet helps the colors merge naturally, creating that soft, swirling galaxy effect. For extra dimension, use a fine detail brush dipped in white polish to add small scattered dots mimicking distant stars, followed by a light dusting of fine silver glitter pressed into the still tacky polish for additional sparkle. Finish with a glossy topcoat to seal everything and enhance the overall depth and shine of the design. The whole process takes about thirty minutes, most of it spent on the sponging and blending technique.
Midnight Galaxy earns its place on this list by offering serious visual drama for anyone who wants their nails to feel like genuine artwork this winter. It pairs beautifully with simple, monochrome outfits that let the bold nail design take center stage as the primary visual interest. Because the pattern is abstract and blended, any natural nail growth tends to merge into the existing design rather than creating an obvious line, helping the look stay fresh for longer between touch ups. This look resonates strongly with people who see their nails as a creative outlet, which continues to drive strong engagement across Pinterest’s bolder, more artistic winter beauty boards. For anyone wanting a truly dramatic, one of a kind winter look, Midnight Galaxy delivers an unforgettable result.
Smoky Chrome Art
Smoky Chrome Art combines a soft gray chrome finish with subtle smoky shading near the cuticle, creating a nail that looks metallic and dimensional at the same time, almost like polished pewter catching the light. This design moves away from the bright, mirror like chrome finishes that have been popular in previous seasons, opting instead for a softer, more muted metallic that feels sophisticated rather than flashy. The gradual shading near the base adds real depth to the design, giving it a smoky, almost mysterious quality that photographs beautifully under different lighting conditions. On Pinterest, this look performs particularly well on boards dedicated to modern metallic nails or edgy winter beauty, since it offers a fresh take on chrome that feels more wearable for everyday settings. It suits almond nails especially well, since the elongated shape gives the chrome finish a smooth, continuous surface to reflect light evenly.
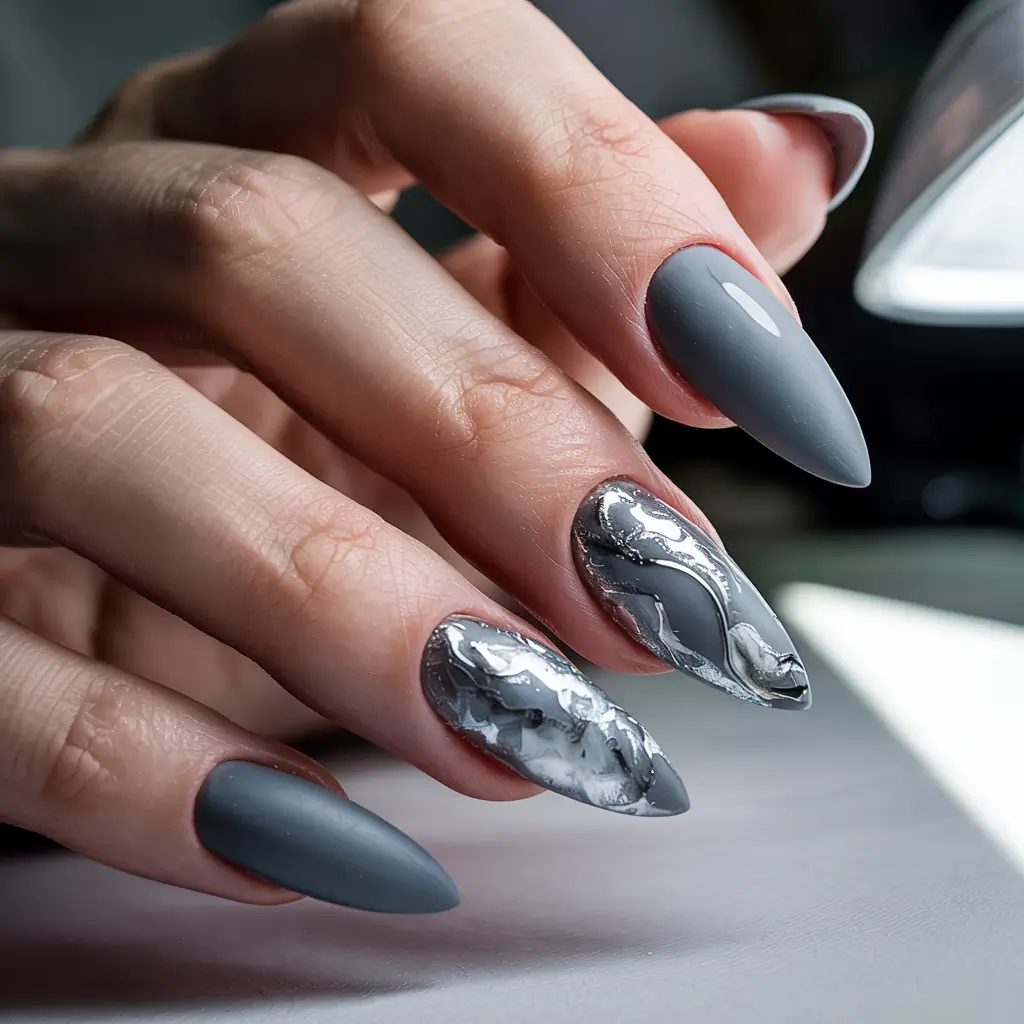
Recreating this look at home starts with a smooth, well prepped nail bed, since chrome powders and pigments tend to highlight any texture or unevenness beneath them significantly. Apply a black or dark gray gel polish base and cure it fully, since chrome finishes typically require a tacky, cured surface to adhere to properly. Using a soft applicator or sponge tip tool, gently rub a silver chrome powder across the nail in circular motions, building up the metallic shine gradually and concentrating slightly less product near the cuticle area to create that smoky, gradient effect. This shading technique takes a little practice to master, but working in thin, gradual layers rather than one heavy application gives the most natural looking result. Once you’re happy with the shine and gradient, seal everything with a glossy gel topcoat to lock in the chrome finish and protect it from scratching. The whole process takes about thirty minutes and typically requires gel products for the best, longest lasting result.
Smoky Chrome Art stands out on this list because it offers a modern, technically interesting alternative to more traditional painted designs, appealing to people who enjoy experimenting with newer nail finishes and techniques. It pairs beautifully with sleek, structured winter outfits and minimalist silver jewelry, letting the metallic nails serve as a quiet but noticeable style statement. Because chrome finishes are naturally eye catching, this design tends to perform particularly well in photos and videos, both of which are increasingly important formats across Pinterest’s beauty content. This look resonates strongly with people who follow nail trends closely and enjoy trying techniques that feel a bit more advanced, which continues to fuel engagement across boards dedicated to innovative winter beauty. For anyone wanting a metallic look that feels fresh rather than familiar, Smoky Chrome Art offers a striking, contemporary option.
Crimson Glow & Crystals
Crimson Glow & Crystals pairs a rich, glossy red base with a scattering of clear and red toned crystals placed near the cuticle, creating a design that feels warm, festive, and just glamorous enough for the holiday season without going overboard. The crystals catch and reflect light beautifully against the deep red backdrop, adding dimension and sparkle without covering the entire nail in embellishment. This balance between bold color and restrained sparkle gives the look a polished, intentional quality that feels appropriate for both daytime festivities and evening celebrations. On Pinterest, this design performs especially well on boards dedicated to holiday glam or festive red nails, since it captures that celebratory warmth people search for throughout December and into the new year. It suits almond nails particularly well, since the tapered shape gives the crystal placement a naturally flattering line to follow near the base.
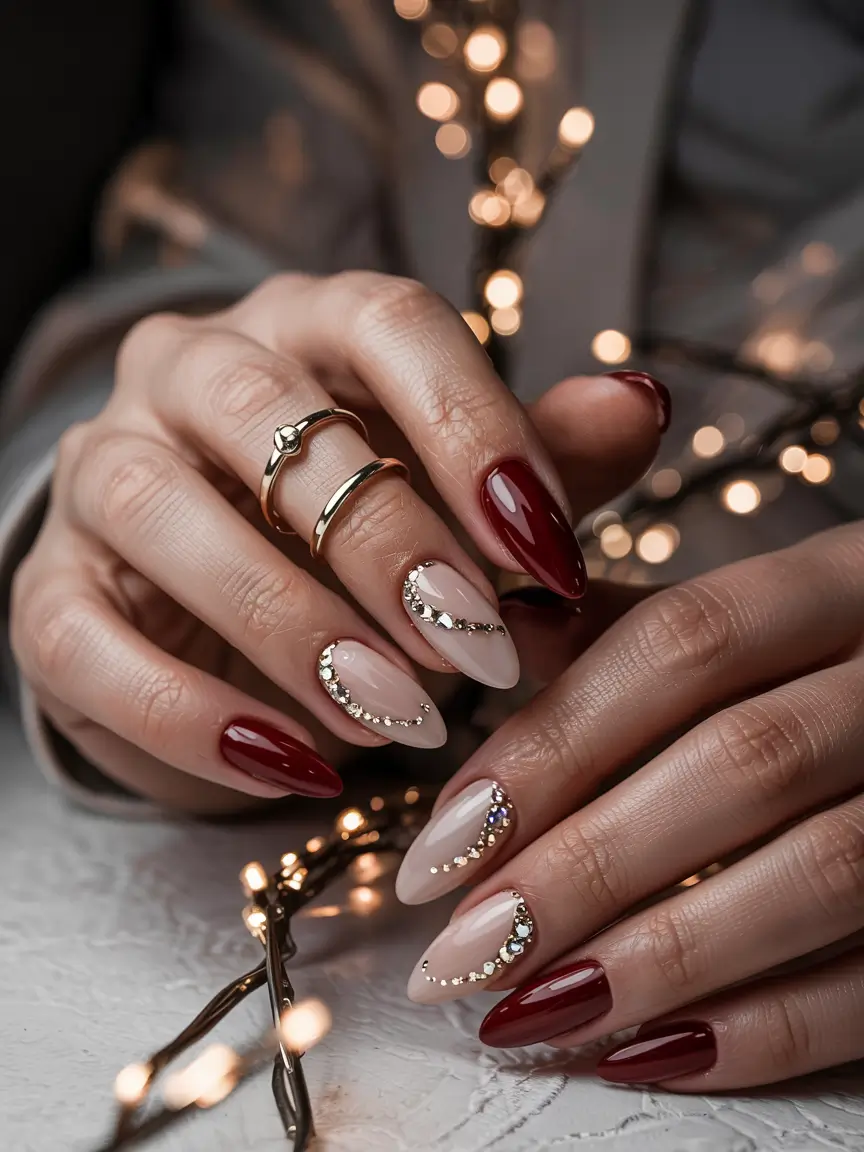
Creating this look at home starts with two to three coats of a rich, glossy red polish, allowing full drying time between each layer so the color builds to a deep, opaque finish without appearing streaky. Once your red base is completely dry, use a small dotting tool or the tip of an orange wood stick dipped in clear nail glue to place your chosen crystals near the cuticle area, working with tweezers for more precise control over placement and spacing. Concentrating crystals slightly more toward the center of the cuticle line and tapering off toward the sides creates a balanced, intentional look rather than a scattered, random one. Let the glue set fully before applying a thin layer of topcoat carefully around the edges of each crystal, avoiding the stones themselves so they retain their full sparkle and dimension. The entire process takes about thirty minutes, most of it spent on careful crystal placement.
Crimson Glow & Crystals earns its spot on this list by delivering real festive glamour without requiring elaborate nail art skills beyond patient, careful placement. It pairs beautifully with gold jewelry and richly textured winter fabrics like velvet or wool, making it a strong choice for holiday parties and family gatherings alike. Because the crystals are concentrated near the base rather than scattered across the whole nail, this design also tends to grow out more gracefully, since new growth simply shifts the crystal line slightly rather than disrupting the overall look. This look resonates strongly with people wanting their nails to feel special during the holiday season without excessive upkeep, which continues to make it a consistently popular choice across Pinterest’s festive beauty boards. For anyone wanting warmth and sparkle in equal measure, Crimson Glow & Crystals delivers exactly that combination.
Frosted Tips
Frosted Tips takes a minimalist approach to winter nail art, applying a soft, shimmery white or icy polish just to the very tips of otherwise bare or lightly buffed natural nails, creating a subtle, frost kissed effect that feels clean and effortless. This look strips things back to the essentials, relying on the contrast between the natural nail and the frosted tip to create visual interest rather than any elaborate color or technique. It has a quiet, understated charm that feels distinctly wintery without being heavy handed, making it a popular choice for people who want a seasonal touch without committing to a full color change. On Pinterest, this design performs particularly well on boards dedicated to minimalist nail trends or natural winter beauty, since it captures that same less is more philosophy that continues to resonate across the broader beauty space.
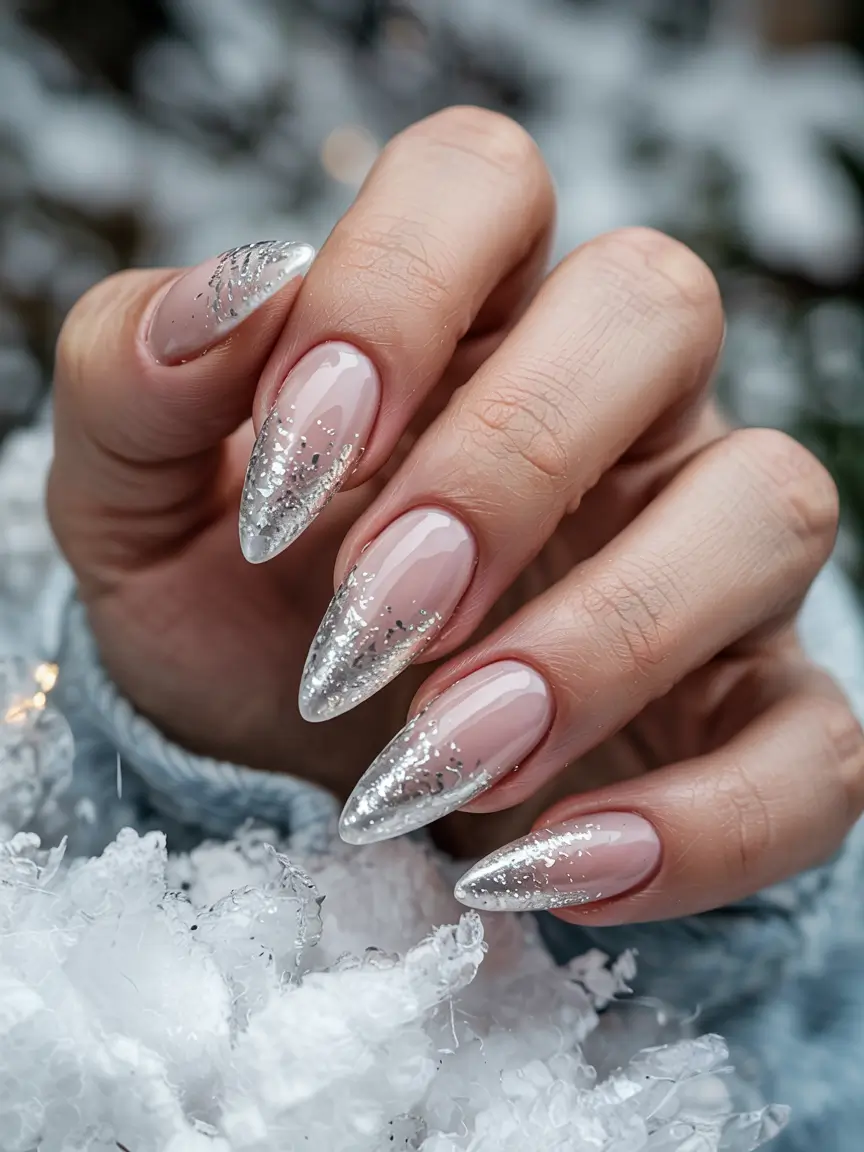
Recreating this look at home is one of the simplest techniques on this entire list, making it a great option for beginners or anyone short on time. Start by lightly buffing the natural nail to create a smooth, even surface, then apply a thin coat of clear or sheer pink base polish across the whole nail to add a subtle, healthy sheen. Using a thin nail art brush or a French tip guide sticker, apply a shimmery white or icy polish just to the very tip of the nail, keeping the line thin and soft rather than thick or overly defined. One coat is often enough for this style, since the goal is a light, frosted look rather than full opacity. Finish with a glossy topcoat to seal the design and enhance the natural, healthy shine of the overall nail. The whole process takes about fifteen minutes, making it one of the quickest looks in this entire collection.
Frosted Tips stands out because it offers a low maintenance way to feel seasonal without sacrificing the natural, clean look that many people prefer for their nails. It works beautifully for everyday wear, professional settings, and casual winter outings alike, since the subtle detail never feels out of place in any environment. Because so little of the nail is actually covered in color, this design also tends to grow out incredibly gracefully, requiring far less frequent touch ups than a full color manicure. This look resonates with people who want their nails to feel put together without spending much time or money achieving that result, which is exactly the kind of practical, realistic content that continues to perform well on Pinterest throughout the season. For anyone wanting subtle winter charm with minimal effort, Frosted Tips delivers a clean, polished result.
Teal & Ice
Teal & Ice pairs a rich, jewel toned teal base with soft icy white accents near the tips, creating a striking contrast between deep color and cool, frosty detailing that feels both bold and seasonally appropriate. Teal sits in an interesting space between blue and green, offering something a little different from the more common navy or icy blue shades found throughout winter nail trends, while still carrying that same cool, wintery energy. The icy white detailing softens the boldness of the teal, keeping the overall look balanced rather than overwhelming, and adding a touch of that classic frosted winter charm. On Pinterest, this design performs well on boards dedicated to jewel toned winter nails or unique color combinations, since teal offers a refreshing alternative for people who want something outside the typical blue or red color families this season.
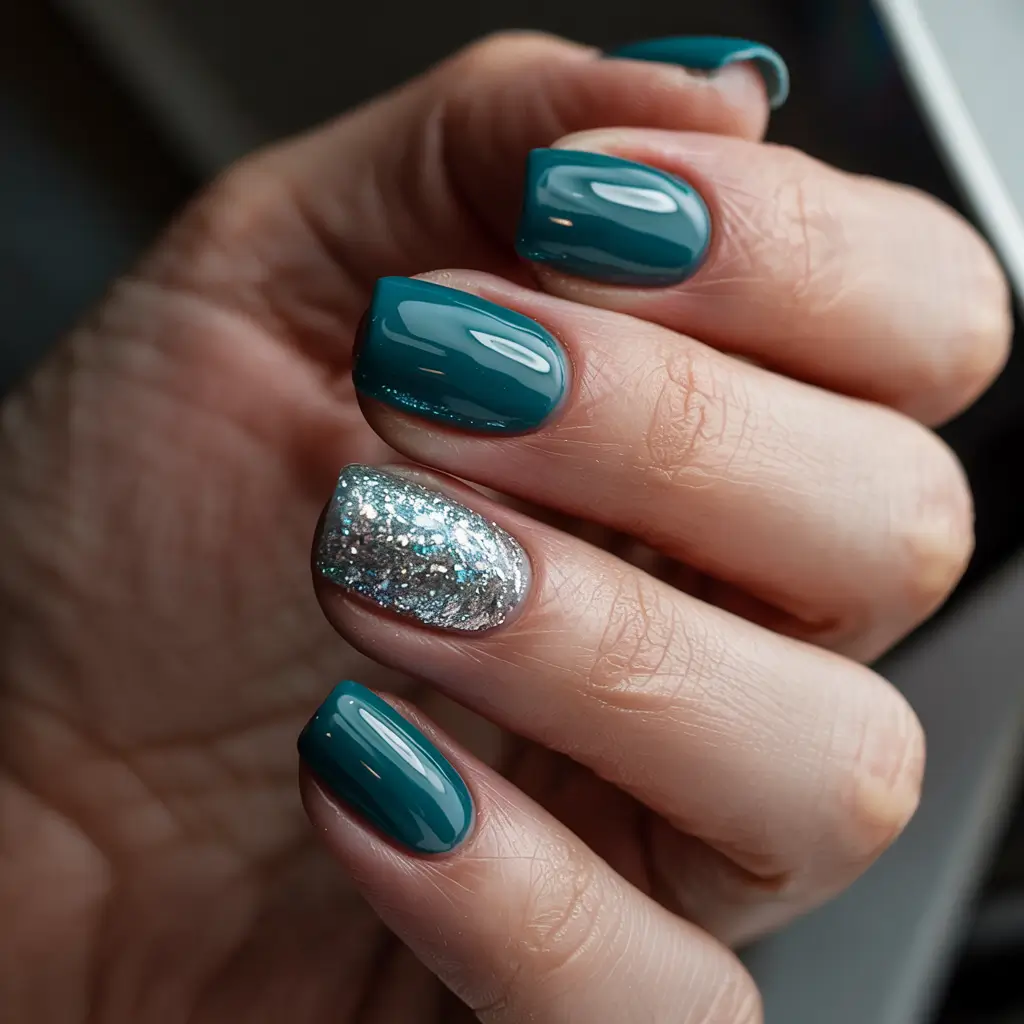
Recreating this look at home starts with two to three coats of a rich, glossy teal polish, allowing full drying time between each layer so the color builds to a deep, saturated finish without looking streaky. Once your teal base is completely dry, use a thin nail art brush dipped in a soft icy white polish to add a small accent near the tip or along one side of the nail, whether that’s a simple line, a small triangle, or a soft, blended patch. Keeping the white detailing minimal and intentional is key here, since the goal is to complement the teal rather than compete with it for attention. Once your design is complete and fully dry, seal everything with a glossy topcoat to unify the two colors and give the whole look a cohesive, polished shine. The entire process takes about twenty five minutes, making it accessible for most skill levels.
Teal & Ice earns its place on this list by offering a genuinely different color option for people who love the cool, wintery mood of blue and navy shades but want something with a bit more personality. It pairs beautifully with both gold and silver jewelry, working well across a range of outfit colors thanks to teal’s naturally versatile undertones. Because the design relies on a bold solid base with only minimal detailing, it also remains fairly easy to maintain, requiring less frequent touch ups than more intricate patterns. This look resonates with people who want their winter nails to stand out a little from the usual color choices, which continues to earn it steady engagement across Pinterest’s more adventurous winter beauty boards. For anyone wanting a fresh, jewel toned take on icy winter nails, Teal & Ice delivers a bold yet balanced result.
Red Velvet & Silver Fire
Red Velvet & Silver Fire takes a deep, matte red base and pairs it with dynamic streaks of silver glitter fanning out from the cuticle, creating a design that mimics the flicker and movement of firelight against a rich velvet backdrop. The matte finish gives the red a soft, fabric like texture reminiscent of actual velvet, while the silver glitter adds movement and sparkle that keeps the design feeling alive rather than static. This combination of deep color and dynamic sparkle creates a look that feels both cozy and celebratory, perfectly suited to the warmth associated with fireside winter evenings. On Pinterest, this design performs especially well on boards dedicated to festive winter glam or velvet nail inspiration, since it captures that rich, warm energy people search for throughout the holiday season.
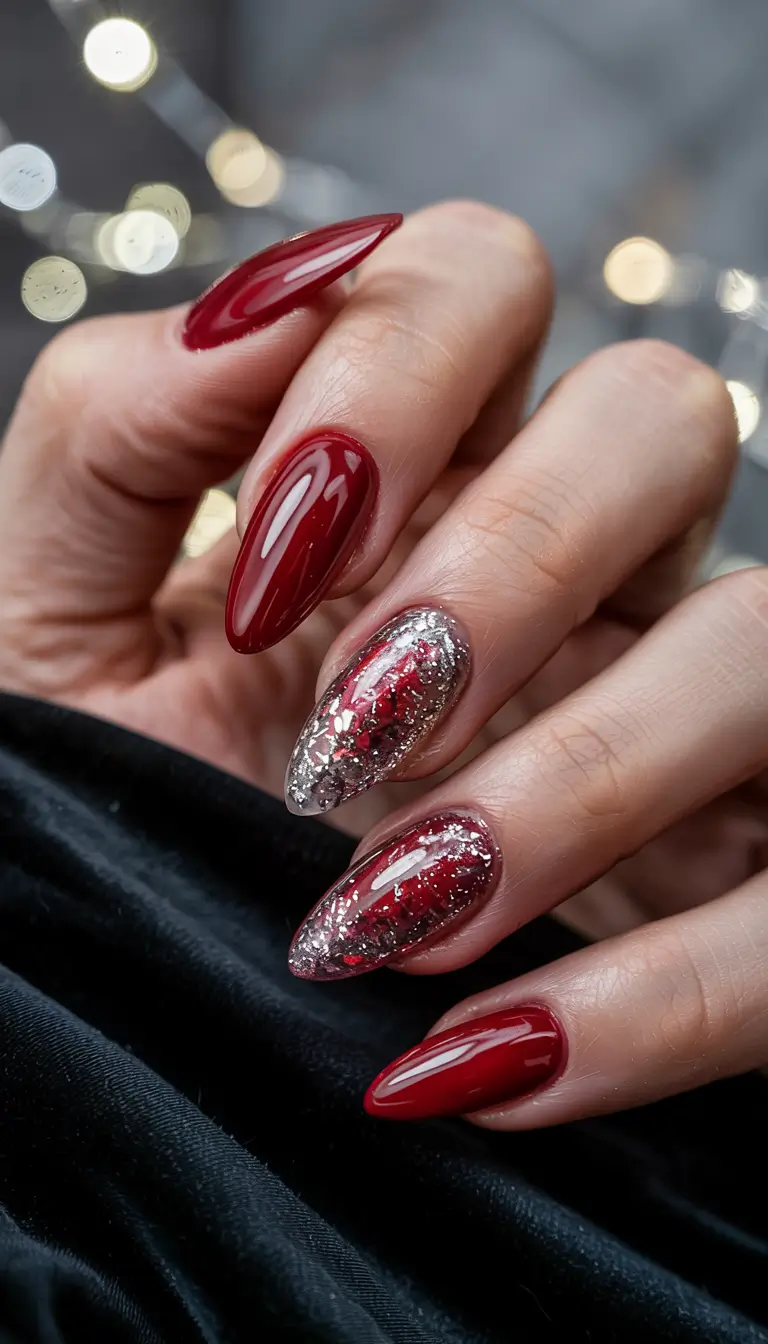
Creating this look at home starts with two coats of a deep, matte red polish, allowing each layer to dry fully so the base color stays rich and even. Once your red base is set, apply a thin layer of clear topcoat near the cuticle area and, while it’s still slightly tacky, use a fine brush to sweep silver glitter polish outward from the base in loose, flame like streaks, varying the direction slightly to mimic natural movement. This technique takes a bit of practice to get the flowing, dynamic quality just right, but working with a light hand and building up gradually gives the best results. Once you’re happy with the glitter placement, seal it with a clear topcoat first to lock the sparkle in place, then apply a matte topcoat over the rest of the nail, carefully avoiding the glitter area so it keeps its natural shine. The entire process takes about thirty minutes, most of it spent perfecting the glitter streaks.
Red Velvet & Silver Fire stands out on this list because it successfully captures a sense of movement and energy that many static winter designs don’t quite achieve. It pairs beautifully with velvet clothing, warm metallic jewelry, and the kind of cozy, festive styling that defines the heart of the holiday season. Because the glitter is concentrated near the base and fans outward, this design also tends to age fairly gracefully, since new growth simply shifts the starting point of the glitter pattern rather than disrupting the overall look. This look resonates strongly with people who want their nails to feel warm, dynamic, and full of holiday spirit, which continues to make it a popular choice across Pinterest’s festive winter beauty boards. For anyone wanting a design that feels alive with warmth and sparkle, Red Velvet & Silver Fire delivers a truly captivating result.
Lavender Dream Glow
Lavender Dream Glow brings a soft, dreamy purple tone to winter nails, using a pale lavender base with a gentle pearl shimmer that gives the color a soft, glowing quality reminiscent of early morning light on freshly fallen snow. This shade offers a lovely alternative to the more common blue and white color palettes typically associated with winter, giving people who love softer, more romantic tones a seasonally appropriate option. The pearl shimmer adds just enough dimension to keep the color from feeling flat, catching light gently rather than in obvious, sharp flashes. On Pinterest, this look performs particularly well on boards dedicated to soft, dreamy winter beauty or romantic nail inspiration, since it captures a quieter, more whimsical mood than some of the bolder designs found elsewhere in winter trends.
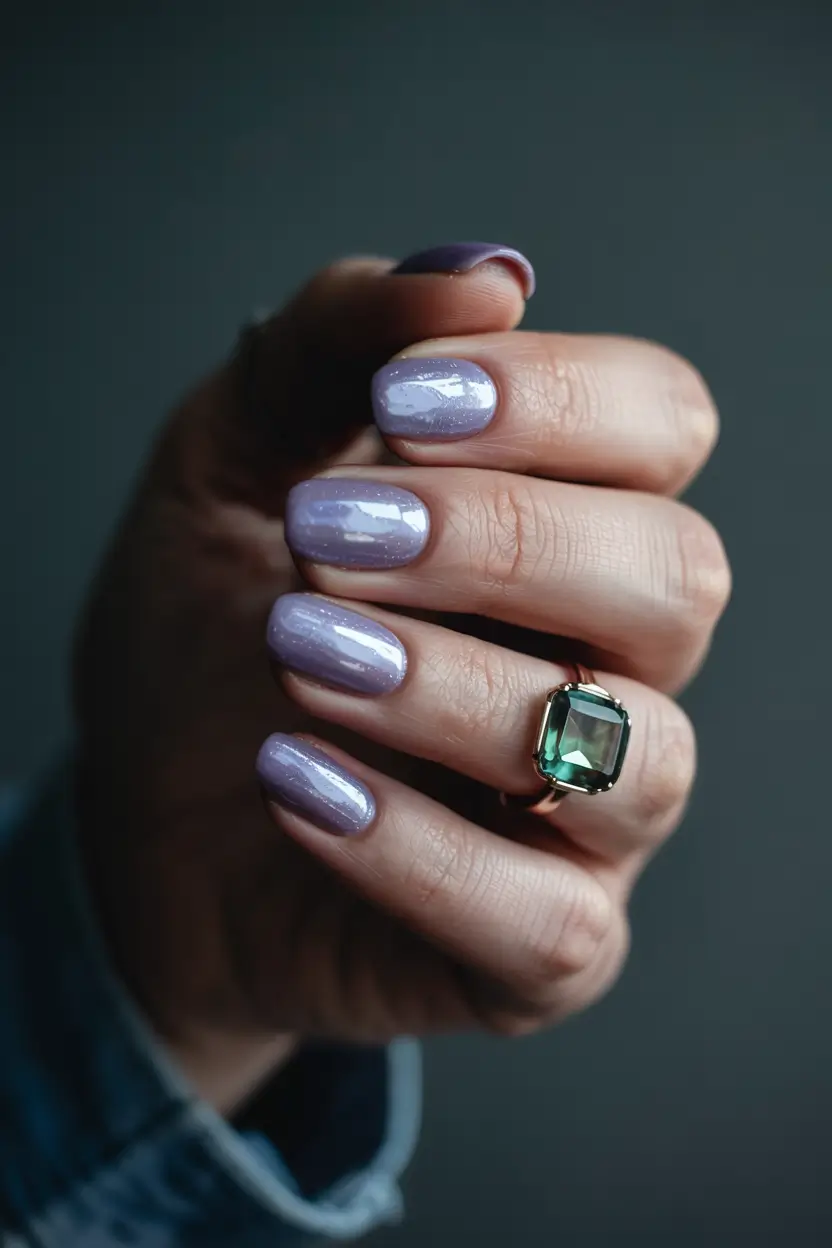
Recreating this look at home starts with a smooth, well prepped nail bed, since pearl finishes tend to highlight any texture underneath rather than hide it. Apply a thin ridge filling base coat first, then two coats of the pale lavender pearl polish, letting each layer dry fully so the shimmer builds evenly without looking streaky or patchy. Because pearl finishes can sometimes appear uneven if applied too thickly, keeping your coats thin and your strokes long and smooth really does make a noticeable difference in the final, glowing result. Once your color is fully dry, seal everything with a high shine topcoat to enhance that soft, luminous glow, since a matte finish would dull the delicate pearl quality that makes this shade so special. The whole process takes about twenty five minutes, making it approachable even for a relaxed evening at home.
Lavender Dream Glow earns its place on this list by offering a gentle, romantic alternative to the icier or bolder shades that dominate much of winter nail trends. It works beautifully for everyday wear while still feeling special enough for winter gatherings or holiday photos, pairing effortlessly with soft pastel makeup and delicate jewelry. Because the color shifts subtly depending on lighting, it also tends to photograph differently in every image, giving it a fresh, ever changing quality that keeps people returning to save new versions of the look. This look resonates strongly with people drawn to softer, more whimsical aesthetics, which continues to be a popular and enduring theme across Pinterest’s winter beauty boards. For anyone seeking a dreamy, gentle take on winter color, Lavender Dream Glow delivers a soft, glowing result.
Frosted Blue Harmony
Frosted Blue Harmony blends two complementary shades of blue, a soft icy pastel and a slightly deeper dusty blue, in a soft gradient that flows smoothly from the cuticle to the tip of the nail, creating a harmonious, balanced look that feels calm and cohesive. This ombre style technique gives the nail a sense of movement and depth that a single solid color simply couldn’t achieve, while still keeping the overall palette soft and wintery. The gradual transition between the two blue tones mimics the way sky and frost seem to blend together on a cold winter morning, giving the design a naturally peaceful, harmonious quality. On Pinterest, this look performs particularly well on boards dedicated to ombre nail art or soft winter gradients, since the blended color technique photographs beautifully and offers something a little more visually interesting than a flat, single shade.
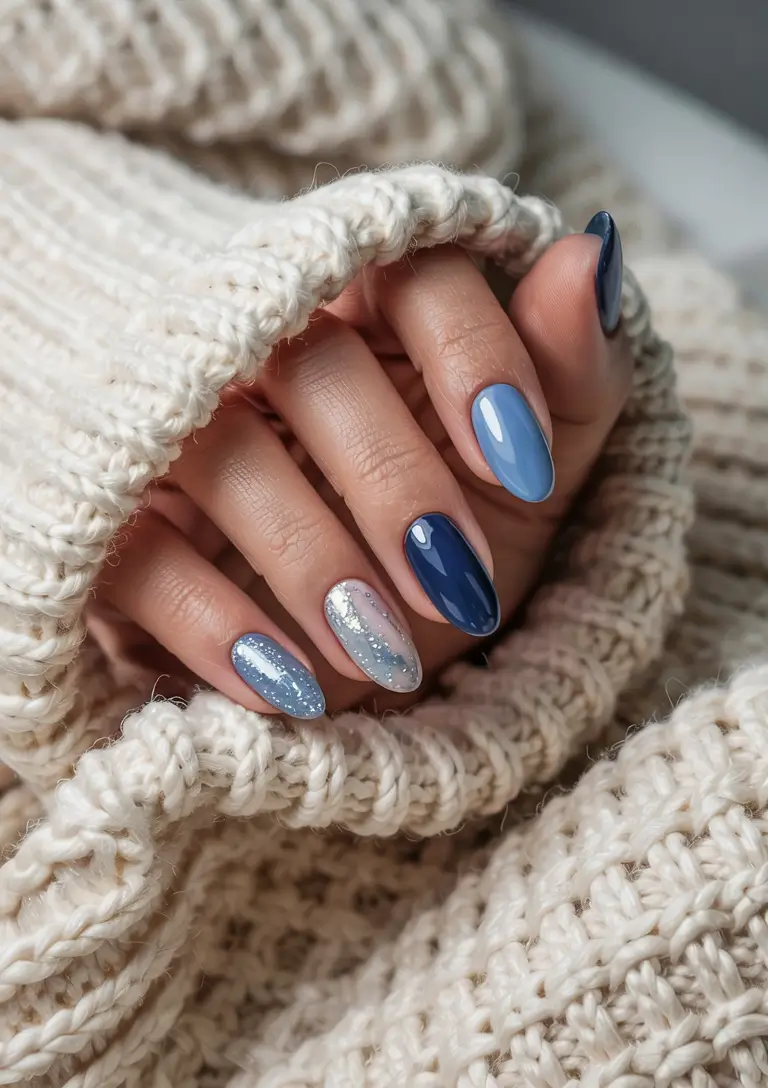
Recreating this look at home takes a bit of practice with blending technique but doesn’t require any specialized tools beyond a makeup sponge. Begin with a coat of the lighter icy blue shade covering the entire nail as your base, allowing it to dry fully before moving to the next step. Using a makeup sponge, dab a small amount of the deeper dusty blue near the cuticle area, then gently blend upward and outward in light, repeated dabbing motions, allowing the color to gradually fade and lighten as it moves toward the middle of the nail. Cleaning the sponge slightly between dabs and working in thin layers helps create a smoother, more gradual transition rather than a harsh, obvious line between the two shades. Once you’re happy with the gradient, seal everything with a glossy topcoat to unify the blend and give the whole design a cohesive, polished shine. The entire process takes about thirty minutes, most of it spent perfecting the gradient blend.
Frosted Blue Harmony stands out on this list because it offers a softer, more subtle way to enjoy multiple shades of blue without the sharp contrast of stripes or distinct color blocking. It pairs beautifully with soft knit textures and simple silver jewelry, fitting naturally into a calm, cozy winter aesthetic. Because the color transition is gradual rather than sharp, this design also tends to grow out more gracefully than a solid color or hard edged pattern, since new growth blends into the existing gradient rather than creating an obvious line. This look resonates with people who appreciate soft, artistic technique without wanting anything too bold or attention grabbing, which continues to perform consistently well across Pinterest’s calmer, more soothing winter beauty boards. For anyone wanting a peaceful, blended take on winter blue, Frosted Blue Harmony delivers a beautifully balanced result.
Emerald Luxe
Emerald Luxe brings the deep, saturated richness of a fine emerald gemstone to winter nails, using a glossy, jewel toned green that carries real depth and luxury without needing any additional embellishment to make its impact. This shade stands apart from the softer, more muted greens sometimes seen in other seasons, leaning instead into a bold, confident saturation that feels distinctly luxurious and sophisticated. The high shine finish enhances this jewel toned quality, giving the nail a glassy, almost gemstone like appearance that catches light beautifully from every angle. On Pinterest, this look consistently appears on boards dedicated to jewel toned winter beauty or luxurious holiday nails, since emerald carries that same rich, opulent quality found in fine jewelry and designer fashion. It suits almond nails particularly well, since the elongated shape allows the deep green color to catch light evenly along its length, enhancing that polished, gemstone like finish.
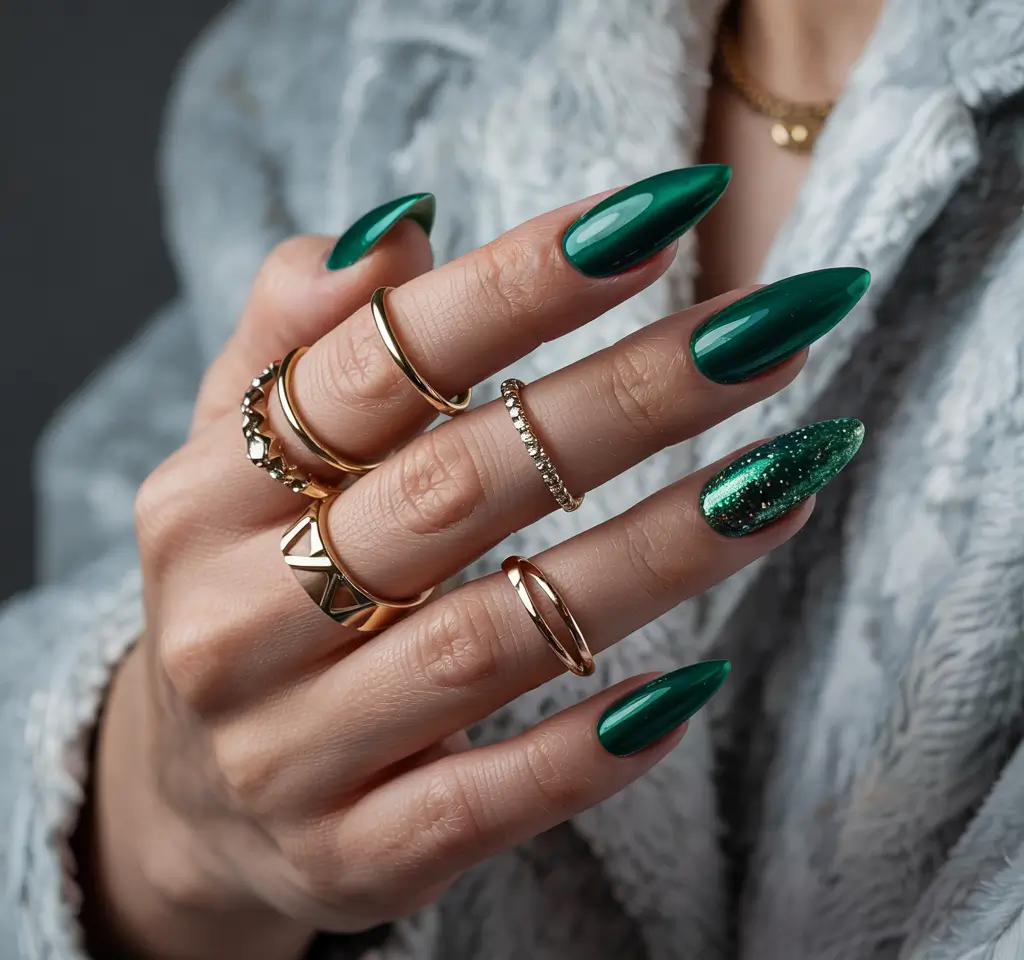
Achieving Emerald Luxe at home is refreshingly simple, since the true impact comes from the richness of the color and the quality of the shine rather than any additional technique. Start with a ridge filling base coat, then apply two to three thin coats of the emerald polish, allowing full drying time between each layer so the color builds to a deep, opaque finish without appearing streaky or uneven. Because this shade is so richly pigmented, taking care with clean, precise application along the cuticle line makes a genuine difference, since any unevenness tends to stand out more clearly against such a bold, saturated color. Once your color is fully set, seal everything with a high quality, high shine topcoat, which is essential for achieving that glass like, luxurious finish that makes this look so striking. The entire process takes about twenty five minutes and requires no special tools beyond your usual polish kit.
Emerald Luxe stands out on this list because it offers a bold, confident color choice that still feels timeless and elegant rather than trend driven or fleeting. It pairs beautifully with gold jewelry and rich, textured fabrics like velvet or silk, making it a natural fit for formal holiday gatherings and New Year celebrations. Because the color is so deeply pigmented, it also tends to resist visible chipping better than lighter shades, helping the manicure stay looking fresh and vibrant for longer stretches between touch ups. This look appeals strongly to people who want their nails to feel genuinely luxurious without spending extra time on intricate technique, which explains why emerald continues to hold its place among Pinterest’s most saved winter jewel tones. For anyone wanting a rich, opulent green this season, Emerald Luxe remains one of the most elegant choices available.
Chrome Midnight
Chrome Midnight combines a deep navy base with a full mirror chrome finish, creating a nail that reflects light like polished metal while still carrying the rich, moody depth of midnight blue underneath. This design takes the chrome trend, which has remained popular across several seasons, and adapts it specifically for winter by choosing a base color that feels appropriately dark and dramatic rather than bright or playful. The mirror like shine this technique produces is genuinely eye catching, reflecting the surrounding environment in a way that makes the nails feel almost liquid or metallic rather than simply painted. On Pinterest, this look performs particularly well on boards dedicated to chrome nail trends or edgy winter beauty, since the reflective quality photographs and films exceptionally well under a variety of lighting conditions.
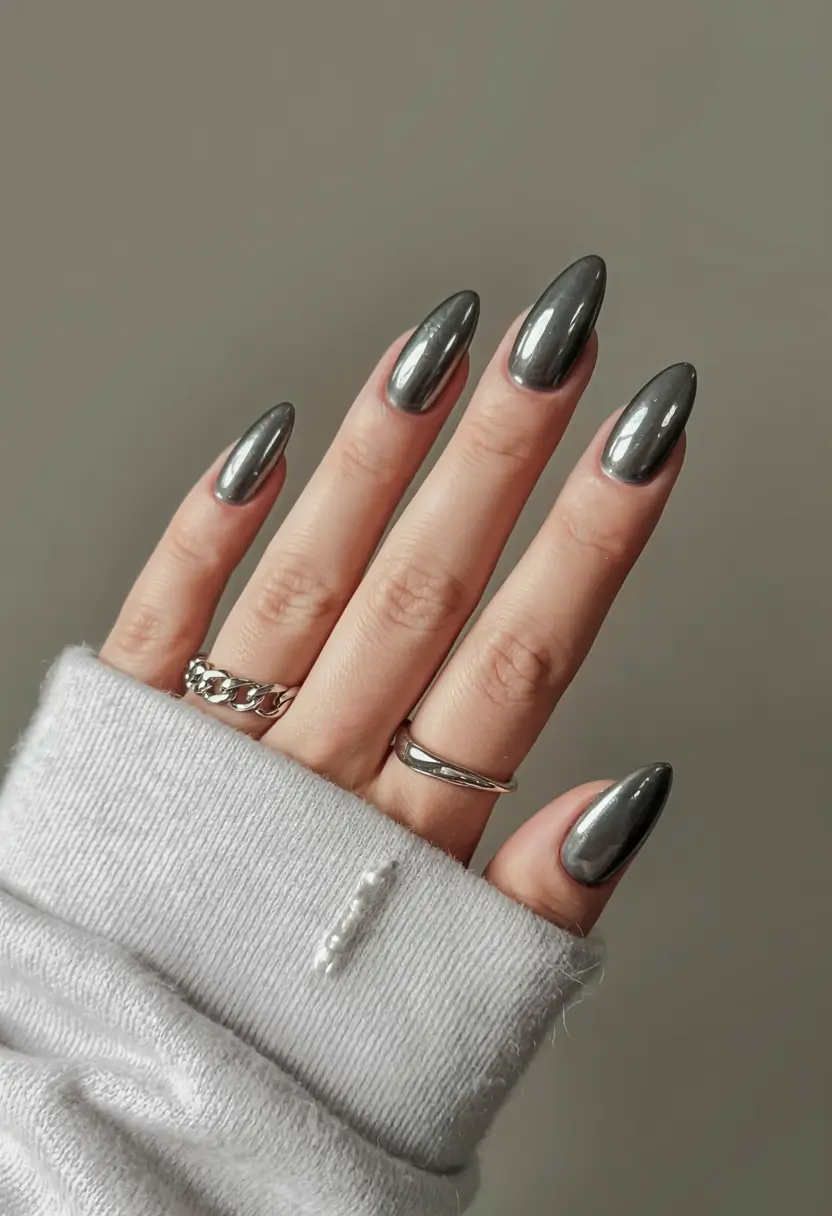
Recreating this look at home requires gel polish and a chrome powder, along with careful attention to surface preparation, since chrome finishes are notoriously sensitive to any texture or imperfection beneath them. Apply a deep navy gel polish base and cure it fully according to your product’s instructions, ensuring the surface is completely smooth and free of any brush strokes or ridges. Using a soft applicator or sponge tip tool, gently rub a silver or blue toned chrome powder across the cured gel surface in circular motions, building up the mirror like shine gradually until the entire nail reflects light evenly. This step requires a bit of practice to master, since uneven pressure or insufficient buffing can leave patchy, dull spots rather than a consistent, full mirror shine. Once you’ve achieved the desired reflective finish, seal everything with a glossy gel topcoat to protect the chrome from scratching and help it last as long as possible. The whole process takes about thirty five minutes, most of it spent achieving that flawless base and precise chrome application.
Chrome Midnight earns its place on this list by delivering maximum visual drama through a technique that, once mastered, produces remarkably professional looking results. It pairs beautifully with sleek, structured winter outfits and bold statement jewelry, letting the reflective nails serve as a genuine style focal point. Because chrome finishes are so visually striking, this design tends to perform exceptionally well in photo and video content, both of which continue to dominate engagement across Pinterest’s beauty boards. This look resonates strongly with people who follow nail trends closely and enjoy experimenting with more advanced techniques, which keeps it consistently popular throughout the winter season. For anyone wanting a bold, reflective statement this year, Chrome Midnight offers one of the most dramatic and memorable options on this entire list.
Mocha Elegance
Mocha Elegance brings a warm, rich brown tone to winter nails, using a glossy, coffee inspired shade that feels cozy and sophisticated at the same time, much like the color of a perfectly brewed cup of coffee on a cold morning. This shade has grown increasingly popular over recent seasons as a warmer alternative to the cooler grays and taupes often associated with neutral nail trends, offering the same understated elegance with a bit more depth and warmth. The glossy finish gives the color a rich, almost syrupy quality, making it look indulgent without requiring any additional embellishment or technique. On Pinterest, this look consistently appears on boards dedicated to warm neutral nails or cozy winter beauty, since mocha tones continue to trend alongside similar warm, earthy shades across fashion and home decor.
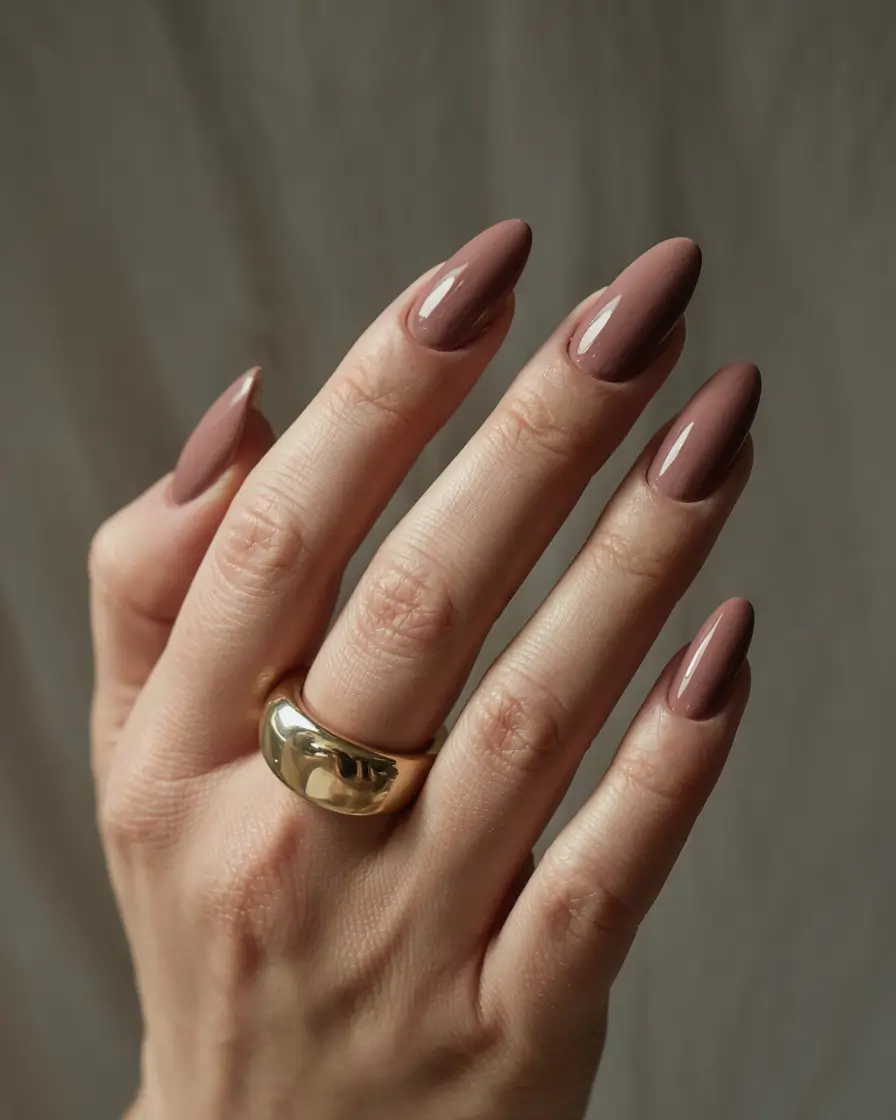
Recreating Mocha Elegance at home is refreshingly simple, since the appeal lies entirely in the richness of the color rather than any additional detailing. Start with a ridge filling base coat to create a smooth foundation, then apply two to three thin coats of the mocha polish, allowing full drying time between each layer so the color builds to a deep, opaque finish without looking streaky or uneven. Because warm brown tones can sometimes appear slightly different depending on lighting, checking the color under natural daylight before committing to the full application helps ensure you’re getting that true, rich mocha shade rather than something that reads too red or too gray. Once your color is fully set, seal everything with a high shine glossy topcoat, which enhances that warm, syrupy depth and gives the nail a genuinely luxurious appearance. The entire process takes about twenty five minutes and requires no special tools beyond your usual polish kit.
Mocha Elegance stands out on this list because it offers warmth and richness during a season that often leans heavily into cooler, icier color palettes. It pairs beautifully with warm toned gold jewelry, cream and camel colored outfits, and the kind of cozy, layered winter styling that has become increasingly popular in recent years. Because the color is deeply pigmented and warm toned, it also tends to be incredibly flattering across a wide range of skin tones, which helps explain its consistent popularity across different Pinterest audiences. This look resonates strongly with people who want their nails to feel cozy and elevated without straying into anything too icy or cold in tone, which continues to make mocha one of the most searched warm neutrals throughout the winter season. For anyone wanting a rich, coffee inspired shade this year, Mocha Elegance offers a genuinely comforting, elegant choice.
Soft Pink Sparkle Magic
Soft Pink Sparkle Magic closes out this list with a gentle, romantic pale pink base topped with a fine dusting of iridescent glitter, creating a nail that feels soft, playful, and quietly magical all at once. This look leans into the softer, more whimsical side of winter beauty, offering a lighthearted alternative to the deeper jewel tones and icy blues found throughout much of this collection. The iridescent glitter catches light in soft flashes of pink, silver, and gold, adding just enough sparkle to feel festive without ever tipping into anything overly bold or dramatic. On Pinterest, this design performs particularly well on boards dedicated to soft glam or romantic winter beauty, since the gentle color and delicate sparkle capture a dreamy, feminine mood that continues to resonate throughout the colder months.
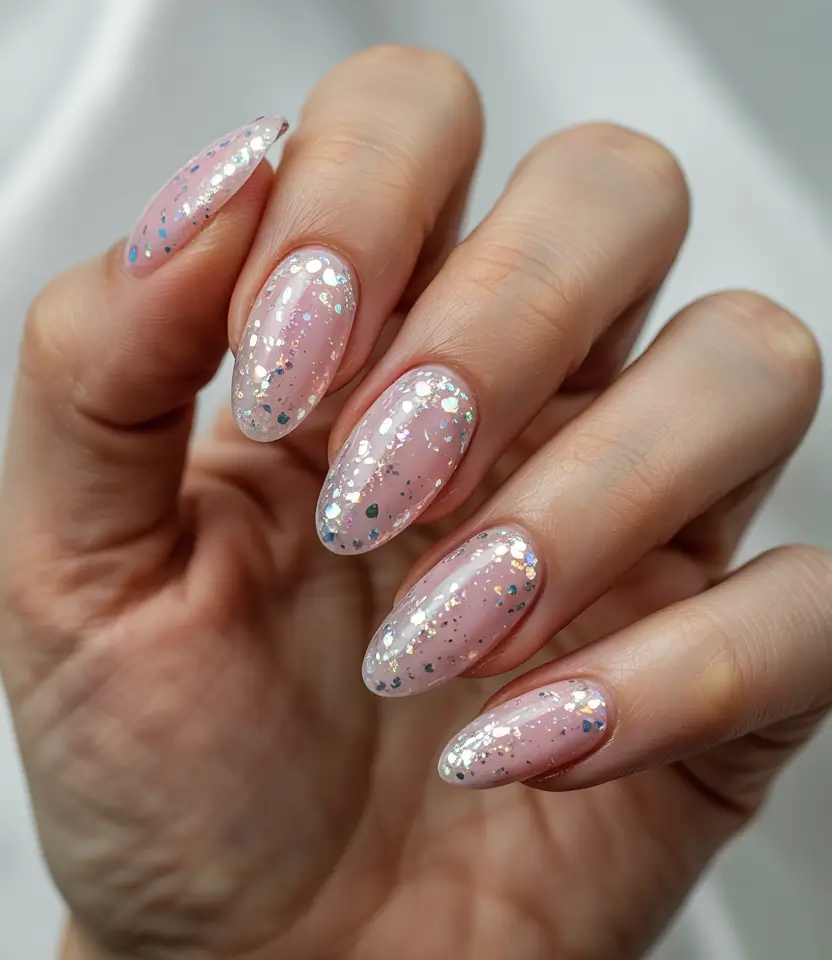
Creating this look at home is approachable for nearly any skill level, since the technique relies on simple layering rather than precise detail work. Start with two coats of a pale pink polish, allowing each layer to dry fully so the base color stays soft and even rather than patchy or streaky. Once the base is dry, apply a thin layer of clear topcoat and, while it’s still slightly tacky, use a small brush to lightly dust fine iridescent glitter across the nail in a soft, even layer, being careful not to overload any one area so the sparkle stays delicate rather than heavy. Once you’re satisfied with the glitter coverage, seal everything with a final clear topcoat to lock the sparkle in place and smooth out any texture from the glitter application. The whole process typically takes about twenty minutes from start to finish, making it one of the more efficient looks in this entire collection.
Soft Pink Sparkle Magic earns its place as a fitting close to this list by capturing a gentle, joyful mood that balances beautifully against some of the deeper, moodier shades found elsewhere in this collection. It works wonderfully for everyday winter wear, holiday gatherings, or any occasion where a soft touch of sparkle feels appropriate, pairing effortlessly with pastel makeup and delicate jewelry. Because the glitter is fine and evenly distributed rather than chunky or dense, this design also tends to be comfortable to wear and relatively easy to remove compared to heavier glitter applications. This look resonates strongly with people drawn to soft, romantic aesthetics, which remains one of the most enduring and popular themes across Pinterest’s winter beauty boards. For anyone wanting a gentle, sparkling finish to their winter nail rotation, Soft Pink Sparkle Magic delivers a truly magical result.
Conclusion
This collection of twenty three almond nail designs shows just how much personality a single nail shape can hold across one season. From the deep, jewel toned richness of Emerald Luxe and Deep Ruby Elegance to the soft, dreamy pastels of Lavender Dream Glow and Frosted Blue Harmony, winter 2026 to 2027 proves that there is no single mood that defines the season’s nail trends. Some looks lean into bold drama through chrome finishes and dense glitter, while others embrace quiet minimalism with frosted tips or a single muted neutral shade. What unites every design on this list is a genuine connection to winter itself, whether that inspiration comes from fresh snowfall, glowing holiday lights, rich velvet fabrics, or the deep colors found in fine gemstones. That thoughtful, seasonal connection is exactly what makes these designs feel current rather than arbitrary.
Choosing which of these looks to try does not need to feel overwhelming, since many of them share core techniques like sponging, striping, gradient blending, and simple glitter placement that become easier to execute the more you practice them. Almond nails offer a naturally forgiving, elegant base for nearly any of these styles, whether you gravitate toward the understated warmth of Mocha Elegance or the bold, reflective drama of Chrome Midnight. Save the designs that speak most to your personal style and the occasions you have coming up this winter, keep a small rotation of your favorite shades on hand, and let this season’s collection guide you through a winter of confident, beautifully finished nails.


